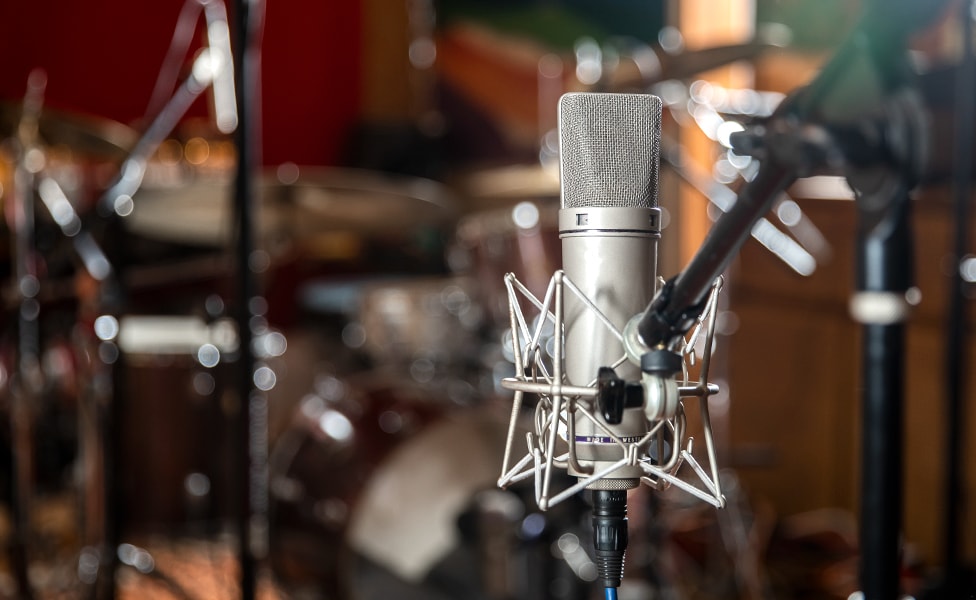
.jpeg)


An esteemed recording engineer we know once mentioned that he used to have a persistent series of nightmares. They always had to do with miking and recording drums. Time, knowledge and experience eventually put an end to those, but the fact remains that one of the most complicated and variable tasks of any recordist is getting a drum set properly miked and capturing great drum sounds. In this article, we hope to be able to smooth the furrowed brow of others with similarly disturbing dreams by covering how to approach miking and recording a drum set, both in a larger sense and drum by drum. With a little information, some common sense and a couple of tricks gleaned from years of capturing the kit, soon you'll be sleeping soundly, with dreams of meaty toms, snappy snares, crisp cymbals and a chest-thumping kick soothing your sleep.
While this particular article is not a buying guide, as such, we'll be using some specific examples. For a more comprehensive look, you may want to read our articles, The Best Drum Mics and How to Choose the Best Audio Interface, if you've been thinking about expanding your studio or your mic locker.
Table of Contents
Things to Consider Before Miking Up Your Drum Kit
The Three Most Common Types of Microphones
How to Mic Up Your Drum Kit
Recording Drums with One Microphone
Recording Drums with Two Microphones
Recording Drums with Three Microphones
Recording Drums with Four Microphones
Techniques for Miking Individual Drums
General Principles When Recording Individual Drums
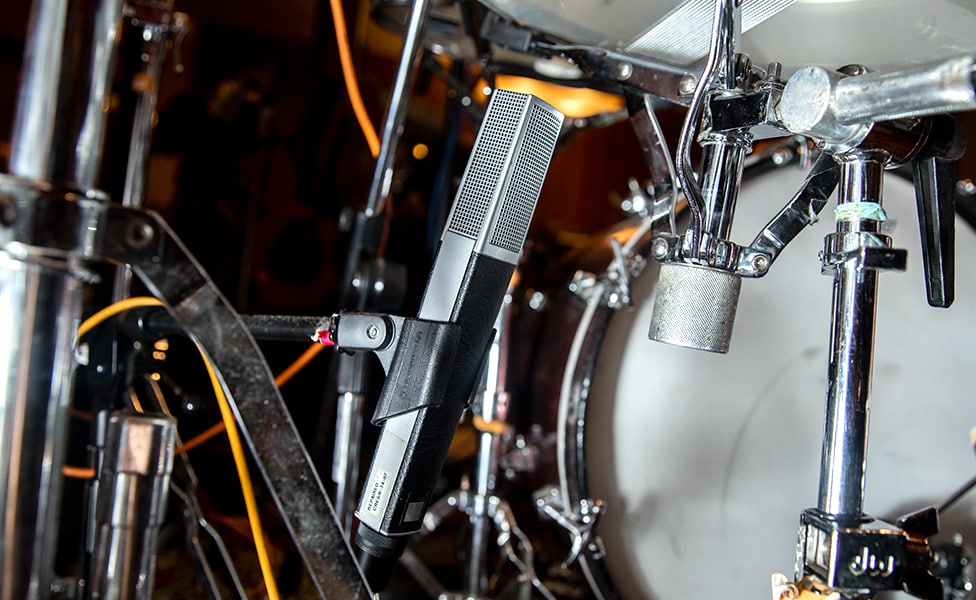
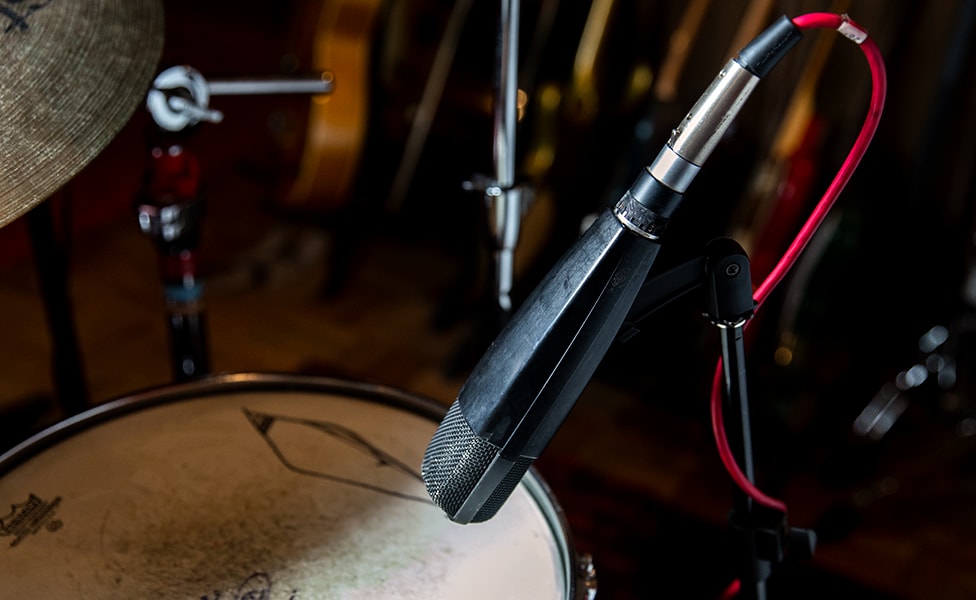
How to Mic Up Your Snare Drum
How to Mic Up Your Kick Drum
How to Use Overhead Microphones to Record Cymbals
How to Mic Up Your Toms
How to Mic Up Your Hi-hat and Ride Cymbals
How to Use Room Mics to Record Your Drum Kit
A Note On Recording Drums and Phase Cancellation
Additional Considerations When Recording Your Drum Kit
Final Thoughts on Recording Drums
Conclusion
Things to Consider Before Miking Up Your Drum Kit
Before you break out the mics, stands, cables and piece of string (we'll get to that one), there are a few items you need to give some thought. Having an overall plan is good. Having a specific plan for a particular recording session is even better. Here are some thoughts to use as a basis for a checklist when you're recording drums.
First, think about the role the drums have in the particular song you’re working on, both in musical and purely sonic terms. If the project is in a specific style or genre, what are the norms for that genre, and do you, the band, or the producer, want to bend (or break) those as a musical statement? These factors can affect mic choice, how many mics you'll use to cover the kit and how they're placed.
Second, consider how your drummers play. How hard do they hit? Do they play with a lot of physical motion or are they more restrained? This is going to help you figure out places you might want to avoid placing mics to keep from having them get clipped with a drum stick or badly overloaded. Nothing can ruin a great take faster than a 5B smashing into the grille of that snare mic.
Third, consider the drums themselves. Do they sound good? Are they in tune? Is everything tight and not rattling anywhere? Do the kick or hi-hat pedal squeak? Are they in balance in terms of resonance? How much sympathetic ring are you getting in other drums when one is struck? Do you want that sound, or do you need to do some judicious muffling? Are the cymbal choices right for the song and balanced properly? Would a different snare sound better? Would a different kit sound better? Are the drums in tune? Yes, we asked that last one before, but it's important enough to recheck after you've made other adjustments.
Fourth, think about the room sound. Does the room sound good, passable or not-so-good? Walk around the room as the drummer is playing their kit. Ask them to play simple beats with a range of dynamics, rather than an extended drum solo. Map out places where the drums sound good and where they don't. We may need those later for room mics. If there are no places where the drums sound good, resign yourself to close-miking everything or, if you know the room well enough to know that it should sound good, go back to the third step and see if there are options there that need to be re-explored. Do another circuit of the room listening for other things that might be rattling or vibrating in sympathy with the drums. Tape them down, or muffle them, but not so much that it can't be undone if you decide that you want a little atmosphere on some tracks.
Fifth, think about what, if any, other instruments will be in the room and what kind of isolation you want or need. Not all of us have the luxury of a separate drum booth. Even if you do, sometimes you want the sound of the whole band, playing together in a single room. A few years ago, we interviewed Grammy-winning producer Don Was shortly after he and Keith Richards co-produced the Aaron Neville album My True Story. When we asked him how he got the amazing drum sounds on the record, he told us that the whole recording was very old school, with all the players in a single room interacting, and a big part of the immediacy of the drum sound was that everything was bleeding into everything else, giving a big picture of what the room itself sounded like. If you're after that type of vibe, you'll need to make sure you have gobos (sound barriers), sound blankets and other treatments to make sure that you get just the right amount of bleed.
Finally, think about mic selection. This is a great time to go a visit our Best Drum Mic article. What mics do you have available to use? How many tracks do you have available for drums? Of the mics you have to work with, what are the best settings for the various pads, filters and pickup patterns to capture the sounds you want and avoid the ones you don't. If you're serious about getting good at this, get to know a drummer who's willing to come by your studio and help you experiment with different mics, placement techniques and settings when you're not in the middle of a session.
Okay. Now that you're mentally prepared and have your checklist down, let's start putting up some mics.
The Three Most Common Types of Microphones
We've done some dedicated articles that cover different types of mics before. To save you having to click away and come back, we'll do a quick summary of mic types for you here. We'll be talking about the three fundamental classes of microphones—dynamic, condenser and ribbon—each with their own unique personalities. We won't wander too far into the weeds here, just enough info so you can make smart decisions based on the task at hand.
First, up, dynamic mics. These fairly neutral, well-balanced mics tend to have the strong proximity effect (low frequencies get a bump the closer the mic is to the source) associated with cardioid patterns in general, They are also good at handling high SPL. Although there are a handful of omnidirectional dynamics, for the most part, dynamics are variations on cardioid polar patterns. Good examples of the type are the Shure SM57 and SM7B, Electro-Voice RE20 and the Sennheiser MD421 and e 604.
Next up, condenser mics. Condensers are classified by the size of the mic's capsule or diaphragm. There are small-diaphragm and large-diaphragm condensers, commonly referred to as SDC and LDC. Condensers are more “hi-fi,” generally brighter and more precise. They require phantom (external) power and handle high SPL gracefully. Condensers are available in every conceivable polar pattern. Many LDCs have multiple polar patterns with a switch that changes from cardioid to omni to figure-of-8. SDCs can have swappable capsules for different patterns, rather than a switch.
So why would you choose an LDC over an SDC for an application? A lot of it comes down to basic physics. The smaller, lighter element in SDCs can respond more quickly to transients, so have more detail in the high end. It also has less coloration from off-axis sounds. On the other hand, the LDC's larger element can capture more low-frequency information. Though not quite as accurate as an SDC, it will sound closer to what the drummer hears when one or two are used as overheads. LDCs also tend to have a more distinctive personality of their own—more mojo, if you will. Examples of LDCs that you might want in your collection include the AKG C414, Neumann U 87, Mojave MA-50, Aston Spirit and Shure KSM32. For SDCs, look to mics like the Neumann KM 184, AKG C 451B, Shure SM81, Røde M3 and Warm Audio WA-84. If you're going to record stereo, many manufacturers offer matched pairs, like the Sterling Audio SL230MP that are intended precisely for that.
Finally, there are ribbon mics. Ribbons are a different type of microphone, being velocity-sensitive rather than pressure-sensitive as dynamics and condensers are. One advantage of this is that they tend to "hear" in a way that's much closer to how the human ear does, making for a very pleasant and natural sound—warm and full with a natural high-end rolloff. The nature of the ribbon design also means they naturally have a figure-of-8 polar pattern, which makes them great mics for capturing room ambience. There are a couple of tricks we'll mention ahead that take advantage of their two-sided nature. The Royer R-121 and R-10, Sterling Audio ST-170, AEA R84 and sE Electronics Voodoo VR1 are all great choices. If you're looking for a stereo ribbon (which we'll also talk more about later), the AEA R88 and Stager SR-2N are great choices.
Now that you've got the background, let's get started miking up that drum kit.
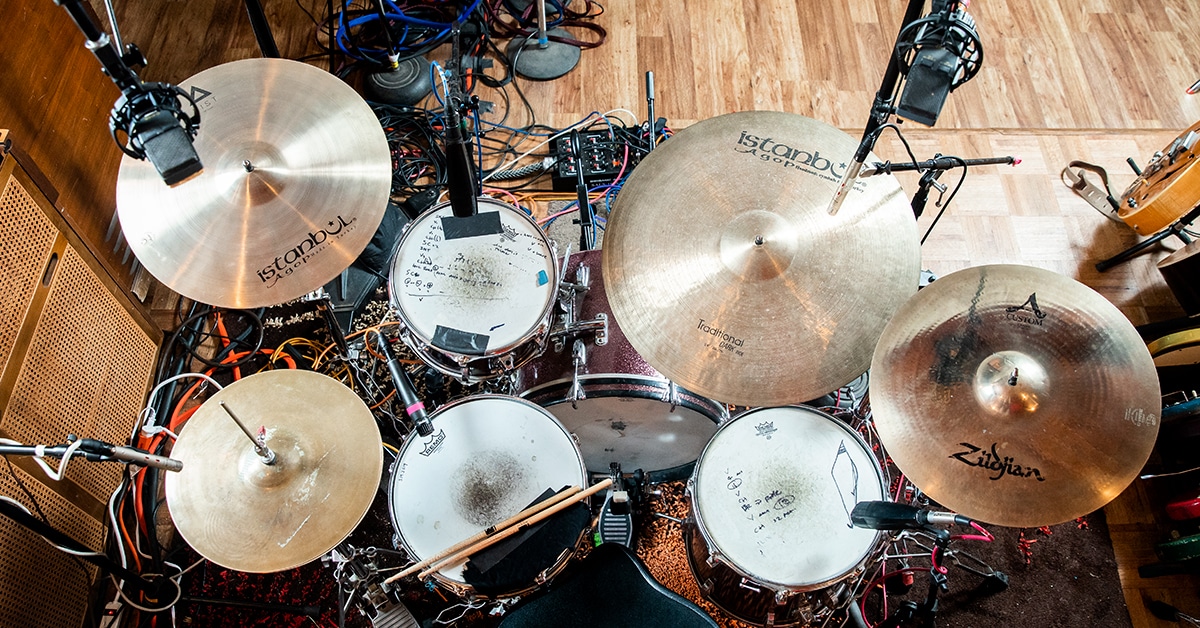
How to Mic Up Your Drum Kit
How many mics does it take to record a drum kit? How many do you have? Like Parkinson's Law, which states that the work always expands to fill the time allotted for its completion, the need for another mic to cover the kit can sometimes seem unending. But great recordings have been made with a single mic for the entire kit, so scale back your dreams for the moment and let's see how we can strip down that setup. Note that some of these techniques will require that you have enough isolation on the drums that you can get a mic or two far enough away from the kit to let the polar pattern of the mic do the work. So, let's start counting up from one.
Recording Drums with One Microphone
Especially if you're looking for a focused, vintage/retro drum sound, single mic kit recording can be an excellent route to a solid drum track. There are a number of fairly similar methods you can use. Here are several of the most popular.
1: After setting up the kit, use a tape measure or that piece of string we mentioned earlier (told you we'd be getting back to that) to measure the width of the kit. Now, place a mic over the center of the kit, at that same distance. You're basically creating an equilateral triangle with each side the length of the width of your drum kit and the apex over the center of the kit. You can start with a cardioid pattern mic, but feel free to experiment with other patterns. An omnidirectional mic, for example, can create a sense of space around the drums, even though it's only a mono track, provided the basic room sound is good.
2: This next technique can be thought of as the “belly button mic." Set the mic three feet in from of the kit about three feet high. Aim the center of the mic's polar pattern between the toms at the center of the snare. Since the snare height is generally around a drummer's navel, this gives the technique its name. If you find that you need a little less or a little more kick in the sound, slightly raise or lower the mic. You probably won't need more than an inch or two either way. A variation on this technique is to raise the stand enough so that the angle of the mic pointing at the center of the snare is at 45 degrees. The same adjustment for more/less kick applies.
3: If you've got the space, and the room sounds good, move the mic stand out to about eight feet away and five feet high, keeping the midpoint of the mic's pattern pointed at the center of the snare. This will give you a better overall kit balance, but it will also pick up more room ambience, which can be a great sound, but may not always be a good match for the particular style of track you're recording.
4: If the drummer is not a flailer, you can place a mic directly over the kit, so the height of the mic head is roughly even with the top of the drummer's head. You'll want to aim it pretty much straight down, so it captures a little less of the cymbals and more of the drums themselves.
5: In the over-the-shoulder technique, a single mic is placed over the drummer's dominant shoulder (right shoulder for drummers who play right-handed, left shoulder for drummers who flip the kit), aimed at the center of the kit.
Feel free to experiment with different types of mics for these techniques. If you've got two available channels, you can try a stereo mic. While this won't give you a super-wide stereo soundstage for the drums, it will provide some space and a sort of intimate, "from the drum throne" feel. Or, if you've got two available channels, you can head to the next section.
Recording Drums with Two Microphones
When you've got more than a single channel, but fewer than three (if our math is right, that would be two), available for the drums, you're ready to dive into some of the truly iconic drum recording setups that have graced numerous classic recordings.
1: The "Glyn Johns" technique is probably the best-known technique for recording a drum kit. It's based on a couple of the single-mic techniques we've already looked at. Although it's frequently used as a three, or even four mic technique, the original version was just two mics. We will be coming back to this one as mics get added.
The basic idea is to use a pair of large-diaphragm condenser mics set to cardioid patterns. The first mic should be placed directly above the snare drum, about five to six feet high. The second mic is placed on the tom side, just above the level of the floor tom, aimed across it at the snare drum. The key to this technique is for the distance from each mic to the center of the snare drum to be as close as possible to equal. Still got that string handy? Use it to measure those distances and make them match. This not only avoids phase issues (about which more will be coming up), but also ensures that the snare drum level is roughly the same in each mic. If you really want to capture the whole classic rock thing with this setup, Johns was fond of slightly overdriving his analog mic pres, so, if you've got a couple of modeled vintage mic pre plug-ins in your DAW, go to it. Pro Tip: When mixing drums recorded this way, you'll want to use the pan controls on your channels for the two mics so that the snare drum is in the middle of the stereo image. This means that the overhead mic would be panned just slightly to the right of center (for a right-handed kit), while the lower-position mic will be panned to the left slightly more. This should provide a good sense of stereo movement for tom fills.
2: Our next dual-mic method is frequently attributed to "Recorderman," a well-known user on the recording.org forums who is largely responsible for popularizing it. This technique is essentially a variation on the Glyn Johns method. Originally, this technique used ribbon mics, but a large-diaphragm condenser (LDC) will work, too. The overhead mic remains pointed at the center of the snare drum but is moved down to about 32" (or approximately the length of a pair of drum sticks held end-to-end) above the snare. In quick, real-world terms that don't require a ruler or tape measure, this is generally a couple of inches above the top of the drummer's head. The second mic is placed in the over-the-shoulder position but aimed at where the beater hits the kick drum. The key to this technique will require breaking out that piece of string again. You want the distance from each mic to the center of the snare and to the center of the kick drum to be as close to identical as you can get it. So, use the string to measure the distance from the snare to the overhead mic and put a knot in it there. Then make a similar measurement to the center of the kick and put a second knot in at that point. Now, use that string and those two knots to find the right placement for the over-the-shoulder mic. Unlike the Glyn Johns method, pan settings won't need to be offset to center the snare, and you'll get a pretty good stereo image with a nice, strong kick. Note: there is no special string needed for this. Anyone who says otherwise is trying to get you to buy overpriced string.
3: We're borrowing our third method from Daptone Records engineer Gabriel Roth, who is famous for taking a minimalist approach that coaxes maximum results from musicians. For this technique to work, it requires a drummer who can listen and adjust playing dynamics on the fly. So, if you're recording a basher, this shouldn't be your go-to, but with the right drummer, it's great. Check the drums on the instrumental track of Sharon Jones & the Dap-Kings "How Long Do I Have to Wait For You?" to hear what this technique can do.
What you'll do is use two dissimilar mics, usually a large-diaphragm cardioid dynamic like an EV RE20 or Shure SM7B, and a figure-of-8 pattern mic like an AKG C414 LDC or a Royer R121 ribbon, side-by-side, low down on the hi-hat side of the kit. Place them more or less even with the height of the bottom rim of the hat-side rack tom. Aim them roughly between the kick and the snare. This technique is intended for mono drums, and the drummer will need a fair amount of this in their headphone mix, as it's up to them to adjust their playing dynamics to balance the kit. If they can do that, you've got an instant classic soul vibe that just won't quit.
By the way, as we're going through these techniques, bear in mind that any one of them can be used for your basic drum tracks, especially if you're going for a specific vibe, and supplemented with individually miked drums to fill out the sound. Before we move on the next number on our "count up," we'd like to take a moment to talk about the importance of phase relations when using multiple mics.
Recording Drums with Three Microphones
When using three-mic techniques to record a drum kit, there seems to generally be a simple concept behind most of them. Capture the kit as a whole with one or two mics and use the other mic(s) for specific detail. Let's start with a variation on a two-mic method we've already covered.
1: The modified Glyn Johns method, which was used by Glyn's brother Andy for some of the iconic John Bonham drum tracks, starts off setting up for the Glyn Johns two-mic setup we covered before. You then add a third mic that's covering the kick. This can be a condenser or a dynamic. You can close mic the kick for extra impact, but you can also try pulling the mic back a few feet to capture some ambience from the room and the rest of the kit. If you're going to try that, get down on the floor with your head at about the level the mic will be. Crawl around to find the spot where it sounds best. If you really want to go all the way with it, use a good ribbon mic in that pulled-back position, as ribbons "hear" sound more closely to the way a human ear does.
2: A slightly different take is using a spaced trio of mics. Start with the first single-mic method we discussed, creating an equilateral triangle with each side the width of the drum kit (still got that string lying around?), and the mic placed at the peak of the triangle. Then, place the other two mics on the outside left and right of the kit, about five feet high and pointing in towards the center. You don't want them too far forward, or they'll capture too much cymbal. Getting a good stereo mix on this one is easy, with the overhead mic centered, and the other two panned to the left and right. Which one goes left, and which one goes right, all depends on whether you want the drums to be from the perspective of the drummer or the audience.
The more mics you use, the more possible combinations there are. For example, you could combine the pulled-back kick drum mic from the modified Glyn Johns technique above with the spaced left/right mics of the spaced trio. Or combine the "belly button mic" with the "Recorderman" two-mic method. Experimentation with recording methods is the key to developing your own sound. But we've got one more stop before we get to the inside info on miking up individual drums, and that's a quick look at methods for capturing the whole kit with four mics.
Recording Drums with Four Microphones
Covering the whole kit with four mics is the last step before you begin miking up everything in sight. There are a couple of basic approaches to using four mics to capture a drum kit. The first one is to use one of the one-, two- or three-mic coverage setups we've already discussed, then add the remainder of the mics to reinforce specific aspects of the kit, like some extra focus for the snare or kick drum. The second concept is to use one of the two-mic capture methods for the kit, then add mics three and four as a stereo pair moved a little bit away to fill out the drum sound with some ambient space. Obviously, there are many possible variations, so we're only providing a couple to try and spike your imagination and creativity.
1: Use a pair of small-diaphragm condensers as overhead mics, about five to six feet high and aimed straight down, more over the drums themselves than over the cymbals, to capture a basic stereo kit image. Remember to use your trusty piece of string to make sure the mics are equidistant from the snare and kick. Then place a thin dynamic mic, like a Shure SM57, about three inches above the rim of the snare drum, aimed at a point about two-thirds of the way in from the rim to the middle of the head. Place either an LDC or a large-diaphragm dynamic about two to three inches from the kick drum resonant head. It doesn't hurt to do a quick mono mix check to see if you're getting any phase cancellation from either the kick or snare mic before you press record. If you do, put on the headphones and go move either or both of those mics a little bit to improve the situation.
2: Start with the spaced trio technique we talked about in the "Three Mics" section and add a close large-diaphragm mic on the kick. If you want a little more "room" in the drum sound, pull the kick mic back a few feet, checking for phase in the new position. You may have to move it more than once, to make sure time and space are on your side.
Obviously, there are lots of other possibilities using various combinations of the techniques we've discussed up to this point. And many classic recordings, both vintage and modern, have been made with them. But for absolute control, and the ability to emphasize specific drums and sounds, you'll need to start miking individual drums, which leads us to the next section.
Techniques for Miking Individual Drums
If you've got enough inputs on your interface, enough mics, and your DAW can handle the number of simultaneous tracks required to record them, then the world of individually miked drums opens up for you. You can use these techniques to cover the whole kit with extreme granularity, or use them for just a single drum you want some extra focus on with the full-kit coverage techniques we went over in the previous section.
It's important to not let your miking process kill the creative flow of the artist or of you as an engineer. As mentioned earlier, we recommend inviting a drummer buddy over (if you drum yourself, that's even better) and working on getting these techniques down during informal sessions before you start to use them on a critical session. As with any recording process, it can be a deep dive into new territory, but take it slow and easy, one drum at a time.
Before you place a mic, though, a little due diligence is called for. First, make sure each drum is tuned appropriately for the material you're recording. If it's your studio kit, get that done before the session starts. Our upcoming article on tuning your drums will walk you through it, if you're not already proficient at it.
Next check that all the hardware and stands are tightened up and won't rattle. Close miking a drum can reveal sounds, like little rattles and squeaks, that you weren't so much aware of.
Finally, a couple of drum-specific items. Check the snare wire and throw-off to make sure there are no broken wires, it's tensioned evenly, works smoothly and doesn't rattle or squeak. Check the kick drum pedal for squeaks. If you can't get the squeak out, swap to a different pedal if you can.
Once you've gone through that checklist, it's time to break out the stands, mics and cables.
General Principles When Recording Individual Drums
First, anytime you're miking both the top and bottom heads of a drum, it's important to flip the polarity, either on your mic pre or in your DAW, for one or the other of these mics. The reason, if you think about it for a second, should be obvious. When you strike the batter head, it moves away from the top mic, creating a trough in the waveform. That creates a movement of the resonant head toward the bottom mic, creating a peak, making these two signals naturally 180° out of phase. To decide which mic to flip polarity on, compare them separately with the other mics—overheads, kick, snare, toms, etc., and change the one which has the greatest audible phase cancellation with those other mics. You'll never get everything perfect here, but you can make sure it's as good as possible.
Here's a serious pro tip that can help set your drum tracks apart. The trick in fine-tuning a recorded drum sound lies in where the mic is aimed on the head. The fundamental pitch of the drum will be at the center of the batter head. As you aim the mic progressively closer to the drum's bearing edge, you move up the harmonic series. This gives you some latitude to change the basic sound of any drum in the kit without having to take any drastic measures. It's great for making one track subtly different from another.
How to Mic Up Your Snare Drum
For much modern music, the backbeat is critical, so let's start with miking techniques for the snare drum.
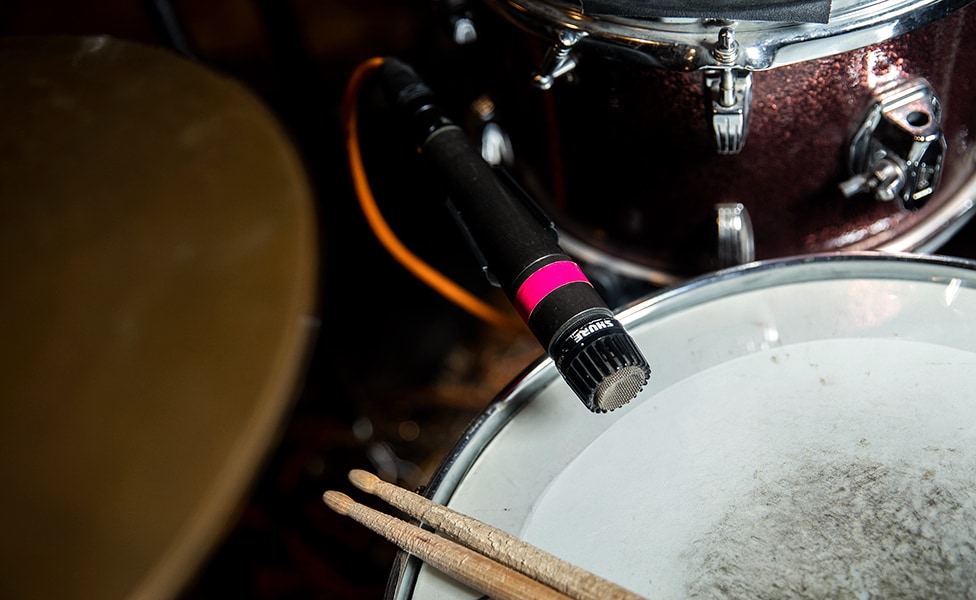
If you've only got a single channel available for the snare mic, the industry standard is the Shure SM57, although there are a number of other similar dynamics that offer slightly different sonic profiles—as always, experiment to find out what you like best. But the 57 frequently comes out ahead due to its "built-like-a-tank" construction that will simply shrug off getting pummeled by enthusiastic drummers. Position the mic about even with the snare rim one and a half to two and a half inches (two or three fingers width) above the head. You'll get more of the sound of the snare wires with the mic aimed at the head. Aiming the mic across the head will give a drier sound with a little less attack. Use the tip on mic aiming in the "A Quick Note …" section above to tweak the sound.
Another technique if you've only got a single mic available for the snare is to mic the snare from the side. This will give a balance between the harmonic content of the batter head and the crispness of the snare side. Just make sure you haven't aimed the mic at any vents on the drum, unless you like the sound of heavy breathing.
If you've got the channels, it's become customary to use two mics on a snare when recording—one on the top, and one on the bottom. Everything we've already discussed about the top mic applies here. The bottom mic is generally a similar style of dynamic mic to the top mic, although some engineers like to use a small-diaphragm condenser that can handle high SPL here. The placement should be a couple of inches in from the rim, aimed straight at the head and the same distance away as your top mic is. When you're mixing, the bottom mic usually is brought in at a lower level than the top mic to emphasize the crack of the snare.
If you've still got a channel free for the snare, there are a couple of triple-mic techniques you can try. The first one is to double mic the top head by combining a dynamic and a small-diaphragm condenser. The easiest way to do this is to put the dynamic mic in its clip, align the two mic heads and use some gaffer's tape to hold them together. It's important for phase issues to have the heads as close to each other as possible. At mix time, this gives you the ability to bring in some of the crispness of the condenser to complement the rounder sound of the dynamic mic.
The second three-mic technique for the snare is a little more fiddly, but can give great results. Mic up as for the standard double-mic setup, then add a ribbon mic aimed at the side of the snare, three times as far away as the distance the top and bottom mics are from the head (remember that 3-to-1 rule we discussed?). This third mic, judiciously mixed in, will add some space to the snare. Once again, the more mics there are on a common source, the more important it is to get the phase relations between them correct, so take your time setting this one up. Adjusting placement on the third mic with headphones that have a mono mix of the three mics can be a huge help.
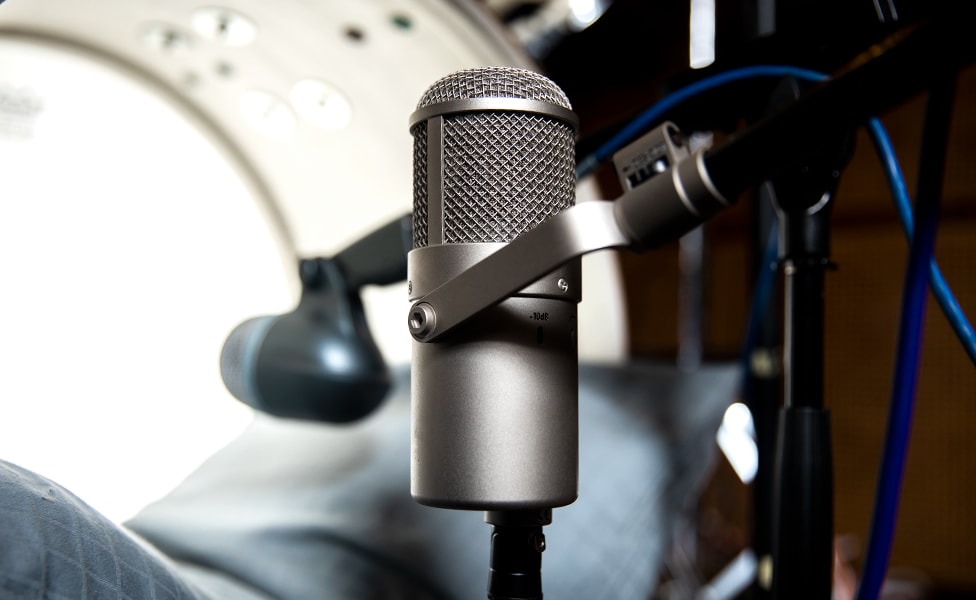
How to Mic Up Your Kick Drum
When it comes to miking a kick drum, the big question is, "Do I want more 'click' or more 'oomph'?" Type of mic and placement will be the determining factors here.
With a single mic, it's pretty much going to be one or the other, and the key is choosing the right mic for the job. A large-diaphragm dynamic mic, like the Shure BETA 52A, EV RE-20, Audix D6 or AKG D112, can take both the overall SPL and the transients of the beater attack to provide plenty of click. Rule of thumb is the closer to the beater, the more click you'll get. Placed inside the drum, a few inches from the batter head, is the classic position for this. We generally prefer using a ported resonant head on the kick through which to mount the mic, rather than removing the front head entirely, for reasons which will become clear when we get to double-mic setups for the kick drum. The one downside of the single inside mic on a kick drum can be that the ring of the drum shell can create a sound that is reminiscent of dribbling a basketball on a hardwood floor, that requires some judicious application of EQ to remove.
For oomph, the usual choice is a large-diaphragm condenser, such as a Neumann U 47 FET or a Mojave Audio MA-301fet, pulled back two to five inches from the front edge of the drum. Placement of the mic from center to edge is an individual choice, so experiment, using the general tips about placement we've already provided. One kick-specific note is the farther from the resonant head the mic is placed, the more low end you're going to get.
Let's come back to that "pretty much one or the other" thing for a moment, though. There is a single-mic technique that gives you a good balance of click and oomph, and virtually eliminates the shell ring problem. That is placing a figure-of-8 pattern mic, like a multi-pattern condenser or a ribbon mic inside the drum, with one side pointing at the batter head, the other pointing at the resonant head. It will get click from one side, oomph from the other, and, with the mic's "nulls" (areas in the pattern where there's no pickup) facing the shell, there's virtually no ring. You can move the mic back and forth inside the drum to adjust the balance of click to oomph. Just make sure to keep the alignment of the mic straight front-to-back in the drum.
Setting up two mics on the kick drum most often consists of combining the two above techniques and making sure there are no phase relationship issues between the two. With two mics, you can go for more click on the dynamic and more oomph on the condenser, since they'll be mixed for a balance in the end. But there are other two-mic techniques for kick drum.
Try replacing the inside mic with a boundary condenser mic (also known as a pressure zone microphone). Just place a small pillow on the bottom of the shell (or a larger pillow if you're also trying to muffle the front head a little). Boundary mics generally have excellent bandwidth, so you'll get a great blend of highs and lows from your inside mic. You can also flip this technique and replace the outside condenser mic with the boundary mic. You'll need a small table or flat-top stand to set the boundary mic on (it's called a "boundary" mic because it relies on sound reflecting off the boundary surface on which it's been placed).
Pro Tip: If your kick drum head is ported, the SPL and the air pressure coming out of the port may be more than some, more-sensitive mics can handle. If you're not sure, use a windscreen to protect the diaphragm of the mic from getting blown away.
This next recording technique is less of a mic thing and more of a physics thing. As we mentioned above, the further away from the resonant head the outside mic is the more low end it picks up. The only problem is that putting that mic further away leads to more and more bleed from other drums. The solution is what's called a kick tunnel. Basically, you build an extension from the kick drum to where you want the mic to be. You can use a series of short boom stands, set to a "T" position, a second (or third) kick drum shell with no heads on it, a one-person backpacking tent with a rainfly, your toddler's play tunnel, or anything else that makes a coverable tunnel out from the kick drum. Start it as close to the kick drum as you can get it without touching the shell or resonant head and cover it with a couple of heavy blankets or quilts to kill the bleed from other drums. Then, have at it. We love this technique because you can easily DIY it from materials on hand, and it makes the kick sound absolutely huge.
As a last note for kick drum techniques, there are a couple of uses for a third mic on a kick, on opposite ends of the frequency spectrum. First, if you really want an accented attack, you can put a mic on the batter head side, pointing at where the beater meets the head. If you're going to do this, make sure that your kick pedal doesn't squeak and that any springs it may have don't "sproing." Be sure to flip the polarity on this one. Second, there's a type of kick drum mic called a "sub kick." Originally, these were DIYed using the woofers from Yamaha NS10 monitors wired as a transducer (a fancy term for something that turns mechanical energy into electrical energy, like, say, a microphone). They were hung in a frame in front of the kick drum and, man, oh, man, do they pick up low end. These days, they're made by folks like Solomon and Avantone Pro (though if you're seriously into DIY, there are plans out there), and if you want some serious grunt in your kick recordings, you can't do much better.
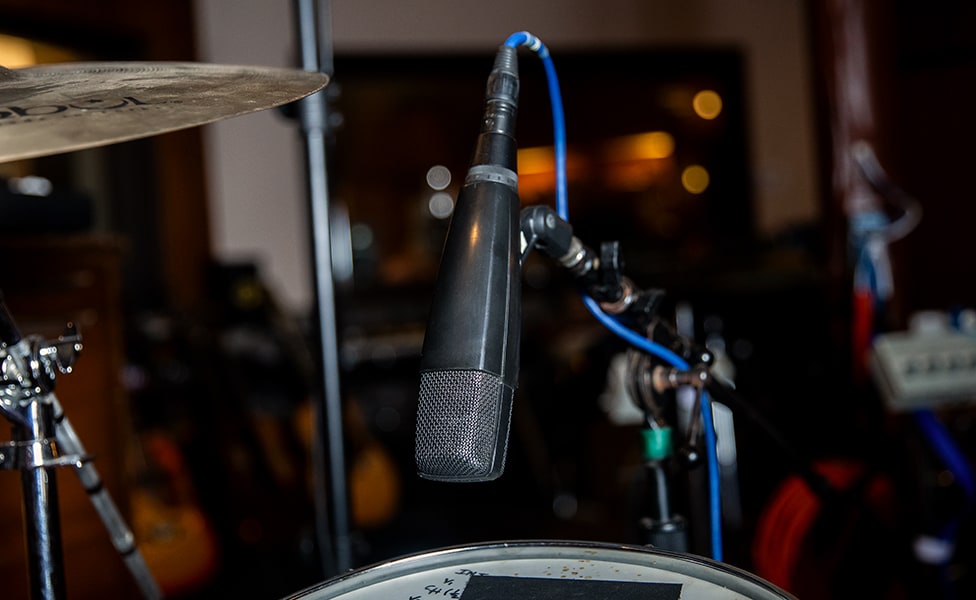
How to Use Overhead Microphones to Record Cymbals
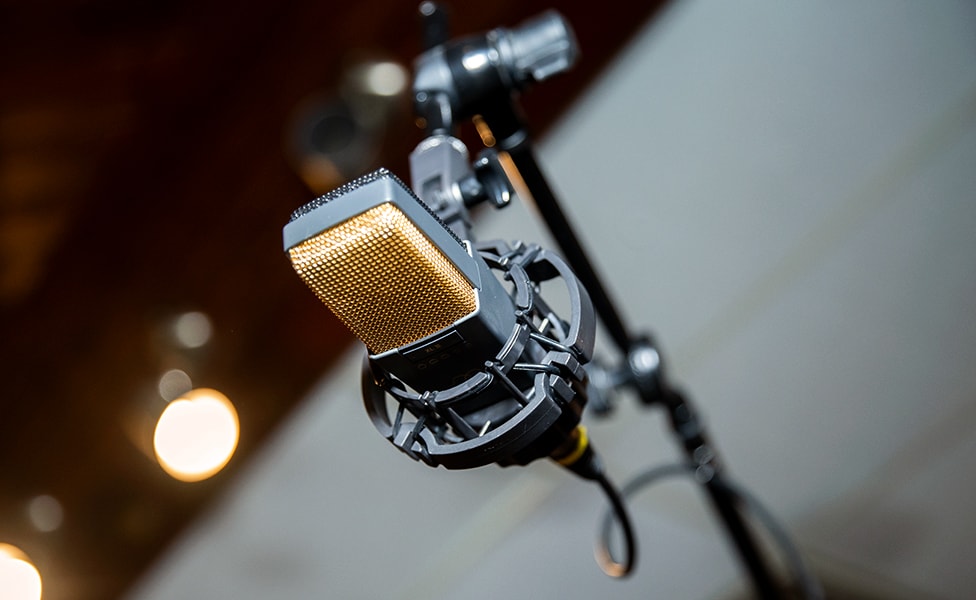
Let's move on to the cymbals, starting with the overhead mics. Overheads can go back to being a little bit thorny, since there are some things you'll need to spend a moment pondering. Are you looking to capture just the cymbals, or are you looking for coverage of the entire kit? How wide a stereo field do you want the overheads to be covering? Answers to these questions are going to guide your mic placement and, to a certain extent, mic choice.
Most often, overheads are a matched pair of small-diaphragm or large-diaphragm condensers, although ribbon mics are increasingly being used because of their pleasing frequency contour and that they "hear" in a manner more similar to the human ear (it's the difference between pressure-sensitive and velocity-sensitive, but that would be a whole other article). A semi-matched pair is okay, but you want their response curves to be as close as possible.
If you're looking to cover the whole kit more so than the cymbals, you can refer back to the two-mic setups for full kit coverage we went over earlier, as a start. Many engineers are very fond of that classic Glyn Johns two-mic setup with selected coverage of individual drums for this. One of the most popular setups starts there and mics the kick drum and the snare, for good stereo coverage and great impact with just four mics total.

If your intention is to primarily cover the cymbals, the simplest option is set up an overhead pair, as you would at the beginning of the spaced trio three-mic setup. Skip the third mic and move the whole thing slightly forward, so that it's pointing at cymbals instead of drums. Sometimes that's all you need. In a big enough room, a spaced pair can be great. The one drawback to a spaced pair pops up in a smaller space that's less well treated acoustically. In such a space, if the mics are far enough apart that the cone formed by the intersection of their polar patterns only covers the very middle of the kit, the outside edges will be picking up things further away from the kit than you might want, like reflections from walls. If the pair is too close together, it's very hard, if not impossible to use them without phase conflicts that make some cymbals sound thin and swooshy. This is because all the cymbals are getting picked up by both mics, and there's no way to get everything at proper distances to avoid it (you can put down that string now). So, how can we deal with this phase problem? By putting the mic head as close to the same place as we can and pointing them in different directions.
The primary way to do this is by using some sort of X/Y pattern. A coincident X/Y mic setup can be done with a pair of quality studio boom stands, or with a single stand and a mic bar (and attachment that allows you to attach two mics to one stand) or custom mic clip that can hold a pair of pencil-type small-diaphragm condenser mics. The idea is to mount the mics at 90° angles to each other with the heads of the mics just touching at the upper edge, so the mic bodies and the extension of the polar pattern of the mic form an "X." Since the heads of the two mics are, essentially in the same place, this minimizes phase issues.
This method has been tweaked, and many say improved, by the French broadcasting company, Office de Radiodiffusion Télévision Française. Since that's kind of a mouthful, we'll just call it the ORTF method. The concept for this variation is to space the heads of the condenser mics 16 to 17 centimeters apart (about 6.3 to 6.7"), which is approximately the width of the average human head. The two mics should be placed so as to form a 110° angle. If you're familiar with the concept of binaural (literally, "two-ears") recording, this is a similar idea, without the specially shaped mics mounted on a model of a human head (which would probably freak your drummer out to have hanging over his head the whole session). It provides a wider and, many feel, more natural stereo image. ORTF miking works better if it's a foot or two higher than you'd do with normal X/Y pattern.
The last variation on X/Y stereo miking we'll bring up is what's known as a Blumlein pair. Developed by EMI audio engineer Alan Blumlein in 1931, this is actually the very first stereo recording technique and remains one of the most natural sounding ones. Interesting trivia: It was originally demonstrated by Blumlein in Abbey Road Studios. Must be something in the air. The concept uses a pair of figure-of-8 ribbon mics, placed head-to-head, with their polar patterns at right angles to each other. So, due to the bidirectional pattern, one mic is picking up the forward right and the rear left, while the other is picking up the forward left, and the rear right. Setting it up as drum overheads can be a little tricky if you're trying to do it with two discrete ribbon mics and two big studio boom stands. Luckily for you, many of the companies who specialize in ribbon mics, like AEA and Royer, make both special mounts for Blumlein pairs as well as stereo mics like the AEA R88 that have everything mounted and ready to go in a single mic body. Note that this can be done with any matched pair of figure-of-8 mics, like a couple of multi-pattern condensers, but ribbons seem to provide the most natural sound in this application.
The kick, snare and overheads are the most complicated things to mic on a drum kit, so from here on out, it should be pretty simple. Sometimes, if you're getting great sound from one of the "whole kit capture" techniques we listed earlier, miking one or both of the kick and snare may be all you need. However, let's cover the rest of the set, because you know that, eventually, you're going to want to mic it up.
How to Mic Up Your Toms
Miking up your toms may be the easiest part of the entire process. By far the most common approach is a single dynamic mic on the batter head, placed and aimed using the general techniques we've already described. Common choices are the Sennheiser MD 421 and MD 441 or the omnipresent Shure SM57 or equivalent. Tom mics are one case where many recording engineers have started using mics originally designed for live performance, like the Sennheiser e 604.
You want more options, you say? A number of engineers have taken to also miking the bottom head of the toms. In a well-tuned tom most of the drum's pitch is generated by the resonant head, so having a separate track recorded from the bottom gives you some great mix options. Just be careful, as always, when miking top and bottom heads at the same time, to flip the polarity on the one that has the most phase cancellation with other mics. That's usually the bottom mic, but check, just to make sure.
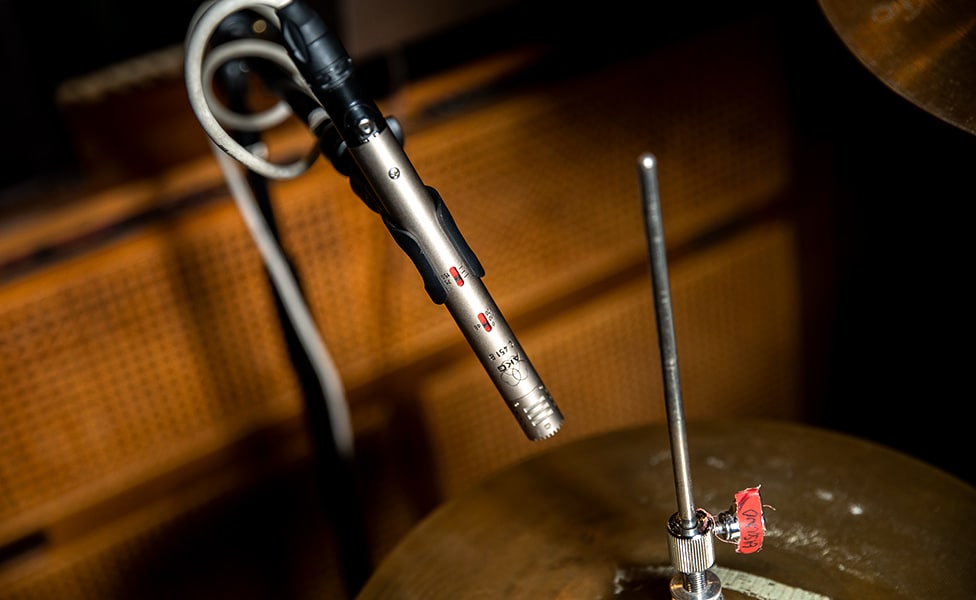
How to Mic Up Your Hi-Hat and Ride Cymbals
The principal reason to mic up the hi-hat and ride cymbals are just for some additional spot coverage that can be useful in the final mix. We recommend small-diaphragm condenser mics like the AKG C451 B or Neumann KM 184. You'll want to place the mic three to five inches from the cymbal so that it's aimed at the part of the cymbal you most want to capture—the chime of the bell, the sizzle of the edge or the meat of the body. Be careful when you're miking the hi-hat that the mic is not placed where it will catch the whoosh of the air noise when the hat closes, or mechanical noise from the pedal.
How to Use Room Mics to Record Your Drum Kit
If you're fortunate enough to have a great sounding room in which to record drums, using one or more room mics to capture some ambience can add a lot of atmosphere and cohesiveness to the kit, especially if you're close miking all the drums. A good room mic placement gives a sense of place and space to a drum kit. This is a good time to go back and review the map you made when you walked around the room listening to the drummer that we talked about way back in the Before You Start Miking the Drums section. If you didn't do it then, there's no time like the present. Just remember that all of these distance-miking positions need to be carefully checked for phase issues, so listen carefully to a mono drum mix, bringing these in and out, and adjust mic polarities as needed.
The simplest setup is to use a single mono mic to capture the room's ambience. You can use a cardioid pattern mic to capture the whole kit from a distance, and then mix in just enough to give a sense of spacial dimension. This works hand in hand with any of the kit capture methods we discussed previously or with a fully miked-up kit. By choosing tighter or looser cardioid patterns (hyper-, super- or regular-cardioid) you can control the blend between room and kit sound. If you want still more ambience than you can get with the cardioid mics, try a mic with an omnidirectional or figure-of-8 polar pattern. Just pick a spot where both the room and the kit sound good and set your mic there.
If you want stereo room ambience, you can easily use a stereo mic if you've got one or any of the dual-mic stereo setups we talked about in the section on overheads. If you want more room reflections, you can point the stereo setup away from the drums, rather than towards them.
If you really want to take a trip into the weeds, let's talk about the concept of spot room mics for a moment. If you did the mapping properly, back in the earlier section, you should have notes about where individual drums sound extra good, or at least extra interesting. These are going to be the places where you might consider placing a spot mic. For more ambience in these tracks, place mics near a reflective surface like a wall, ceiling or floor, and use a figure-of-8 pattern.
This is also the opportunity, if you've got available tracks, to just try experimenting. Place a mic near something that might vibrate sympathetically in an interesting way, like near the soundhole of an acoustic guitar or the body of an acoustic piano. This writer once miked an upside-down snare drum that was on a stand in the corner of an adjacent room. Andy Johns recorded some of John Bonham's most iconic drum tracks with a mic placed in a stairwell of the house where they were tracking. A lot of times, such tracks aren't used, but sometimes they're the little bit that makes something magic, so unleash your weird. You never know when it will pay off.
A Note On Recording Drums and Phase Cancellation
We've touched on the importance of maintaining proper phase relationships, perhaps without you really noticing, when we pulled out the string trick for the first two of the dual-mic techniques. The following is a (hopefully) quick explanation of just why this is critical.
Imagine you're sitting in front of a perfectly still pool with two pebbles in your hands and, just for fun, you toss them into the pool. Your non-dominant hand is just a hair slower, so they hit the water at slightly different times. As you watch the ripples expand out from where the pebbles hit, you notice something peculiar. Where the peak of one ripple meets the trough, or low point, of the other, the water goes back to still and undisturbed. They cancel each other out. When two peaks meet, or two troughs meet, they intensify each other.
Now, think of them as sound waves. Each frequency of a sound has a waveform with a peak and a trough. When two or more microphones pick up the same sound at slightly different times, those peaks and troughs will cancel or reinforce each other, creating a sound that's hollow and softer. The frequencies that get cancelled or amplified will vary with the time difference and the wavelength of an individual cycle at that frequency. We're not going to do math here, but we've also just discovered the basis of how a flanger or chorus effect works. At any rate, you should be able to see how and why it's important to keep your microphones in a proper phase relation.
It should also be obvious that any multiple mic setup can't avoid some sort of phase cancellation, because there will always be some frequencies that will be in the wrong relationship. So, what do we do about it? To begin with, there's the "3-to-1" rule that was developed in the early days of making mono recordings with multiple mics, as would be used for recording a big band or a choir. This rule says that mics that are covering a common source need to be spaced in that proportional relationship. For example, if one mic is one foot away from your snare, the second mic should be three feet away. It's not a perfect solution, but it's one of those rule-of-thumb things that works. Once you've got mics set up in that relationship, use your ears and move the mics a little (but only a little) if there are particular frequencies you need that are being problems. It's possible to fix some of these problems in the mixing process by using your DAW’s phase correction, or even by manually nudging one audio track to line up properly with another. Remember, though, that can have a big effect on any ambient room sound you may have tried to capture. It's all better if you get it tracked properly to begin with, as "fix it in the mix" always takes longer than you think it will.
Before we go on, there's one more quick thing. Make sure your mic cables are all wired to the same standard. The AES (Audio Engineering Society) has a wiring standard of pin 2 hot, pin 3 neutral, pin 1 ground on balanced XLR connectors. Pick up a cable tester, if you don't have one, and check your cables, just to be sure, or you may find yourself spending hours trying to track down a problem that's the cable, not the mic position. Now, back to our regularly schedule article.
Additional Considerations When Recording Your Drum Kit
Once you've got the basic techniques down, and record great-sounding drums using them, it's time to start combining these techniques in whatever ways you can imagine. For example, using the "belly-button mic" technique with heavy compression, alongside the Glyn Johns two- or three-mic setup, can help reinforce the center of the image and provide some extra texture for the kick, snare and toms. Or, adding the Glyn Johns or over-the-shoulder "Recorderman" setup to a kit that's otherwise tightly miked can add an extra sense of dimension and excitement. Use your imagination. However, always pay attention to placement and potential phase issues, and you'll soon start to develop your own bag of tricks. Who knows? When this article is revised at some point in the future, some technique you've come up with might get mentioned.
Final Thoughts on Recording Drums
As a last reminder, here are some of the things that you should be sure you're paying attention to beyond just mics and where to put 'em.
First, you'll get the best recordings from drums with fresh heads that are properly tuned, both batter and resonant side. While you may not be a drummer yourself, you should learn the basics of both how to play and how to tune a drum kit. If nothing else, it helps your ear become dialed into what's in tune and what isn't.
Next, when you're going to be recording a drum kit, have plenty of different types of drum mutes, from moon gels and towels to gaffer tape and mouse pads of various sizes. Be prepared to use them to get the sounds you need or want. You'd be surprised at the range of things that have been used over the years, from Ringo Starr's famous tea towels to someone simply dropping their wallet on top of that tom with a little too much ring.
Third, and this is an important one, tighten everything. Drums make stuff rattle, and all too often, you may not hear the rattle until after the track is recorded. If you're gonna tighten up, you got to tighten stuff down.
Lastly, make sure the drummer is using really well-isolated headphones that seal well over their ears. It both minimizes bleed and helps save the drummer's hearing, because you don't need to crank their headphone mix too loud. This is actually a great tip for every musician, but goes doubly so for drummers.
Conclusion
At this point, you should have all the basic information you need to start on your way to recording great drum tracks. As we suggested earlier, if you don't drum yourself, it helps to find a friendly drummer who will come by your studio or other recording space, and help you get comfortable with all these techniques.
Also, rule #3 says there are no rules, really mostly guidelines. Some of the greatest recordings have been made by consciously breaking some of those "rules," but it's still good to know what they are before you leap off the cliff.
As always, have fun. Make inspired music. Be happy and make all of us who play music proud. We know you've got it in you. So let it out.