


One of the biggest challenges in your home or project studio is getting great sound when recording acoustic guitars. Getting the right balance of warmth, body and sparkle can be a challenge even in professional studios. As we’ll show you in this article, all it takes is a little care and attention to detail. With the right microphones, a few carefully chosen bits of gear, and a handful of time-tested recording techniques, you can get results to rival the pros.
Table of Contents
Getting Ready to Record Acoustic Guitar
Essential Gear for Recording Acoustic Guitar
Your Recording Mindset
Capturing Acoustic Performance With Microphones
What Microphone Should I Use to Record Acoustic Guitar?
How to Record Acoustic Guitar With One Microphone
How to Record Acoustic Guitar With Multiple Microphones
Phase Considerations When Recording Acoustic Guitar
How to Record Acoustic Guitar With Two Microphones
Using an X/Y Microphone Setup to Record Acoustic Guitar
How to Record Acoustic Guitar With Three Microphones
A Quick Word on EQ for Acoustic Guitar
Recording Acoustic Guitar Direct via DI Box
How to Beef Up Your Acoustic Guitar Tracks
Step-up Your Gear for Better Acoustic Recordings
Getting Ready to Record Acoustic Guitar
The best recording techniques for acoustic guitars, like every other recording, start with a little thought and planning. This preproduction stage is important for a number or reasons. Having a solid game plan for tracking saves time in the studio. If everybody (and in your home studio, everybody might be just you) sees a clear path to the finished track, it makes it easier to get there. Also, it can save you from frenzied calls to friends after the music store has closed and you discover that you don’t have the cable, DI box or other critical piece of gear you need to get it done. So, we’re going to start with a short look at what you need to have together.
Essential Gear for Recording Acoustic Guitar
Throughout this article, we’re going to assume that you are recording using a computer or mobile device with an audio interface and some sort of DAW software (Pro Tools, Logic, Studio One, Ableton Live, etc.). Every DAW package does things just a little bit differently, so we will be referring to general features like routing, signal/dynamics processing and audio modeling plug-ins when we’re talking about them.
To get the best results when recording acoustic guitars, there are several things that are important to have. First, you need to have an audio interface with a decent amount of gain in the internal preamp. For most interfaces, this will be about 30–60dB of gain, although some mics, like passive ribbon mics, may need a little more than that. Your interface should provide phantom power for condenser microphones and external devices, like active DI (direct injection) boxes or external mic preamps, that are also powered this way.

Pictured: Focusrite 2i2 Gen 4 Audio Interface
Second, if you will be using direct recording to capture your acoustic’s sound and your audio interface or dedicated external mic preamp doesn’t have instrument-level 1/4” inputs, either as separate jacks or on a XLR/TRS combination input, you will need a DI box.
Third, you’ll need microphones. For acoustic guitars, while you can easily get started with a single mic like a Shure SM57, the most commonly used mic in the world, most acoustic guitar recordings call for the wider frequency response and switchable polar patterns of a condenser mic. Some of the techniques we’ll discuss will take more than a single mic. You’ll probably also want some sort of acoustic isolation for the guitar to minimize any audio bleed from other sources, like your neighbor’s dog.
Your Recording Mindset
When you pull back far enough, there are two basic approaches to recording acoustic guitars. The first is to try and record the instrument being played within a specific space. The inclusion of the room sound does mean that you’re more or less committed to that “space” for that song, unless you go through the process again. If you have a real solid idea of what the final song should sound like, and have a great sounding room, this method is simple and as quick as getting a good take to use.
The second approach is to record the acoustic with as little room sound as possible. This method enables you to capture the performance, but go back and change the instrument’s ambience later without having to re-track. You can also create a perfectly doubled track that’s run through a totally different virtual signal chain, without inconveniencing the guitar player. If you, or the person you’re recording, treats the studio like a big, flexible instrument, or if you’re starting with a less defined target, recording this way offers tremendous creative freedom, as well as saving a lot of time.
So, it’s important, when you put on the producer/engineer hat, to take off the player hat, if you’re wearing one, and think about the functions any acoustic guitar tracks are going to serve in the particular song you’re recording. A little time spent pre-planning your tracking sessions can save a whole lot of time on the other end of the production.
Capturing Acoustic Performance With Microphones
The main goal in recording acoustic guitars is to capture as natural a sound as possible. Sure, you can go for warped, altered and as out-there-as-you-want sounds for the final master, but that’s always best done in processing, starting with a pure source. The right mics in the right position are the best place to start. So, let’s take a moment to talk about your mic collection.
What Microphone Should I Use to Record Acoustic Guitar?
There’s not enough room here to go deeply into microphones types and characteristics. But here are some basic concepts that will help you make smart decisions about which mics you’ll want to own to get great acoustic guitar recordings.
There are three fundamental classes of microphones—dynamic, condenser and ribbon—all with their own basic sonic characteristics (see handy little table below). As with everything, there are exceptions (for instance, omnidirectional dynamic mics aren’t all that common, but you’ll find a few). We’re going to talk about the most common types, and get specific about which ones you’ll be using for acoustic guitars.
First, let’s talk bout dynamic mics. Sturdy and reliable, these have a fairly neutral tonal balance with strong proximity effect and handle high SPL well. They are predominantly cardioid and hyper/super-cardioid pattern. Good examples of the type include the Shure SM57 and SM58 and SM7B, Electro-Voice RE20 and the Sennheiser MD 421 and e 609. We’re just touching on them for completeness here, as they are not the usual choice for recording acoustic tracks.
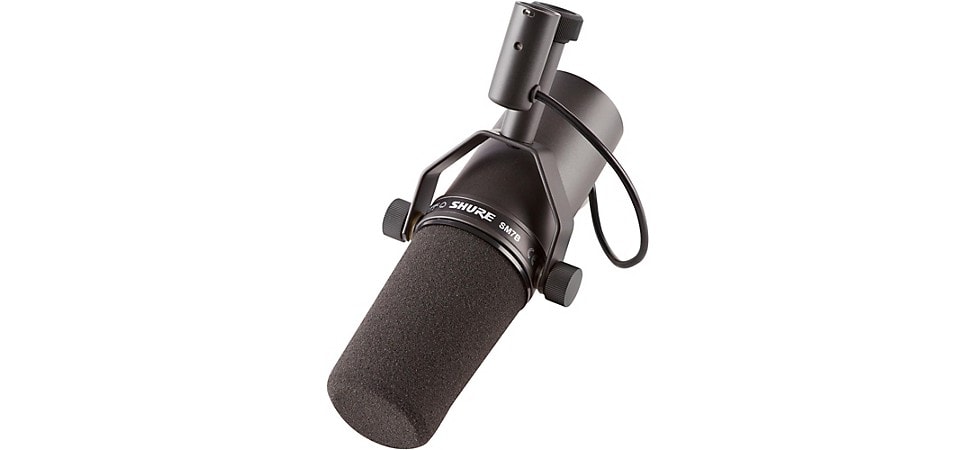
Pictured: Shure SM7B Dynamic Microphone
For great acoustic recordings, the condenser mic is the go-to in almost every studio, due to its transparent high end and overall sensitivity. There are two main categories, here: Large-diaphragm condenser (LDC) and small-diaphragm condenser (SDC) microphones.
First, let’s look at LDCs. This type is more “hi-fi,” generally brighter and more precise than dynamic mics. LDCs are available in every conceivable polar pattern, with many having either switchable patterns or swappable capsules. They require phantom (external) power and handle high SPL well. Some of the condensers you might want in your collection are the AKG C414, Neumann U 87, Mojave MA-50BK, Audio-Technica 4047 and Shure KSM32.
Next, the SDCs. These mics share a lot with their larger siblings, but are especially sensitive to high frequencies thanks to the decreased mass of the smaller diaphragm. Generally you’ll find these in cardioid variations and omni patterns, sometimes the microphone capsule will be swappable between the two. Some common choices here include the Shure SM81, AKG C451, Røde NT5, Neumann KM 184 and sE Electronics sE7.
Finally, ribbon mics. These are warm and full with a natural high-end rolloff. They don’t have the transparency and “air” of the condensers, so are usually chosen as the second mic in a multiple-mic setup. Active models require phantom power. Passive models don’t. The nature of the design means they almost all have a figure-of-8 polar pattern, so they’re great for capturing a little extra room sound. We recommend you check out the Royer R-121 and R-10, AEA NUVO N8 and sE Electronics Voodoo VR1.
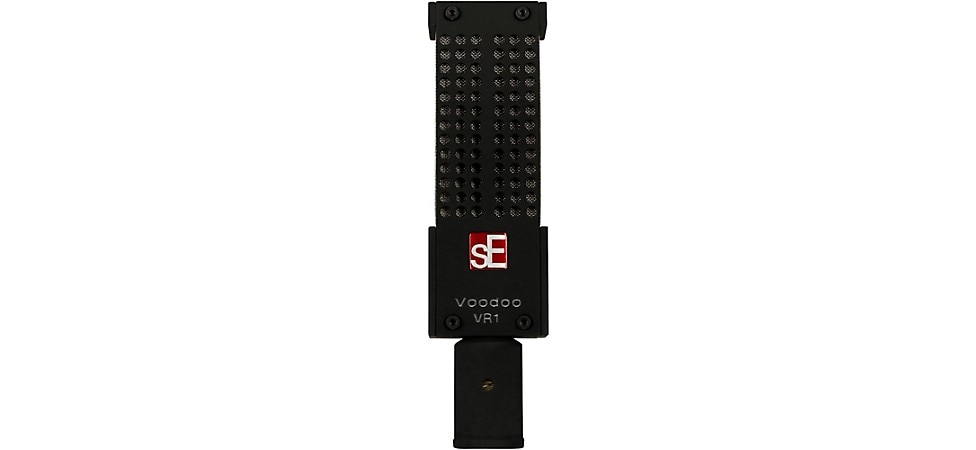
Pictured: sE Electronics Voodoo VR1 Ribbon Microphone
Like many other musical interests, building a mic collection can be an obsession for the recordist. The usual starting place is a couple of Shure SM57s, which have a wide range of applications. For recording acoustic guitars and other acoustic instruments though, you’ll want to start with condensers. Get at least one large-diaphragm condenser mic and a pair of small diaphragm condensers—a matched pair is best—in your collection. A ribbon mic isn’t a “must-have” in this situation, but can really sweeten up a track, so check a few of the ones mentioned about out. Ribbon mics have been undergoing a resurgence in the last couple of decades, thanks to new materials and refined designs, like the ones from Royer.
Some of the techniques we’ll talk about in the coming sections use a single mic, some two or more. Once you’ve got the basics down, experiment. Who knows, you may end up with a mic technique named after you, like Herr Blumlein, who we’ll encounter later.
How to Record Acoustic Guitar With One Microphone
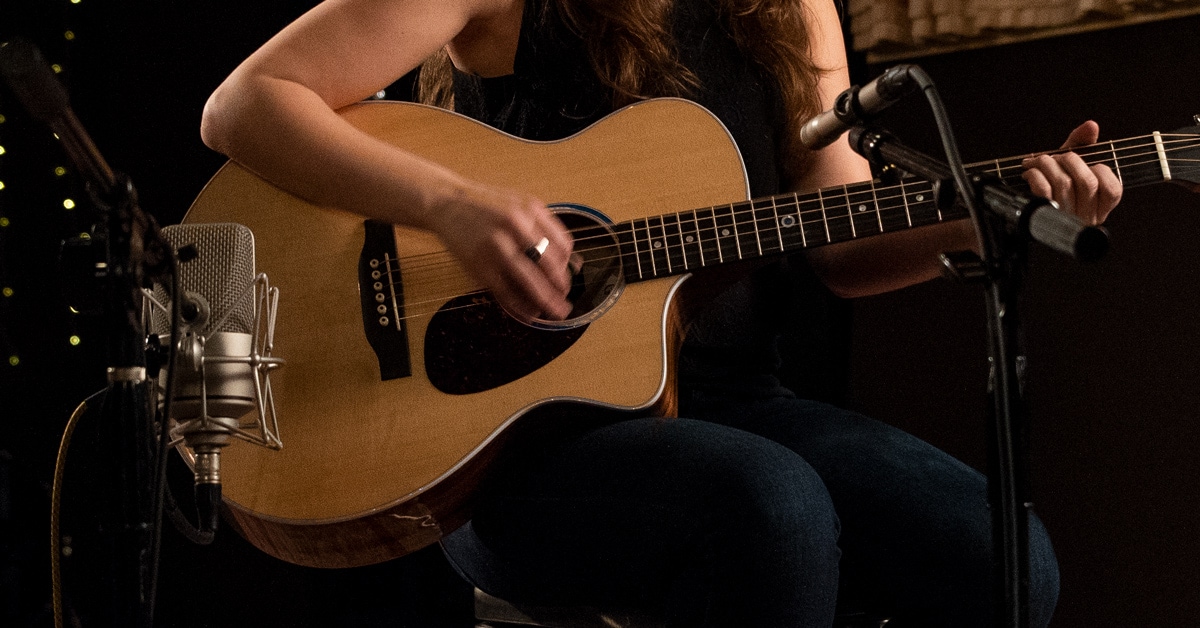
Capturing a great acoustic guitar sound with a single mic is one of the most intriguing challenges in recording. Finding the spot that captures both the deepest tones of the guitar’s vibrating top and body and the ethereal delicacy of the string’s highest frequency, is often a case of compromising on getting a balance between the two. You’ll find that you are juggling mic placement for both the distance from the instrument, placement along the sweep from neck to bridge and the angle at which the mic is pointing. A single-mic technique is almost always the way to go for a singer/songwriter who is doing both at the same time, since it gives less audio bleed from the vocals than a multi-mic technique would.
The most common placement for a single mic is aimed at the point where the neck meets the body, usually the 12th or 14th fret. We recommend starting with one of the multi-pattern large-diaphragm condensers mentioned above, like the popular AKG C414, placed about a foot away. Put on a set of headphones and make sure you’ve got your smartphone or camera handy. Experiment with the angle at which the mic is aiming and with the different polar patterns on the mic. When you’re multi-tasking the roles of talent, engineer and producer here, you’ll have to make an adjustment, play and repeat until you find the sound you want all on your own.
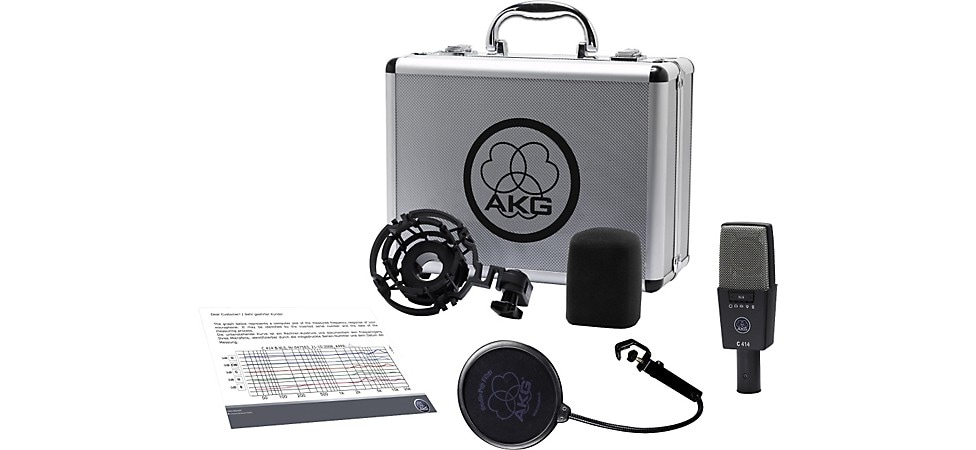
Pictured: AKG C414 XLS Multi-Pattern Condenser Microphone
The general rule of thumb is the more you angle towards the bridge, the more body sound (low end) you’ll get. If you want more room sound, move the mic out a few inches and repeat. If you want less room sound, move the mic closer, then adjust the angle. You can get up to about 6 inches away with a single mic before getting closer makes it too difficult to find a good balance, in our experience. If this happens, you’ll want to move to the section on multiple-mic setups. Note: It’s always best that the guitarist you’ll be recording is in on these tests, because a change of touch on the instrument is going to change that balance.
Once you find the sound you like, stop, and, moving the guitar as little as possible, take a couple of pictures that clearly show where the mic is and how it’s pointed in relation to the guitar. This is your “preset.” If you’re a total obsessive about sound (and we know how that is), keep going through the exercise, making “presets” of everything that sounds good to you. If you can add a note to the photo about the sound characteristics you like in that position, it’ll help save you a lot of time in future sessions. The positions that sound good are going to vary from one guitar to another, so if you’ve got multiple acoustics, you might make a day out of logging these for different guitars. Send out for pizza.
A couple of things worth mentioning here. Directional polar patterns, like cardioid variations, are subject to what’s known as “proximity effect.” This means that the closer the mic gets to a sound source, the more the low-end response is exaggerated. If you’re pulling the mic in and it’s getting too boomy, switch to the figure-of-8 or omnidirectional patterns. Sometimes these mics will also have a switchable low-frequency cut available. Omni and figure-of-8 patterns will also bring in more room sound. If your room sounds great, all the better. If it doesn’t, or you are looking for a “drier” track, you’ll want to get some sort of acoustic isolation to place behind the mic to reduce the ambience. If you’re looking for a slightly warmer sound, try using a ribbon mic here, like the Royer R-10.
A single-mic recording can give you a very clean capture of a specific sound, but if you want something a little larger that can really be the centerpiece of a recording, it’s time to break out the extra mics.
How to Record Acoustic Guitar With Multiple Microphones
Recording acoustic guitars with multiple microphones opens up a huge number of possibilities. This is how to get huge sounds that can dominate a track or delicate textures with just enough body to support another instrument or a vocal. But before we start breaking out the boom stands, there’s a problem, and we need to talk about it.
Phase Considerations When Recording Acoustic Guitar
Anytime you have more than one microphone (or any other sort of transducer, which is just a fancy word for something that turns sound energy into electrical voltage or current) on the same sound source, there is a danger of phase cancellation. Imagine two copies of the same sound wave moving back and forth through the line that indicates 0, which means no signal, or silence. If you take one copy and flip it so that negative becomes positive (a 180-degree phase reversal or polarity swap), then play them back through the same speaker, they will add together. Since they’re perfect mirror images, they cancel each other out completely and all you’re left with is an eerie silence where there should be sound. If they’re not perfect duplicates, you’ll get something that sounds hollow and pinched, not like that spectacular sound you thought you had dialed up. If the phase difference is less or more than a perfect 180 degrees, different frequencies will be canceled and some will be reinforced, the way ocean waves can be when they come together, and you’ll end up with a sonic mess. Since the audible effect of this “comb filtering,” tends to be greater at lower frequencies, it will make everything sound hollow and lacking in punch and body.
The first step in avoiding phase and polarity problems is to use a cable tester, like the Livewire LWSCT, to make sure that all your XLR mic cables are wired to the AES (Audio Engineering Society) standard of pin 2 hot, pin 3 neutral, pin 1 ground. This ensures that you’re starting off with all your interconnects (a fancy term for cables) at the same electrical polarity. You’ll find that a cable test is also a tool that comes in handy for the most important rule of troubleshooting audio problems—check your connections first.
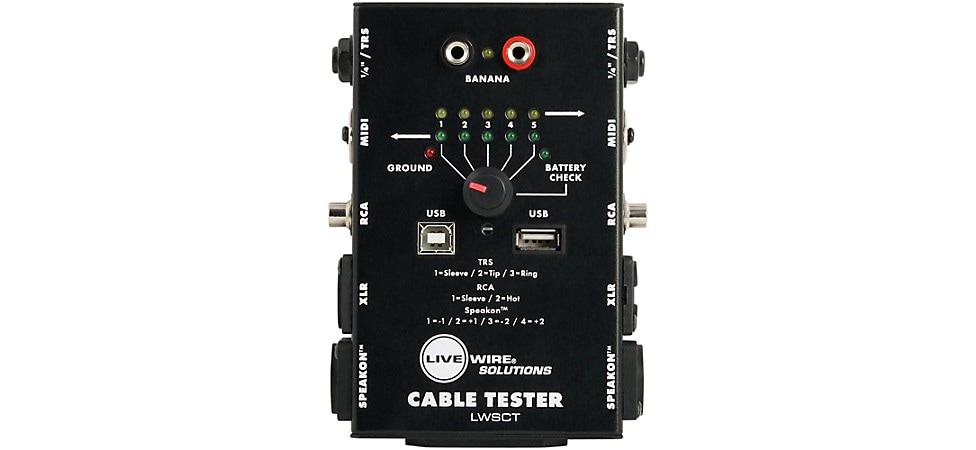
Pictured: Livewire LWSCT Cable Tester
Second, internalize the relationship between distance and phase. Every sound wave has peaks and troughs (positive and negative) parts, and each one is at a different frequency. If your mics pick up the same sound source from distances that are in different relationships to the peaks and troughs of some frequencies, those frequencies will be canceled or reinforced, depending on that relationship. The “3-to-1 rule” was developed in the early days of recording. It states that mics on a common source should be spaced in that distance ratio. For example, if the mic number one is one foot away from a source, mic number two should be three feet away. While it doesn’t strictly apply to mic placement for a single acoustic guitar (it was developed for placing mics for choirs and big bands back when all recording was mono), it’s still a good starting place. It’s never possible for a multiple-mic setup to be completely free of phase-difference artifacts, but paying attention to these two things will help you minimize them when recording.
Okay, back to the world of practical applications.
How to Record Acoustic Guitar With Two Microphones
There are several different ways you can use multiple microphones to get great acoustic guitar sounds. If you’ve read our article on How to Record Electric Guitar, you may recognize the basic concept of using two separate mic types to create a more complete capture of the total sound of the instrument.
By far, the most common multi-mic technique for recording an acoustic guitar is to combine a small-diaphragm condenser (SDC) and a large-diaphragm condenser (LDC). This technique is great for either mixing mono to a single track, or recording on separate tracks for a stereo mix. An SDC, like the Shure SM81 or Neumann KM 184, is used in similar placement to the starting point of the single-mic setup, but, because there’s a second mic you’ll be using, it should be aimed straight at the neck/body joint and kept 6–12 inches away. This takes advantage of the inherently narrower pickup of the mic to capture more of the percussive, bright nature of the direct string sound.

Pictured: Neumann KM-184 Small Diaphragm Condenser Microphone
To capture the deepness and punch of the body and top, place an LDC, like the Shure KSM32 or Mojave MA-50BK, aimed toward the bridge/soundhole area from 18–36 inches away. Use the 3-to-1 rule we discussed above as guidance, and listen through headphones with both mics panned center to check for any possible phase issues. From this starting point, you can proceed to move the mics in and out and change the aiming point to fine-tune the sound you want. Always remember to keep checking for phase as you move them. A small difference in position can change the phase relationship in unexpected ways. While it’s never really possible to make a multi-mic recording with zero phase cancellation issues, careful mic positioning can minimize it.
There are a couple of variations on this technique that are worth trying. If you’re looking for a warmer, fuller sound, substitute a ribbon mic, like the Royer R-121 or AEA NUVO, for the LDC. You can also use the “over-the-shoulder” technique, where the LDC is positioned above the player, and aimed at the top edge of the guitar body. Usually this is done over the left shoulder for right-handed players, or right shoulder for left-handed players, but feel free to experiment. This captures a little bit of the character of the sound the player hears when playing, and is slightly brighter than having the LDC directly in front. Pro tip: With techniques like this, where it can be hard to measure distances to keep close to the 3-to-1 rule, use a piece of string to measure the distance from the mic that’s further away, and fold it in thirds to measure the right distance for the closer mic. Omni and figure-of-8 patterns will be capturing more room sound in all of these setups. So, if you want it dry, you’ll need to consider some form of acoustic isolation placed behind the mics.
Using an X/Y Microphone Setup to Record Acoustic Guitar
Our next technique uses a matched pair of SDCs, like the sE Electronics sE8, in a stereo X/Y position. There are two basic techniques commonly referred to by this term—what we’ll call “True X/Y” and “near-coincident.” True X/Y has the two microphones placed at a 90° angle to each other with the two mic capsules positioned so that one is directly above the other, making a “V”shape. This positioning has many fewer phase issues and collapses to mono much more easily. The near-coincident positioning has the mics at an angle to each other, crossing in the middle, one directly above the other, forming an “X.” For most SDCs, this puts the capsules about 6 inches apart. The advantage of near-coincident positioning is you can adjust the angle to better define the width of the sound source, giving a more defined stereo image with better capture of room ambience, at the cost of more potential phase issues and less mono compatibility. If stereo width of the acoustic image is intended to be fairly narrow, X/Y is probably your best bet. If you’re going wide, give near-coincident a shot.

Pictured: sE Electronics sE8 Small Diaphragm Stereo Microphone Pair
For both of these techniques, adjust the angles of the mics so they are pointing, respectively, at the neck/body joint and at the bridge of the guitar. This means you’ll have to adjust the aim/angle every time you try a new distance, but the results should be satisfying. You will want to use shockmounts for the mics with both of these approaches. If you don’t want to continually wrestle with a pair of mic stands, you’ll also want to pick up a mic bar, like the On-Stage MY500 Stereo Microphone Bar or the RODE SB20 Stereo Microphone Bar.
There are other methods of stereo capture from a single point available. There are some seriously good dedicated stereo mics, like the Royer SF-12 ribbon and the Vanguard Audio Labs V44S Gen 2 LDC . If you’re feeling ambitious, you can also rig up a pair of identical ribbon mics into what’s called a Blumlein pair, which has one mic upside down directly over the other, with the figure-of-8 pickup patterns forming an “X.” It’s a marvelously weird thing to look at, but is great for a full stereo image with lots of room sound.
How to Record Acoustic Guitar with Three Microphones
At this point, we hope you’re starting to see the basic concepts behind recording acoustic guitars. The neck is bright and has lots of attack. The body is punchy and bigger. Closer is drier. Further gives more room vibe. Always listen and always check phase if you’ve got more than one mic. Bear those basics in mind, and it’s just doing it enough so that you start to develop instincts for what will work.
So now it’s time to experiment with a third microphone. You will want to remember that every added mic increases the possibility of phase issues, so always check. This means that the third (or fourth, or fifth) mic needs to go on its own track. We’ll give you a couple of suggestions, though, to start the process. Try the X/Y front mic position combined with the “over-the-shoulder” setup. If your room sounds good, use an omni pattern mic 12 feet or more away, using the 3-to-1 rule to decide placement) to get some serious room sound. Feed the recorded track back through a studio monitor with an open-tuned guitar in the key of the song (or not. We won’t judge.) on a stand in front of the speaker. Distance mic that for some spooky ambience. You can take it from there. It’s music. Be creative and most importantly, have fun.
A Quick Word on EQ for Acoustic Guitar
If you are careful with mic placement, your acoustic guitar should sound great without having to touch any EQ while tracking. In our book, that’s the goal—if the basic track sounds great without any processing, it simplifies the mix process. Any EQ causes some degree of phase shift, though the degree of audibility of that shift has been a subject of debate in serious engineering circles. So if you can avoid it while tracking, that’s best. Mixing is another matter, and, another article.
Recording Acoustic Guitar Direct via DI Box
We haven’t said much here so far about just plugging in the output of your acoustic-electric guitar’s preamp and recording direct. That’s largely because the pickup and preamp systems built into acoustic guitars are really designed for live sound use, not for studio recording. They do have the advantage of putting out a signal that can be plugged straight into your audio interface without needing a DI box. Without having to set up and position a couple of mics, this makes for easy scratch tracks—a common term for a track you lay as a guide for other tracks, but isn’t intended to be used in the final mix, although sometimes they are. Quick demo recordings are also a great use, so you can just plug in the guitar to get an idea down before it goes away. But there are a couple of ways to leverage that built-in preamp to add some depth to your recordings.
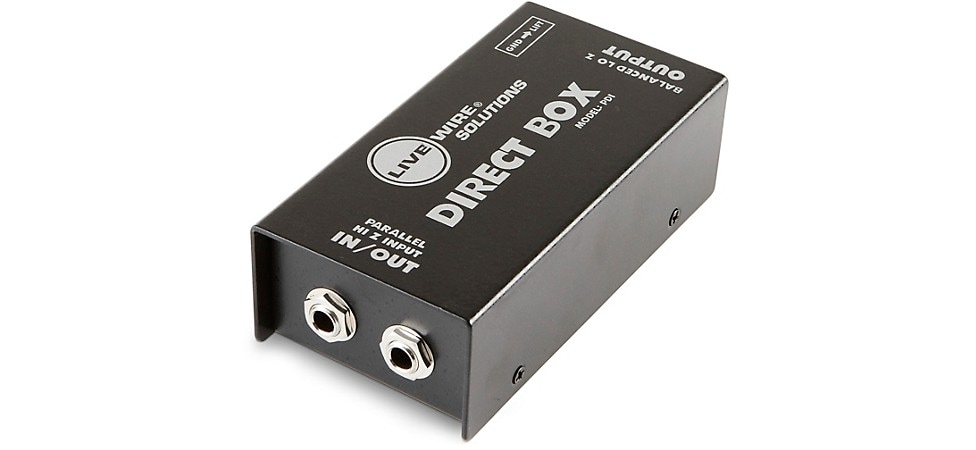
Pictured: Livewire PDI Passive Direct Box
How to Beef Up Your Acoustic Guitar Tracks
The direct sound of the preamp in your acoustic-electric’s preamp will vary with the quality of the system the guitar builder chose to use. At base, they tend toward accentuating attack and string sound, with less resonance and body than you will get from an external mic. This makes a great choice to layer with the tracks from external mics to add a little extra definition and precision to the acoustic at mix time. This is the time to use some EQ to contour the direct sound. Upper midrange, say 5–7kHz contours how much attack and presence is present. High frequencies, 10–15kHz, will add clarity if it seems a little muddy. Use a light touch to avoid it sounding harsh and too edgy.
Recording your acoustic guitar direct is also a great foundation for added effects on the acoustic, whether you use that effected track by itself or layered with a mic’d track. Running through your pedalboard or using the plug-ins that came with your DAW to add delay, chorus, reverb and other effects generally designed for electric guitar can provide some very interesting textures in a song. You can also use modeling software, like Native Instruments Guitar Rig or IK Multimedia AmpliTube for processing.
Step-up Your Gear for Better Acoustic Recordings
Now you’ve got the basics. If you really want to get the most out of all this, you may want to think about some general studio upgrade, small and large, that can help. You’ll also want to check out our article on How to Record Electric Guitar, our Audio Interface Buying Guide and our guide to Home Recording Essentials.
The first place to turn is acoustic treatments to improve your recording space. This could be something as simple as getting reflection filters for your mics and some movable “gobo” acoustic panels for better isolation. If you’re dedicating a room, a garage or other space, you’ll want to consider a more permanent installation, with acoustic foam, bass traps and wall panels that will control reflections and kill standing waves. Whichever way you jump, to whatever degree, making your space sound better makes for more pro-sounding recordings.
The next stop is better headphones and quality headphone extension cables. A good pair of closed-back, well-isolated studio ‘phones on an extension lets you monitor more accurately when positioning mics. That’s important in using the techniques for checking phase and evaluating mic placement we mentioned earlier.
Upgrade the shockmounts for your mics. Stray vibrations making their way onto a track have spoiled more than one take. While you’re at it, add some studio-quality mic stands, especially when you’re using larger, heavier mics. They’re easier to adjust, more stable, and they offer better isolation from stray vibrations.
In the control room, upgrading your studio monitors will make for more accurate mixes, as will adding acoustic isolation pads under the monitors. Getting a better audio interface can expand tracking possibilities, as can adding external DSP, like one of the UAD units. You might also want to add an outboard mic preamp, since most audio interface mic pres, while they can be pretty good for general purpose use, generally don’t have the gain or tonal quality of a premium external pre.
Finally, as you get deeper into the recording process, you’ll want to build out your mic collection (usually referred to as a mic closet or mic locker) with several different dynamics, condensers, both large- and small-diaphragm, and ribbon mics. If you think you might need some help with that, keep your eyes open for a whole other article.