


Recording guitars at home has become more popular than ever. A rapidly increasing number of musicians are discovering the satisfaction of creating fully fleshed masters in their personal studios. As the number of home recordists increases, more musicians want to know about proper recording technique. In this article, we’re going to focus on the best techniques for recording electric guitars. We’ll look at direct recording options, single- and multiple-mic setups, and how to combine the two to achieve a best-of-both-worlds result. Whether your studio is a corner of the living room, a spare bedroom or a converted space like a garage, by the time we’re through, you should be ready to create pro-level guitar tracks for your home recordings.
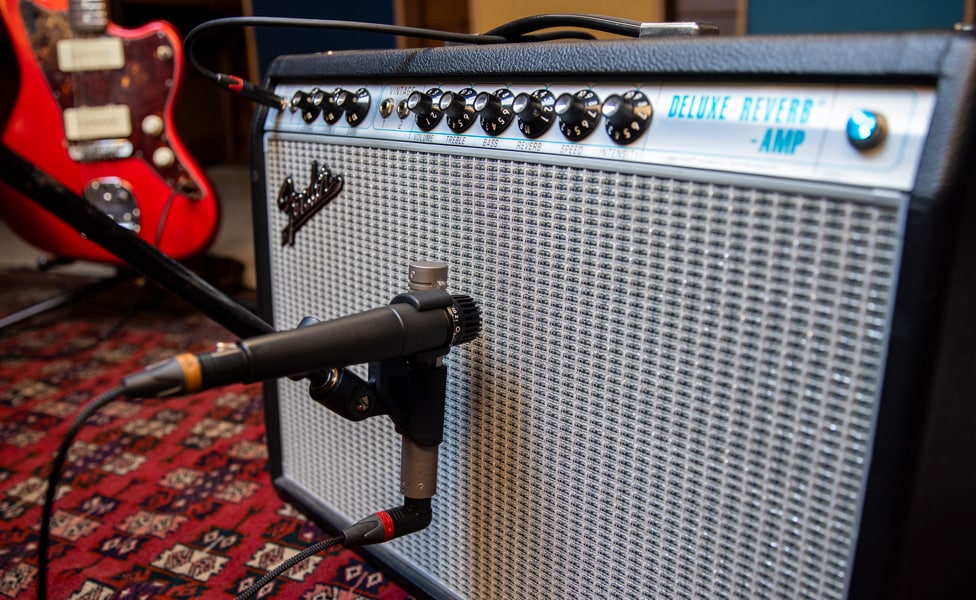
Table of Contents
Preparing to Record Electric Guitar
The Gear You Need to Record Electric Guitar
Getting in the Recording Mindset
How To Record Electric Guitar Direct
Recording Electric Guitar Using a DI Box
Plug-ins for Recording Direct
Recording Electric Guitar with Modeling Gear
How to Record Electric Guitar with Microphones
A Quick Microphone Primer
Single-Mic Recording Techniques for Electric Guitar
Multiple-Mic Recording Techniques for Electric Guitar
Creating Sonic Synergy when Recording with Multiple Microphones
First Pairing: Dynamic/Dynamic
Second Pairing: Dynamic/Condenser
Third Pairing: Dynamic/Ribbon
Fourth Pairing: Ribbon/Condenser
Hybrid Recording Techniques for Electric Guitar
Re-amping Electric Guitar
Cabinet Modeling Hardware
Additional Gear for Recording Electric Guitar
Preparing to Record Electric Guitar
Before we dive into techniques, we need to spend a few moments talking about how your home recording studio is set up, and the gear you have and what you may need to get the best results when recording guitar.
The Gear You Need to Record Electric Guitar
Throughout this article, we’re going to assume that you are recording using a computer or mobile device (phone/tablet) with an audio interface and some sort of DAW software (Pro Tools, Logic Pro, Studio One, etc.). Each of those DAW packages works a little bit differently, so we will be talking about general features like routing, signal/dynamics processing and audio modeling plug-ins.
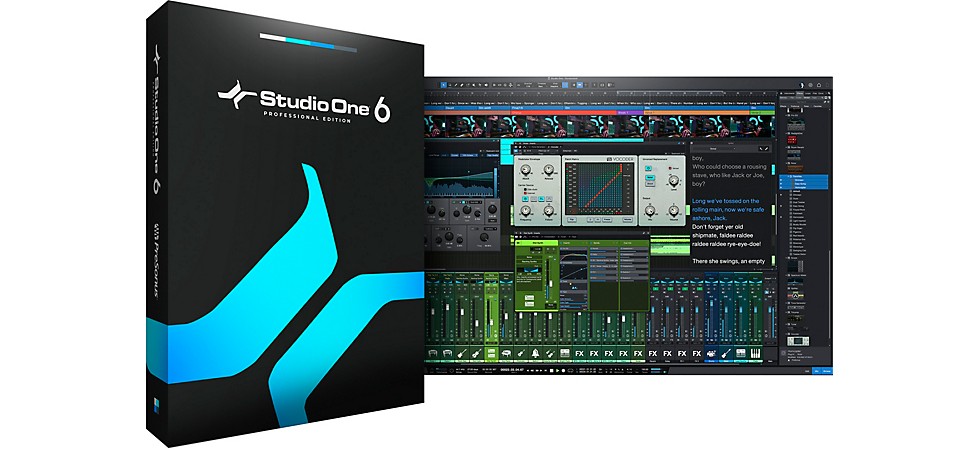
Pictured: PreSonus Studio One 6 Professional
To get the best results when recording guitar, there are a couple of pieces of gear that are important. First, you need to have a multi-input audio interface with a decent amount of gain in the internal preamp. Generally, this is about 30–60dB of gain, although some mics, like passive ribbon mics, may need a little more than that. Your interface also needs the ability to provide phantom power for condenser microphones. Some external devices like an active DI (direct injection) box or external mic preamp may also be powered this way.
Second, if you will be going the direct recording route and your audio interface doesn’t have instrument-level 1/4” inputs, either as separate jacks or on a XLR/TRS combination input, you will need a DI box. More about these in just a little.
Third, if you will be recording your amp, live in the room, you’ll need microphones. You can easily get started with a single mic like a Shure SM57, the most commonly used amp mic in the world, but some of the techniques we’ll discuss take more than a single mic. You may also need some sort of isolation for the amp, unless you have very tolerant roommates or family, and understanding neighbors. We’ll discuss these factors as they come up.
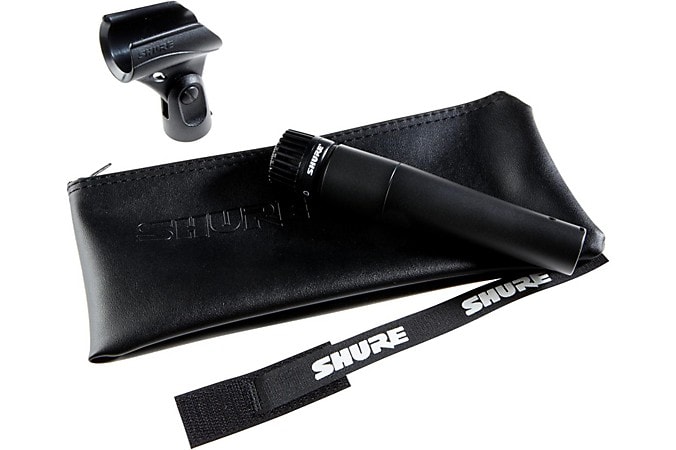
Pictured: Shure SM57
Getting in the Recording Mindset
When you pull back far enough, there are two basic approaches to recording electric guitar. The first is to dial in a tone on your amp (or amp model) and record it. From that point, you’re more or less committed to that basic tone for that song, unless you go through the process again. If you have a real solid idea of what the final song should sound like, this method is simple and relatively quick.
The second approach is to record the guitar track absolutely clean and direct, with the guitarist(s) monitoring through whatever sound they prefer. This method enables you to capture the performance, but go back and change the basic guitar sound without having to re-track. You can also create a perfectly doubled track that’s run through a totally different virtual signal chain, without inconveniencing the guitar player. If you, or the person you’re recording, likes to play the studio like an instrument, or if the nature of the song changes, recording this way can offer tremendous creative freedom, as well as saving a lot of time.
So, it’s important, when you put on the producer/engineer hat, to take off the player hat, if you’re wearing one, and think about the functions any guitar tracks are going to serve in the particular song you’re recording. A little time spent preplanning your tracking sessions can save a whole lot of time on the other end of the production.
How to Record Electric Guitar Direct
Even just a few years ago, we would have started off with the section on recording electric guitars with microphones, but times have changed. The current state of digital technology has more and more guitarists plugging straight into their interface and recording directly into their DAW software. The power of modern computers and advances in digital modeling algorithms enable any track to roar like a cranked full stack or sparkle with classic clean tube chime.
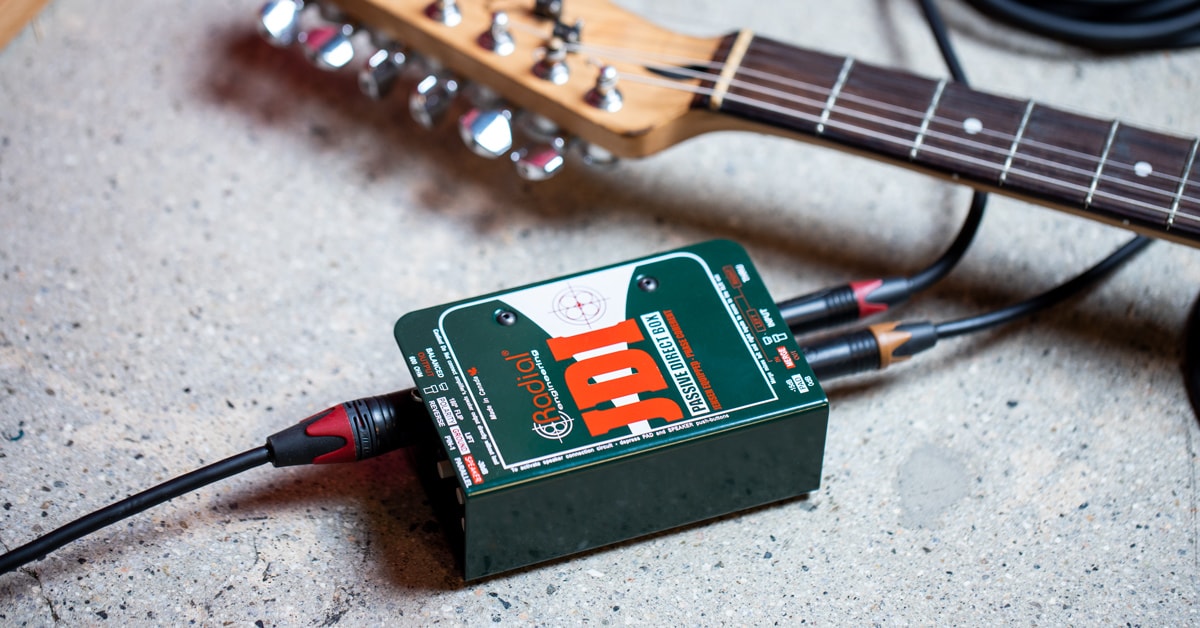
Recording Electric Guitar Using a DI Box
What’s the simplest possible approach to recording an electric guitar? Plug it straight into the preamp on your audio interface and press record. Most interfaces have instrument inputs built in, but you’ll probably still want to have a direct injection box in your toolkit for situations where you only have a mic input available. In its very simplest state, a basic DI box, like the Livewire SPDI, uses an internal transformer to match the very high impedance of the typical instrument output to a low-impedance signal that matches the impedance and connector of a mic preamp or audio interface’s balanced XLR input. The signal from the guitar is split, and one side of that split feeds the transformer, while the other is fed to an amplifier system. There is also a ground lift switch on basic boxes to avoid ground loop hum. A convenient feature, also in the SPDI, is a switchable pad on the XLR output.
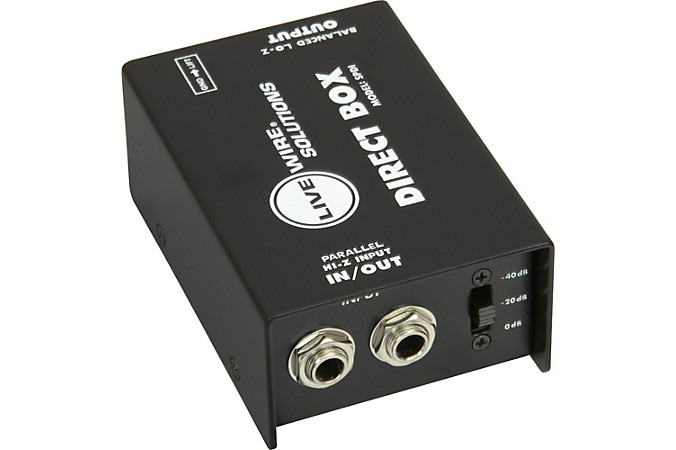
Pictured: Livewire SPDI Direct Box
More advanced DI boxes come in active and passive versions. Active DIs are intended for use with passive pickups, which tend to have higher impedance output, and the passive ones are intended for instruments with low-impedance active pickups. High-end DIs can also have phase correction, internal EQs, compression, and other signal processing built in, to optimize signal quality to the preamp. A few incorporate a full-blown instrument preamp. The most important feature in any direct box is the quality of the transformers used and, in active boxes, the component quality in the analog electronics. Radial Engineering makes one of the best full lines of advanced active and passive DIs with a wide range of available features.
You’ll also find that many amps have a line-level output, either on a 1/4” plug or an XLR out, or an output that’s labeled “Direct” or some variation. Depending on the amp, that may just be a feed from the amp’s preamp, or a padded (reduced=level) tap from the power amp output. It might also be a signal that has what’s called “speaker compensation,” which has been EQ’d or otherwise processed to emulate the sound of a mic on a speaker cabinet. While you’ll need to consult the amp’s manual to determine exactly what the output is, generally they can be plugged directly into your audio interface without the need for a DI box. If you do this, and find you’re getting excessive noise and hum, use the DI box, if only for the ground lift capability, if the amp’s DI out doesn’t have one.
Once you’ve got a proper way to feed your instrument signal, you’re ready to lay down a track. If you’re running from the DI or line out of an amp, you’ll already have a basic guitar sound to work with. Without any other sort of signal processing, what you’ll end up with is a pristine, super clean, full-bandwidth signal. If clean and shimmery was what you were after, you should have it right there. If you have a tube-based mic pre that you’re using, you can crank it up and get some pretty raw distortion. But, if you’re looking for something a little more subtle than totally clipped overdrive and less clinical than perfectly clean, something needs to be done. Which leads us to our next section.
Plug-ins for Recording Direct
One of the greatest boons for recording over the past couple of decades has been the development of the software plug-in. The range of plug-ins is mind-boggling and constantly growing. Every basic DAW package comes with a huge selection of plug-ins for EQ, dynamics processing (compression, expansion, gates, etc.), time-based effects (delays, reverbs and the like), from basic to models of rare, high-end studio units. Third-party developers have created a massive marketplace of other plug-ins and virtual instruments, from simple to complex, and cover the range from specialty effects that are only possible in the digital world, to amazingly accurate models of rare vintage instruments, effects and amplifiers. What we’ll look at here is how to use these plug-ins to get great recording guitar sounds.
Using Plug-ins
There are two approaches to using plug-ins when recording guitar. If you use the first approach mentioned above, in the “Your Mindset” section, place whatever plug-ins you’re using in the signal path of your DAW and simply record the output of that signal path. You gain a lot more flexibility, though, by recording direct, then bouncing the track with the amp and effects plug-ins in place, giving you a solid track, but retaining the ability to make radical changes later. This also saves on CPU use in your computer, if you’ve got enough going on that it becomes an issue.
While most DAWs come with basic amp modeling plug-ins, third-party plug-ins like IK Multimedia’s AmpliTube 5 and Native Instruments’ Guitar Rig, included in their KOMPLETE bundle, go far, far deeper into the breadth and depth of modeling, with huge collections of rare vintage and in-demand modern models. You can even combine them in a signal chain if, for instance, one plug-in’s cabinet models catch your ears, but the amp model you like is in another one.
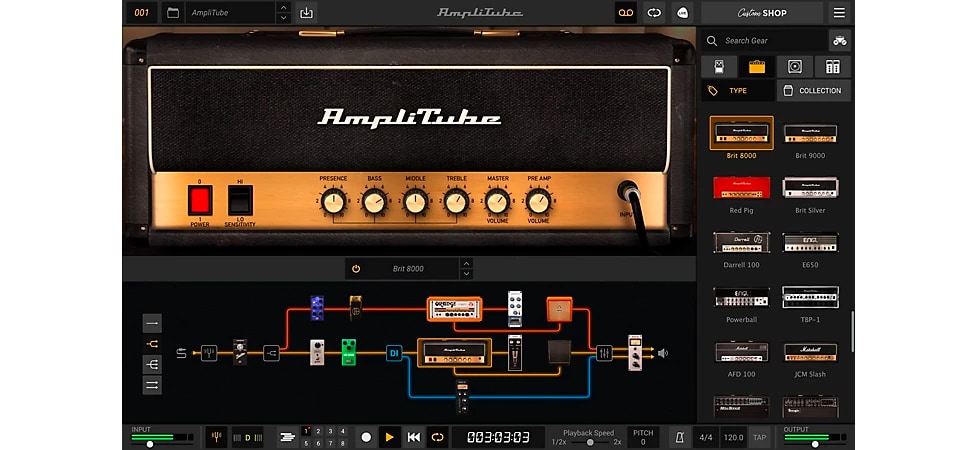
Pictured: IK Multimedia AmpliTube 5
Universal Audio’s Unison technology ups the ante by providing custom tweaking of input impedance and response when used with their Unison-enabled plug-ins and hardware. Available in UA’s Apollo series of audio interfaces, and enabled by the built-in UAD DSP hardware, there are Unison plug-ins that model vintage tweed Fenders, classic Marshalls, boutique amps like Fuchs, Suhr, Friedman and more, plus a plethora of vintage and modern mic preamps.
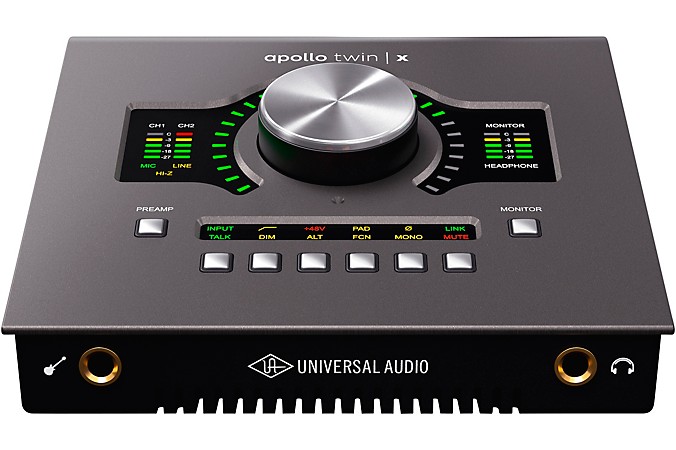
Pictured: Universal Audio Apollo Twin X
Whichever plug-ins you choose, there are a couple of things to bear in mind when dialing in a sound. First, you probably need less gain than you think you do. Take a careful listen to your favorite recorded guitars and you’ll notice that there’s probably less distortion there than you thought. The huge sounds of recorded guitars are usually from layering a part with a couple of different amp sounds and careful use of effects rather than from sheer volume. Luckily, plug-ins make that easy to do. Just set up a couple of buss sends on the guitar channel on your DAW, create a couple of different virtual amp and effect chains, and you can make massive-sounding guitars.
Second, bear in mind that, in the final mix, every track needs to have its own sonic space, and a guitar track that kills when it’s soloed, may wash out other instruments, or be washed out by other instruments in the mix. Once again, a little advance planning can help guide sonic decisions when you’re designing your guitar tones.
Using plug-ins can start to eat up your computer’s CPU power pretty quickly, especially if you’re not using something like UA’s outboard DSP. There is, however, a solution for almost totally off-loading the DSP power needed. Which takes us to outboard modeling gear.
Recording Electric Guitar with Modeling Gear
Digital amp and effects modeling has come a very long way since it first appeared in the mid-1990s, especially when it comes to recording possibilities. The versatility and ease-of-use of digital modeling hardware makes it especially good for home recording and project studio applications.
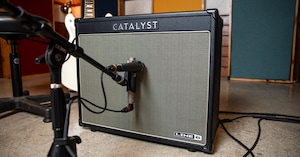
Choose from the Line 6 Helix family of modeling devices, the HeadRush series, BOSS GT-1000 and GT-1000CORE, or the Kemper Profiler, and you pretty much can’t go wrong. Most of these also serve as a class-compliant USB audio interface in their own right, some even having an XLR input for plugging in a mic. If you are only recording one or two tracks at a time, or if your computer OS allows for composite virtual audio devices, this makes your recording path for guitar that much simpler. Bass amp and cabinet models are frequently built in and experimentation with some of those, especially the vintage models, can make a guitar track memorable.
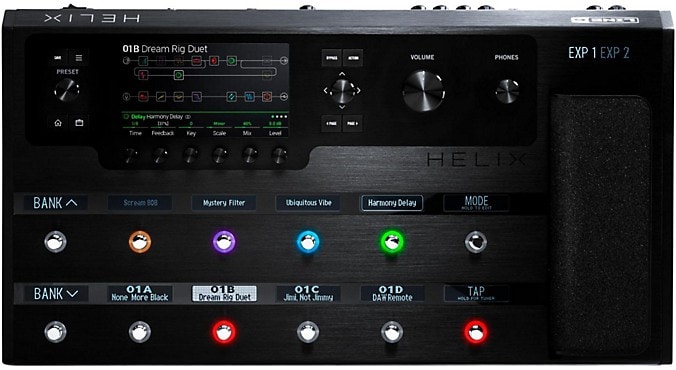
Pictured: Line 6 Helix
Once you’ve hooked up your modeling gear and installed any necessary drivers, you’ll find that this one device can cover both of the approaches to guitar recording we discussed earlier. You can just set up the sound you want and track it. You can also record the guitar direct and clean, then feed it back to the modeling unit to change sounds on the fly (a process called “re-amping,” which we’ll discuss more in the section on using microphones with your amplifier). Many of the modeling units have a re-amping setting that’s available when they’re connected via USB. Please consult your manual for this, since they all do it slightly differently, so that configuration is beyond the immediate scope of this article. There’s also no rule saying you can’t use both your modeling hardware and your plug-ins at the same time. All’s fair in love, war and sound design.
There is still a school that says capturing non-virtual moving air is the best way to record guitars, which is why we’re going to talk about that next.
How to Record Electric Guitar with Microphones
Despite all the convenience and flexibility of modern digital technology, there are still many musicians, producers and engineers who swear by the sonic impact of moving air from a speaker hitting the diaphragm of a microphone. In many cases, especially when a recording engineer with years of experience knows just where to place a particular type of microphone on a particular cabinet, it’s a difficult position to argue with. For the average home recordist or small project studio owner/operator, mastering these methods can be a serious learning experience. But we’ll try and get you started here. First, let’s talk a little bit about microphones.
A Quick Microphone Primer
While we don’t have the space here to do a complete breakdown on microphones for recording, probably the basics are the best place to start.
There are three fundamental classes of microphones—dynamic, condenser and ribbon—each of which have basic characteristics. As with everything, there are a number of exceptions (for example, omnidirectional dynamic mics aren’t very common, but there are some), but we’re going to talk about the most common types.
First, dynamic mics. These have a fairly neutral tonal balance with strong proximity effect and handle high SPL well. They are predominantly cardioid and hyper/supercardioid pattern, although there are a handful of omnidirectional dynamics. Good examples of the type are the Shure SM57 and SM7B, Electro-Voice RE20 and the Sennheiser MD421 and e 609.
Learn more: How Dynamic Microphones work
Next, condenser mics. This type is more “Hi-Fi,” generally brighter and more precise. Condensers are available in every conceivable polar pattern, with many have either switchable patterns or swappable capsules. They require phantom power and handle high SPL well. Examples of condensers that you might want in your collection include the AKG C414, Neumann U 87, Mojave MA-50, Audio-Technica 4047MP and Shure KSM32.
Learn more: How Condenser Microphones Work
Finally, ribbon mics. These are warm and full with a natural high-end roll-off. Active models require phantom power, passive models don’t. The nature of the design means they almost all are a figure-of-8 polar pattern, and some don’t handle high SPL quite as well as the other types, though the ones we’re listing here are capable of dealing with more than you want to be near without earplugs. We recommend you check out the Royer R-121 and R-10, Sterling Audio ST-170, AEA N8 Nuvo and sE Electronics Voodoo VR1.
Learn more: How Ribbon Microphones Work
Like guitars, building a mic collection can be another musical obsession. Start with a couple of Shure SM57s, the most widely used mic on the scene, which have a wide range of applications. From there, you’ll want at least one large-diaphragm condenser mic in your collection. Ribbon mics date back to the early days of radio but have been undergoing a resurgence in the last couple of decades, thanks to new materials and refined designs like the ones from Royer.
Some of the techniques we’ll talk about in the coming sections use a single mic, some two or more. Adventurous recordists are discovering new microphone techniques, some from inspiration, some from necessity. Once you’ve got a handle on the basics, never be afraid to experiment.
Single-Mic Recording Techniques for Electric Guitar
Let’s start with the absolutely most basic technique--one amp, one mic, one input. Sounds pretty basic, right? But there are a few places where you can trip up here.
The nature of a speaker is that it can sound very different, depending on what part of the speaker you’re listening to. Since a microphone is nothing but a mechanical extension of your ear, where the mic is placed, and how it’s placed, becomes of singular importance. Any speaker, from the 4” speaker in a mini amp to the 15” speaker that lurks in some vintage cabinets, is brightest in it’s very center and gets darker/warmer as you move towards its edge. Part of this is because high frequencies are very directional, and part because a speaker cone moves more quickly in the center than it does at the edges, where there is great mass to move.
The classic single-mic placement is a cardioid pattern dynamic mic, like the Shure SM57 or Sennheiser e 609, almost touching the grille cloth, aimed straight at where the dust cover (the dome at the center of most speakers) is glued to the speaker cone itself. This avoids the “ice pick” highs you can get from having the mic dead center but is still bright and well defined. If that position is too bright, move the mic placement outwards, toward the edge of the speaker, pointing straight in, until you find a tonal balance you like. This technique is called “on-axis” mic placement and provides the most focused sound with plenty of treble bite. If the amp isn’t so loud that you’ll hurt yourself doing this, many engineers get their head down in front of the amps and listen with one ear to find the spot that sounds best to them. Use caution, earplugs, or both, if you want to attempt this. If you intend to have a long career recording you need to be careful with those ears.
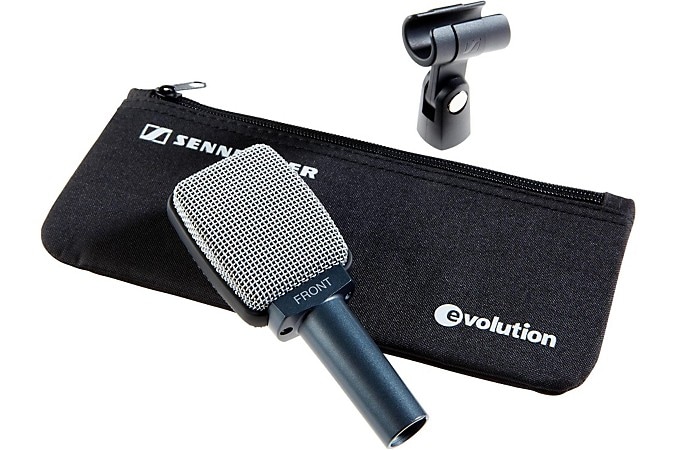
Pictured: Sennheiser e 609
If all of that is still too bright for the track, you can try an “off-axis” mic placement. This is when you aim the mic at an angle to the speaker, not straight on. This placement will lose some of the high-end bite, give you a little more low frequency and, if the angle is fairly sharp, start to add some room sound. As with on-axis placement, feel free to experiment with what part of the speaker you’re angling toward.
The next single-mic technique involves getting a little more perspective on the overall sound of the amp by pulling the mic back from the grille cloth. You’ll get a little less focus and a little less “punch,” but you’ll get a more balanced sound that has a little bit more of the room sound in it. This is more like the sound that you’re used to hearing when you see a guitar player or bass player performing live. It’s also the sound that the musician is more used to hearing, so they may be more comfortable with this as they’ll feel it’s more representative of their sound.
For any of these single-mic techniques, you can swap in other types of mics. Swapping in a condenser mic will give you a more “Hi-Fi” sound with the type of high-frequency response engineers commonly call “air.” Using a condenser’s pattern switch can also give interesting results here, with omnidirectional or figure-of-8 patterns adding some room sound, even when used in close positions. A ribbon will add warmth, with a natural high-end roll-off that means you’ll need less EQ later in the mixing process. The ribbon’s natural figure-of-8 pattern will also add a little room sound. Note: If your room sounds good, this can be a good thing. If your room doesn’t, you might hold off on those techniques until you get some acoustic treatment in to shape the room sound.
“But,” we hear you saying, “what if I want both that explosively punchy, bright, right-on-the-grille sound and a balanced, ‘amp-in-the-room' sound?” That’s an excellent question, and one that we’ll deal with next.
Multiple-Mic Recording Techniques for Electric Guitar
Using two or more mics to record a guitar amp opens up a whole new world of sonic possibilities. By mixing different placements and mic types, you can make a tiny practice amp sound like a full stack in a concert hall, for example. It’s also fertile ground to let your imagination run wild and experiment with different approaches that greatly expand the possibilities of your small home recording setup or project studio. We’ll start to get into that in a moment, but first a cautionary tale.
Maintaining Proper Phase When Recording Electric Guitar
Before we dive into multiple mic techniques, we need to say a few words about phase and polarity. Anytime you have more than one microphone (or any other sort of transducer, which is just a fancy word for something that turns sound energy into electrical voltage or current) on the same sound source, there is a danger of phase cancellation. Imagine two copies of the same sound wave moving back and forth through the line that indicates 0, which means no signal, or silence. If you take one copy and flip it so that negative becomes positive (a 180-degree phase reversal or polarity swap), then play them back through the same speaker, they will add together. Since they’re perfect mirror images, they cancel each other out completely and all you’re left with is an eerie silence where there should be sound. If they’re not perfect duplicates, you’ll get something that sounds hollow and pinched, not like that spectacular sound you thought you had dialed up. If the phase difference is less or more than a perfect 180 degrees, different frequencies will be canceled and some will be reinforced, the way ocean waves can be when they come together, and you’ll end up with a sonic mess. This is also known as “comb filtering,” which is what gives phase shifter pedals their characteristic “swoosh.”
Avoiding phase and polarity problems takes a little planning and a couple of precautions. First, make sure that all your XLR mic cables are wired the same way. This ensures that you’re starting off with everything at the same electrical polarity. The AES (Audio Engineering Society) standard is pin 2 hot, pin 3 neutral, pin 1 ground. A cable tester, like the Livewire LWSCT, can get all that sorted quickly, and is a tool that everybody should have sitting in their utility kit.
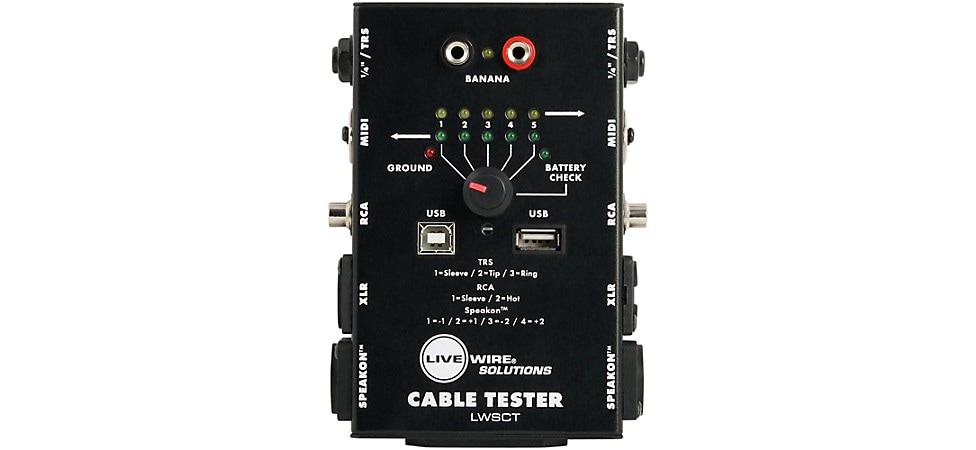
Pictured: Livewire Cable Tester
Second, think about the relationship between distance and phase. Every sound wave has peaks and troughs (positive and negative) parts and each one is at a different frequency. If the mics are picking up the same sound source, but from distances that are in different relationships to the peaks and troughs of some frequencies, those frequencies will be canceled or reinforced, depending on that relationship. There’s a rule called the 3-to-1 rule that was developed in the early days of recording. This rule says that mics on a common source should be spaced in that relationship. For example, if the first mic is one foot away from a source, the second mic should be three feet away. While it doesn’t strictly apply to mic placement for a single guitar amp (it was developed for placing mics for choirs and big bands back when all recording was mono), it’s still a good starting place. It’s not possible for a multiple-mic setup to be totally free of phase-difference artifacts, but these two things will help you minimize them when recording.
Okay, on to the stuff that you came to hear about.
Creating Sonic Synergy when Recording with Multiple Microphones
There are several basic strategies for using multiple mics on a guitar amp, but a virtually infinite range of variations on those. Once you’ve got the basics down, feel free to experiment to find the placements that will make for your personal sound.
The main idea here is to pair mics with different sonic qualities and/or polar patterns to expand the sonic range that’s captured on the recording. In most of these cases, you use a dynamic mic as your basic sound and the second mic is generally mixed in at a lower level. In analog tape days, these would be mixed to a single track, but with the virtually unlimited track count of most DAW packages, we recommend recording separate tracks for each mic and mixing later. If you’re going to mix them to the same track, always be careful to check for proper phase (see above).
First Pairing: Dynamic/Dynamic
There are two basic ways to approach this combination. First, with both mics close on the grille, at the same distance, with one placed on-axis, the other off-axis. This is more subtle than using different mic types but combines the focus and punch of the on-axis placement with the added low end and slight added room sound of an off-axis mic.
Second, for open-back cabinets, one mic close on the grille, the other at the rear of the cabinet. Note that you will absolutely have to flip the phase switch on the rear mic’s channel, since it is physically 180 degrees out of phase, capturing the other side of the speaker’s movement. This adds low end and more of a sense of the cabinet itself.
Commonly used mics include the Shure SM57, Sennheiser e 609 and Electro-Voice RE-20. Note, there’s not as much to be gained from close/distant mic placement with a pair of dynamics, especially ones that have similar capsules and polar patterns. But you can always experiment.
Second Pairing: Dynamic/Condenser
The main use here is as a close/distant pairing. Use your favorite dynamic mic tight on the cab, either on- or off-axis. This is a great use for the Sennheiser e 609’s ability to hang over the cabinet. Use a wider polar pattern on a condenser, if it’s switchable, and pull it back one to three feet from the cabinet. The condenser will add more of a sense of what the amp sounds like in the room. If you want to capture more of the space you’re in, you can pull the condenser mic back further, checking for phase at every distance you use. A large-diaphragm condenser with switchable patterns, like the AKG C414, Mojave MA-50 or other condensers mentioned above are great choices here.
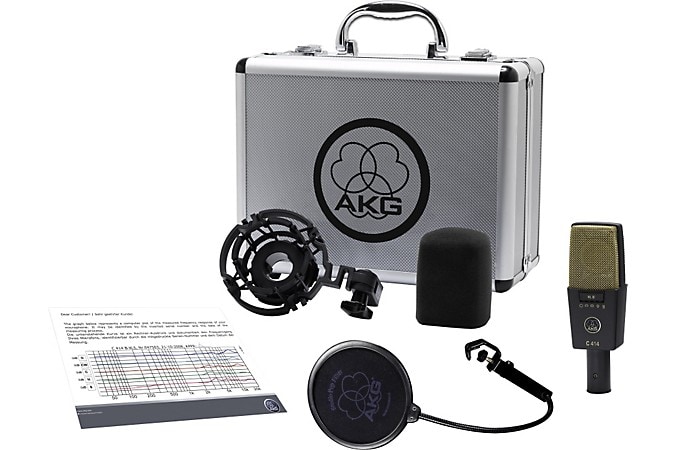
Pictured: AKG C414 XLII
Third Pairing: Dynamic/Ribbon
This technique is almost always for close placement, frequently right next to each other to avoid phase issues. In fact, Royer makes a dual mic clip that’s designed to hold both an R-121 and a Shure SM57 in the proper relationship to avoid phase problems. This placement brings plenty of bite and attack from the dynamic, and big body and warmth from the ribbon. The nature of the ribbon’s figure-of-8 pattern will also bring a little bit of room sound into the equation.
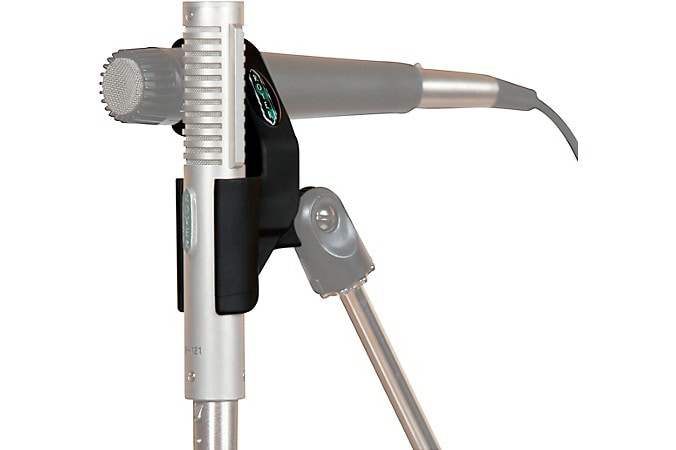
Pictured: Royer AxeMount Dual Mic Clip
You can also pull the ribbon back for more room sound, as with the condenser above. The nature of the ribbon’s frequency won’t make it as dramatic a combination as with the condenser, but it can be a cool, very vintage-y sound
Fourth Pairing: Ribbon/Condenser
This one is basically a variation on the dynamic/condenser pairing, but using a ribbon, like the Sterling Audio ST170 or the sE Voodoo VR1, as the close mic, leverages the warmth and natural high-end roll-off for a less aggressive main tone, with the high-end detail and room sound coming from a condenser, such as a Neumann U 87 or Audio-Technica AT4047MP. Because ribbons sometimes don’t handle higher SPL levels as well as regular dynamics do, you will want to be careful with this one if you’re trying it with a fully cranked, high-wattage amp. Another thing to try with this method is to use the condenser’s figure-of-8 pattern to add more room sound.
Pictured: Sterling Audio ST170
With all these tools available, there is also a case to combine them all and enter our next stage—the world of hybrid recording techniques.
Hybrid Electric Guitar Recording Techniques
Hybrid recording isn’t exactly a new thing. For quite some time, the standard method of recording electric bass has been to combine a DI signal, for clarity and definition, with a mic on the bass cabinet for some low-end support. There is no reason why this shouldn’t be done with guitars. With modern tools and track counts, there’s no reason not to capture any instrument by as many different paths as you can. Your imagination and ingenuity are the only limits, but here are some possibilities to start with.
Start with the basic principle that you can always stick a DI box inline with a guitar. You will generally want to grab the signal before it hits any effects pedals, so you aren’t removing signal processing possibilities from your captured direct track. Mic up the amp by your preferred method. Having done this and recording the direct signal to one track and the amp to the other, you can use plug-ins to process the direct recording, creating a new texture to layer in. Or, mix just a little of the direct track behind the recorded amp to add a little extra definition and clarity to the part.
Re-amping Electric Guitar
We touched on the concept of re-amping a part in the section on recording with modeling gear. You can do the same thing with physical amps and effects, too. You’ll need what’s called a re-amping box. This is basically the reverse of a DI box. It takes a line-level signal from your recording system and uses transformers to drop it to the correct instrument level and impedance to feed effects pedals and/or an amp. This allows you to rerecord that part through a different amp and effect chain without having to play the part again. This is a great way to make guitars sound absolutely huge in your final mix. Radial Engineering makes a full range of passive and active re-amping boxes to get you started. Reflecting the rise in popularity of re-amping, other companies such as IK Multimedia and Walrus Audio, have started introducing re-amping options also.
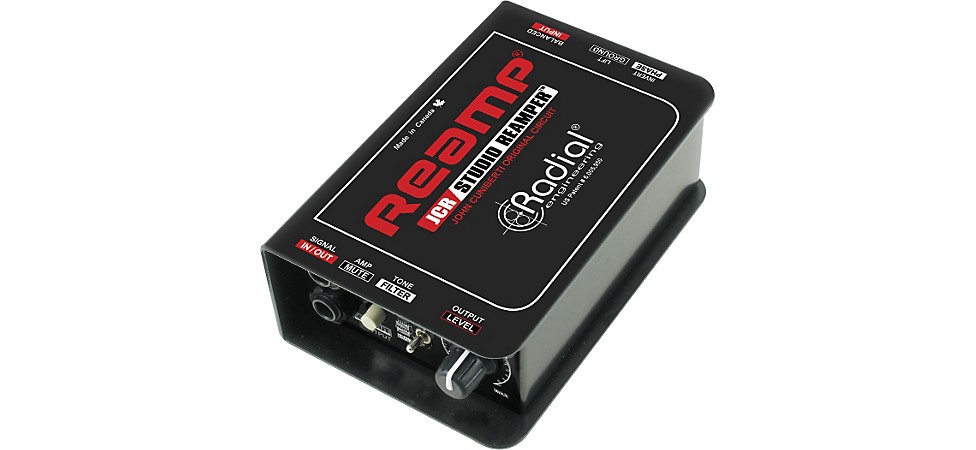
Pictured: Radial Engineering Reamp JCR Passive Reamper
Cabinet Modeling Hardware
For those of us who live close enough to neighbors who might object to crushing death metal through massive amp stacks being recorded at three in the morning (which is absolutely the best time for this), the ability to do silent recording is a big advantage. The advent of seriously good cabinet modeling hardware and software has made this relatively easy. The key is having a proper reactive load box for your amp, along with something that serves as an IR (Impulse Response) loader. IRs are, in essence, a snapshot of a speaker cabinet’s response that capture the sound of a cabinet and microphone combination. To use these, run the speaker output of your amp into the load box and the line or instrument level output of the load box into your IR loader, pick a cabinet and go. You can go with a separate load box, like those from Radial Engineering, Two notes Engineering or others, plus an IR loader, like one from Two Notes,. You can also choose one of the number of all-in-one load box/cabinet modelers that have come on the market, including the UA Ox Box and BOSS Waza Tube Amp Expander. Add these to your re-amping setup, and you’ve got the power to get the guitar tones of your dreams, wherever you may be recording.
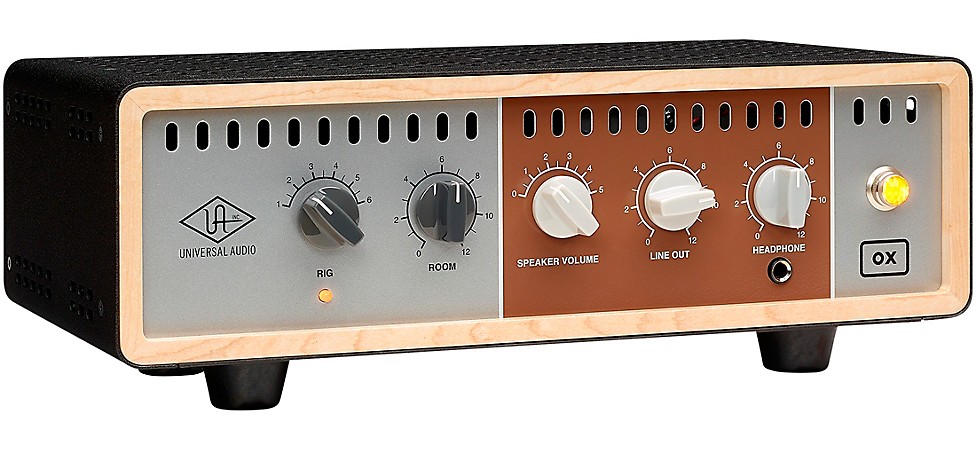
Pictured: Universal Audio OX Amp Top Box Reactive Load Box
Additional Gear for Recording Electric Guitar
We’ve given you some basic starting points here on how to up your electric guitar recording game, but if you really want to get the most out of these tips, there are some studio upgrades you might want to consider that will help you with that. You’ll also want to check out our Audio Interface Buying Guideand our guide to Home Recording Essentials.
First, look into acoustic treatments for your recording space. It might be something as simple as picking up reflection filters for your mic stands or movable acoustic panels (called “gobos” for “go-betweens”) to improve isolation and deaden reflections. You might choose to go with a more permanent installation of acoustic foam, bass traps and wall panels to control reflections and kill standing waves. Either way, making your space sound better goes a long way toward more pro-sounding recordings.
Better headphones and headphone extension cables will help out. A quality pair of closed-back, well-isolated ‘phones on an extension lets you monitor more accurately when positioning mics and are a lot safer than the “stick-your-ear-next-to-the-cabinet” technique we mentioned earlier.
Some amp stands will decouple amps from the floor when recording. While that coupling can add impact when you’re playing live, it can make for muddier recordings, and floor vibrations can bleed into mic stands for other instruments if you’re recording multiple tracks simultaneously.
Studio-quality mic stands also make a difference, especially when you’re using larger, heavier mics like a tube condenser. They also offer better isolation from stray vibrations.
In the control room, upgrading your studio monitors will make for more accurate mixes, and getting a better audio interface can expand tracking possibilities. You might also want to add an outboard mic preamp, since most audio interface mic pres, while they can be quite good, generally don’t have the gain or tonal quality of a quality external pre.
Finally, as you get deeper into the recording process, you’ll want to build out your mic collection (usually referred to as a mic closet or mic locker) with several different dynamics, condensers (both large- and small-diaphragm) and ribbon mics. But that is a whole other article.