.jpeg)


Live performances can be like the mysteries of the unfathomable Marvel Cinematic Universe, the disappearance of Amelia Earhart and why the British Royals can’t just get along all rolled into one big puff of smoke. Why? Because once the last echoes of music fade away and the crowd stops applauding and cheering, your show is lost to the wisps of imperfect memory ... freeze dried into the past … gone.
Unless you recorded the show.
Having a tangible, unbiased and perhaps even unforgiving audio and/or video documentation of your gigs is essential to a musician’s development as a live performer. Subjective feedback—from friends, fans, bandmates, sound crews and your own inner feelings—can be nice for your ego when everyone loves you. But unless the commentary is backed up by tangible proof, you can never really be sure what is definitive truth and what is well-intentioned puffery.
This is not necessarily an exercise for newbies, either. Even experienced professionals can learn from appraising gig audio and video footage. For example, The Cure has been thrilling arena audiences for decades, so you’d think they know what they’re doing. However, founder and vocalist Robert Smith not only records many of the band’s shows, but like a football coach reviewing game films, he evaluates the complete performances and sends instructive notes to each band member for review. That’s an example of someone who is still burning to up their game. Should you be any different?
Beyond evaluating song arrangements, and the quality and energy of each musician’s performance, recording your shows provides invaluable audio and video assets for marketing, promotion, EPKs (electronic press kits), livestreaming events, YouTube content and more. All of these elements are key to expanding your audience and engaging fans. No content. No outreach.
Committing to documenting a show—whether it’s a coffee shop, busker’s spot in a park, bar, small club or full-on concert venue—takes a little pre-planning and setup. But as you’re already performing, it seems foolish to ignore the voluminous benefits of recording what you do. After all, unless you’re a telepath who can beam your memories into the minds of others, no one will be able to experience your live energy and sonic intensity unless they can see or hear a show.
To get you started documenting your gigs, we’ll set out some live-recording scenarios, help you with the details, and reveal the pros and cons of each approach. You’ll see that expending just a little effort will deliver all kinds of content to get your music out there and engage potential super fans.
Table of Contents
Recording Your Show With a Handheld Recorder
Documenting Gigs Using a Smartphone and a USB Mic
Taking a Stereo Submix From a Mixing Board
Make a Multitrack Recording of Your Band
Recording Live Shows to Video
Capturing the Glory
Recording Your Show With a Handheld Recorder
Handheld recorders are small, stealthy recording devices that are excellent options for documenting your gigs. They are crazy portable, offer completely self-contained recording operations and typically use batteries for hassle-free power. You can easily position one on a chair or road case, and many can be mounted on a mic stand (with the right attachment) or optional camera tripod.
Placement is usually determined by how you want to use the recorder. Are you planning to release live audio of your band in action or simply document performance elements for private evaluation? For rough recordings that only the band will hear, you can drop the recorder almost anywhere on stage, keeping it in view, safe from audience interference or theft.
Of course the recording may be unbalanced if the recorder is placed too close to the drums or guitar amps, and the majority of the vocal sound will likely come from the stage monitors rather than the main house speakers—which are usually set up in front of the stage. That said, many artists have had decent results keeping the recorder near the band, as the audio is often good enough to study parts, arrangements and the general tightness of the ensemble—even if, say, the drums are the loudest element of the recording.
Pro tip: Before you get onstage at your local venue, try positioning the recorder in various areas of your rehearsal space. This will give you at least a general idea of what you’ll hear when the recorder is placed on the bandstand during a show.
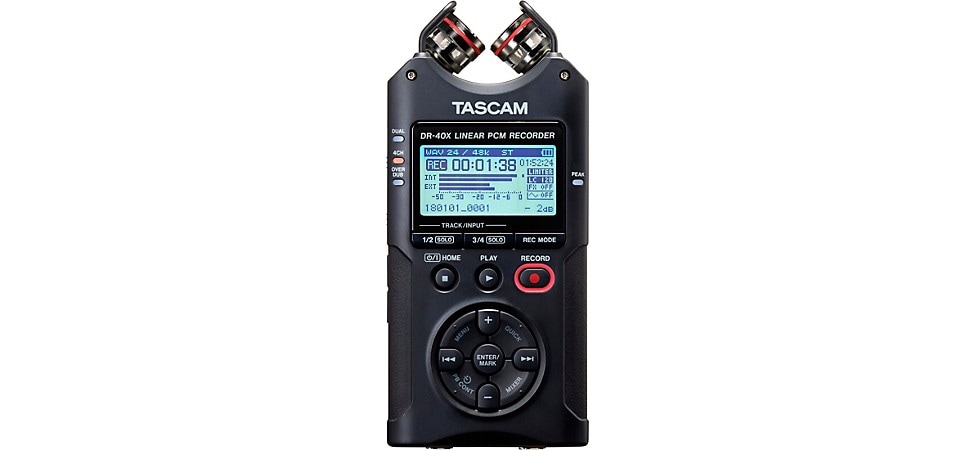
Pictured: TASCAM DR-40X Portable Digital Recorder
However, if you want a well-balanced live recording of the entire band, you may need to find a sweet spot some distance from the stage to ensure the full onslaught of your awesomeness is satisfactorily documented. If you plan to release these live recordings via streaming—or as soundtracks for EPKs or performance videos—they should sound clear, clean and exciting, as well as spotlight elements that make your band super special (an amazing guitar solo, a stellar vocalist, mammoth grooves and so on). This may take some moving around the room during a soundcheck to find just the right position to capture all of the audio goodies. Try placing the recorder near the house mixing position (if it has a dedicated mix area), back at the merch table, above the bar or high up along the back wall. (Hopefully, the sweet spot isn’t in the middle of the dance floor.)
Keep in mind there will be compromises to all of these positions when using a handheld stereo or mono recorder. You aren’t close-miking any of the instruments for a multitrack recording. You’re capturing a perspective of a performance in a room, so every sound in the environment will invade your audio track—glasses clinking, people laughing and talking, pinball games chiming and so on. Basically, every sound your audience will hear—whether that’s a guitar solo or a motorcyclist revving a Harley near the front door of the club—is what the recording will capture.
All of that said, a handheld recorder still provides a hassle-free way to record a live performance, and many models offer versatile features that can really upgrade your sound. For example, the top-selling TASCAM DR-40X includes two mini-condenser microphones preset in a very practical X/Y pattern that can be adjusted for ultra-wide stereo or a tighter, more focused stereo perspective. In addition, the DR-40X offers a 4 CH mode where you can mix the sound of the onboard mics with two external inputs—such as from a mixing board feed or close-miked instruments and vocals.
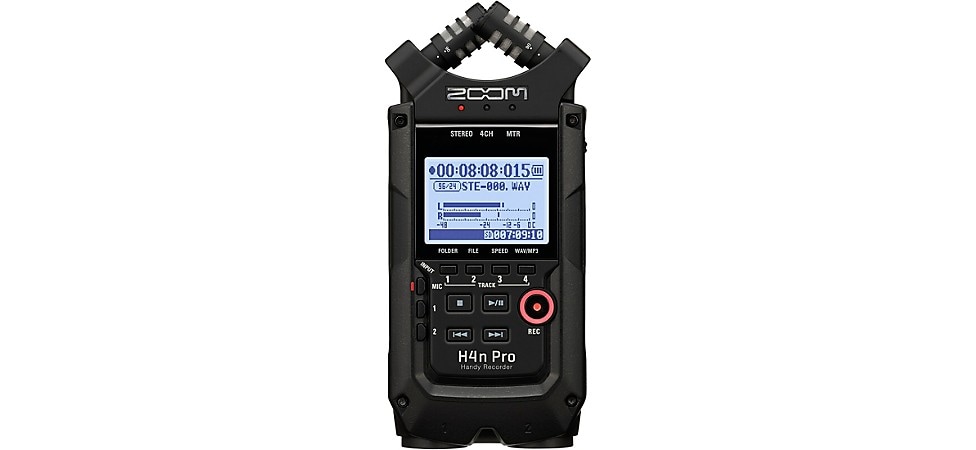
Pictured: Zoom H4n Pro Handheld Recorder
If you want a little more flexibility, the popular Zoom H4n Pro provides many of the same features, but adds a multitrack mode (four independent tracks), a menu of onboard effects, guitar and bass amps and more.
Musicians who love the ease and portability of a handheld recorder, but who also aren’t timid about shifting into multitracking if the need and opportunity arises, should check out the TASCAM Portacapture X8. The Portacapture X8 includes two onboard condensers for X/Y or A/B stereo recordings. However, you also get four TRS mic/line inputs for miking individual instruments—or inputting signals from a mixing board—along with the stereo signal captured by the onboard mics. Ultimately, you can record up to eight tracks (six separate tracks and two mix) with the Portacapture X8, and the unit’s 3.5" color, touch-panel display and Launcher icon system make dealing with the additional signals a relatively stress-free operation.
Pros
- Extreme portability
- Simple set up
- Some models offer onboard effects and additional tracks
Cons
- Captures environmental distractions and noises along with your band’s performance
- May require some of your soundcheck time to find the optimum place to position recorder
- If left unattended, small size can tempt thievery
Documenting Gigs Using a Smartphone and a USB Mic
Of course, most of us already have a pretty fabulous recording device in our pockets—a cellphone. Given the plethora of recording and signal-processing apps available for iOS and Android, why would you need anything else to record your gigs?
Well, it all comes down to the microphone.
While you can capture decent audio with a smartphone, the almost microscopic mic (or mics) embedded in the casing are often not the best tools for capturing expanded-bandwidth music content. Especially if you’re looking to release tracks on socials or streaming services—rather than keep the recordings “in house” to evaluate with your bandmates—you’re going to want your live-performance audio to thrill listeners with robust lows, taut and articulate mids and shimmering highs. Don’t trust that job to your tiny cellphone microphone.

Pictured: Shure MV88+ Video Kit
A cool all-in-one solution is the best-selling Shure MV88+ Video Kit that includes a stereo condenser mic, Manfrotto PIXI tripod, phone clamp and mount, Lightning cable and a neoprene roll-up bag. The MV88+ Video Kit is designed for use with iOS devices and generally not compatible for streaming and recording on Android phones.
Another iOS add-on microphone is the RØDE VideoMic ME-L. This directional RØDE electret cardioid condenser can reduce environmental noises to focus on your performance, and its Lightning connector fits seamlessly onto your Apple device. Also included is a windshield and a mini-plug headphone output.
Zoom offers two dual-mic options for iOS that accommodate your recording preferences. The Zoom iQ6 X-Y Stereo Microphone deploys the same X/Y configuration as the previously mentioned Zoom H4n handheld recorder, so you can tailor the stereo field to widescreen or more center focused.
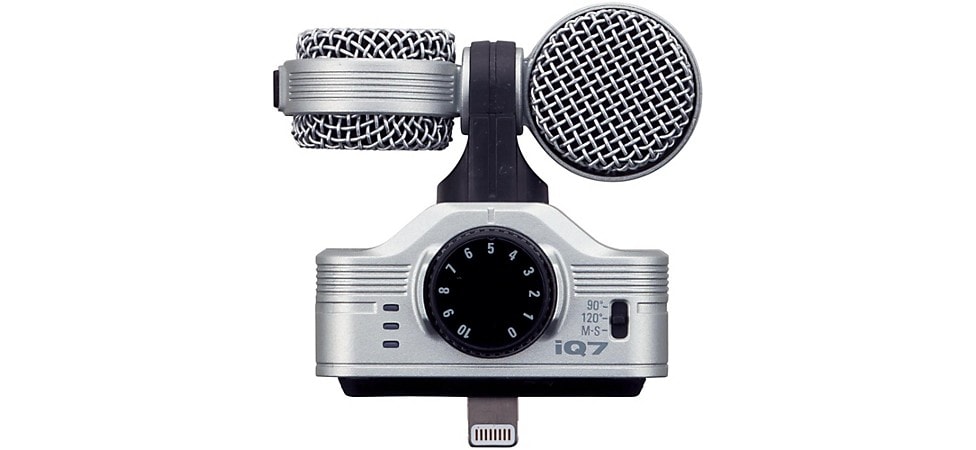
Pictured: Zoom iQ7 MS Stereo Microphone for iOS
If you want a little more control over the stereo imaging, the Zoom iQ7 MS Stereo Microphone (also for iOS) provides a cardioid “mid” mic that concentrates on sound in front of your recording device and a bidirectional “side” mic that obtains sounds from the right and left. The advantage of the M/S mic technique is that you can choose between the two perspectives. For instance, you can boost the level of the mid mic for more of a directional impact with a cushion of ambience at the sides. Or you can lower the volume of the mid mic—or increase the level of the side mic—to open up the stereo spectrum while still maintaining coherence in the center field. The basic goal is to avoid that unwelcome “hole in the middle” effect. This is when two coincident mics are angled too far from each other, producing an expansive stereo image but capturing a weaker signal of the source sound at the center—which, in a typical live-recording application, is your band.
While it can sometimes seem all of the big, mobile-recording fun is dedicated to the iOS platform, Android devices are not ignored. In fact, the Zoom Am7 Android Stereo Microphone gives Android users much of the same M/S capability as the company’s iQ7 microphone.
Pros
- No need to purchase a dedicated recording device
- Third-party apps may be available as additional recording/production tools
- Extremely portable and easy to set up
Cons
- Clubby—product variety and options may depend on whether you’re iOS or Android
- Don’t forget to manage phone storage, as it is now a recording device warehousing big audio files
- Taking your eyes off a phone placed out in the audience for an optimum recording perspective is never a good idea if you want to keep it
Taking a Stereo Submix From a Mixing Board
If you’re already carting your own P.A. system to a gig, make that thing multitask. Any mixer or mixer/amp/speaker combo with a USB output, line out or analog stereo outputs is capable of routing signal to a recording device and documenting your show.
For example, portable mixers, such as the Harbinger LX8 and LX12, let you choose the desired number of audio inputs for your act (eight for the LX8 and 12 for the LX12) and simultaneously output the mix to powered speakers or a power amp (through the XLR Main Outs) and a recording device (via a stereo Rec Out) or DAW (using the mixer’s USB function).
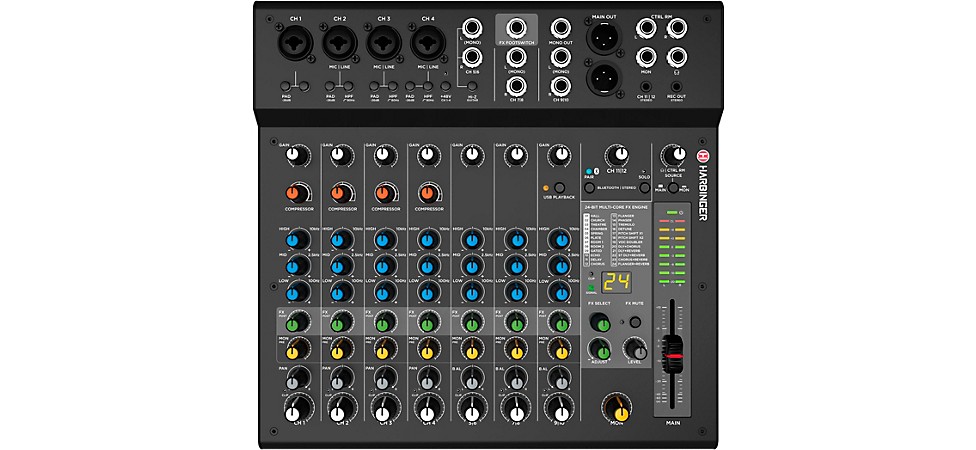
Pictured: Harbinger LX12 12-Channel Analog Mixer With Bluetooth, FX and USB Audio
Keep in mind that, in this scenario, the output from whatever mixer you use will be summed to stereo, so the house mix for the audience and the recorded mix for later release or band evaluation will be the same. In other words, if you needed to boost the acoustic guitar in the club to cut through the band mix, the acoustic guitar may be one of the loudest elements on the recording—perhaps even so loud that it interferes with the lead vocal. It can be challenging to serve two different applications with one mix, but it can be done.
Pros
- Control over the level of individual sounds
- EQ and effects can be tailored to your taste
- Miking instruments and vocals—and using line inputs—can minimize environmental noises and put the full focus on the band’s music
Cons
- A more complicated setup and soundcheck
- The live mix may be not the best recording mix
- Requires a separate recording device
Make a Multitrack Recording of Your Band
The full-cowabunga operation for any live recording is to go multitrack and ensure all critical elements are assigned to their own tracks for meticulous mixing down the road. Most of the huge live-concert productions—meaning on the level of SZA, Bruce Springsteen, Taylor Swift, Beyoncé, Shania Twain, Muse and other top acts—are typically recorded to multitrack, refined by big-time audio engineers and prepped for myriad streaming, documentary, and other promotional and commercial releases.
Ultimate audio control is the key. The artists don’t want screaming fans to constantly overwhelm the music and vocals. They don’t want the grooves to be weak, the low end underwhelming or the guitars and keyboards sounding mushy and unclear. In addition, if there’s an obvious mistake on a stereo recording, you’re probably going to have to live with it, but on a multitrack production, you may be able to zero in on a flat vocal passage or a muffed note on a guitar solo, and fix it—like it never happened.
There are tons of advantages to multitracking a live performance, but it can also be a far more complex campaign of required gear, cartage, set up, soundchecking and more. Evoking your inner Springsteen or Taylor Swift usually requires a large mixer and a hefty DAW (digital audio workstation, or software-based multitrack recorder) to accommodate a considerable track count.

Pictured: Universal Audio Apollo x8p Heritage Edition 8-Channel Thunderbolt Audio Interface
Even a five-piece rock band can eat up tracks if you want to have much the same audio control as you’d have with a conventional studio recording. For example, you could be looking at six drum tracks (kick, snare, rack tom, floor tom, two overheads), two bass tracks (one amp mic and a direct signal), two keyboard tracks (for stereo), and one track each for the guitar amp and lead vocalist. If the drummer, guitarist and bassist sing background vocals, you’ll need to add three more tracks. We’re at 15 tracks already, and this is for a relatively conventional rock band. A big cover act that plays corporate events and festivals might include multiple guitarists and keyboardists, several background singers, a horn section and a phalanx of percussionists to perform a massive repertoire of hits. That lineup is going to require significant resources and gear.
Another vital consideration is that, unlike taking a stereo output from the board being used to mix your live sound, you may want to have a separate, dedicated recording rig, as well as a recording engineer who is a different person than the house mixer. This will ensure that one engineer is completely focused on mixing an exciting live show for the audience, while the other tech is solely focused on capturing clean signals for a multitrack mix.
It is conceivable that one talented and attentive audio engineer could do both jobs, as many high-end mixers have direct outs on each input channel that can be routed to individual DAW tracks. Direct outs free up the live engineer to do whatever he or she desires regarding EQ and effects for the show, as the direct feed is not typically altered by any processing available on the channel strip—hence, the recording device gets a bunch of pristine signals that can be messed with at a later mixdown stage.
Whether you take signals from direct outputs or use a separate recording rig to capture your live-performance tracks, you’ll need an audio interface to get the sounds into your DAW of choice, whether it’s Avid Pro Tools, Apple Logic Pro, Steinberg Cubase, PreSonus Studio One or another digital recorder. Top-selling interfaces include the Focusrite Scarlett 18i20, Focusrite Clarett+ 8Pre and Universal Audio Apollo X8 Heritage Edition 8-Channel Thunderbolt Audio Interface.
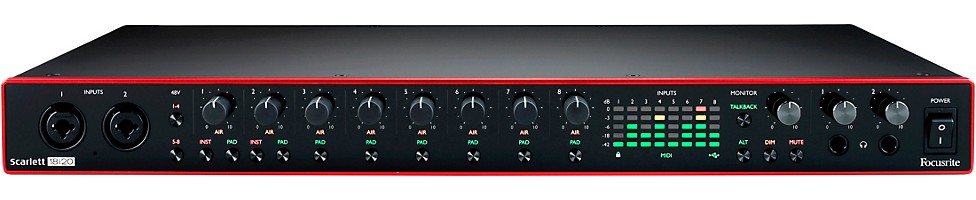
Pictured: Focusrite Scarlett 18i20 USB Audio Interface (Gen 3)
Pro tip: Many affordable interfaces offer eight channels, which may not provide enough inputs to cover a massive multitrack production. Don’t stress out about it. Simply assign those eight inputs to critical tracks—lead vocal, drums, lead guitar, etc.—and then take a stereo submix from the venue’s front-of-house console. This way, you’ll get all of the band sound in the stereo mix, and you can sneak up those individual tracks if, for example, the lead vocal or guitar solo needs a bit more level or some specific processing. If you want more guidance on choosing and using these tools, check out our article, How to Choose the Best Audio Interface.
On the other hand, if the prospect of assembling a mixer, audio interface and DAW at a live gig makes you quake in terror, enter a world of relative calm with an integrated multitrack mixer/recorder, such as the top-selling Zoom LiveTrak L-12 or popular Zoom LiveTrak L-20. These Zoom digital mixers record multitrack audio directly to an SD card, so you can document your show with just a LiveTrak and some microphones—no outside DAW required. Bigger band? Build a bigger mix with the PreSonus StudioLive 32SC, which offers 32 channels and records tracks to an SD card. PreSonus also includes its Studio One Artist DAW and Capture live-recording software in the StudioLive 32SC package, so you can choose to really upgrade your productions.
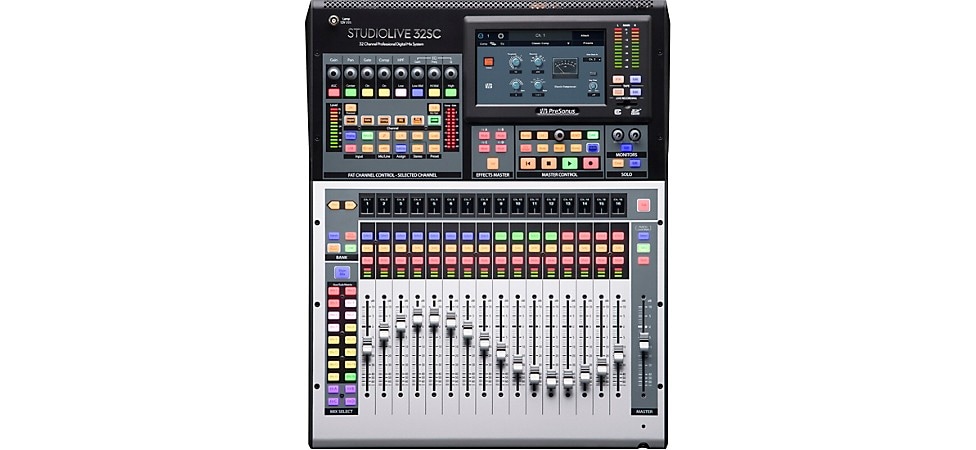
Pictured: PreSonus StudioLive 32SC 32-Channel Mixer
The extremely versatile QSC TouchMix-30 Pro serves up 32 channels as well, but the audio tracks must be output to an external USB drive rather than an onboard SD card.
Pros
- Near ultimate control over every sound coming from the stage
- The multitrack mix quality knows no boundaries, and the high-quality audio can be used for uber professional-sounding CDs, LPs, streaming distribution, film soundtracks, television underscores and more
- Separate tracks mean that remixes for different mediums or bonus releases are always an option
Cons
- So much to do!
- May need a dedicated recording crew to ensure optimum multitrack sound
- Additional gear and a tech crew can be costly
Recording Live Shows to Video
The DIY ethic is alive and well at shows where friends of the band, fans and complete strangers point their smartphones at the stage to record videos of a performance. Sometimes, an amateur videographer can just nail it, achieving truly stunning visuals and audio that perfectly capture a glorious moment in time for an EPK, YouTube, TikTok, Instagram and other media.
On the other hand, DIY video can present compromised audio, jarring camera angles and a less-than-cinematic vertical perspective (rather than horizontal) that do not portray your band as a live-concert powerhouse. You can make the argument that dreadful videos can still go viral, and you’d be right. But why would you want your artistry associated with something appalling, or at best, noticeably inferior to the releases of other bands?
This is where you say, “Yes. I will improve my video footage and my audio quality because my performances deserve to be documented on the level of a Tim Burton, Peter Jackson or James Cameron film.” (You can dream, right?)
Pictured: Zoom Q8n-4K Ultra-High Definition Handy Video Recorder
It’s actually not an unattainable or unrealistic goal to seriously upgrade your live-performance videos. The best-selling Zoom Q2n-4K Handy Video Recorder incorporates stereo mics in an X/Y pattern and automatic exposure adjustment that ensure changing lighting effects don’t impair clear and sharp visuals.
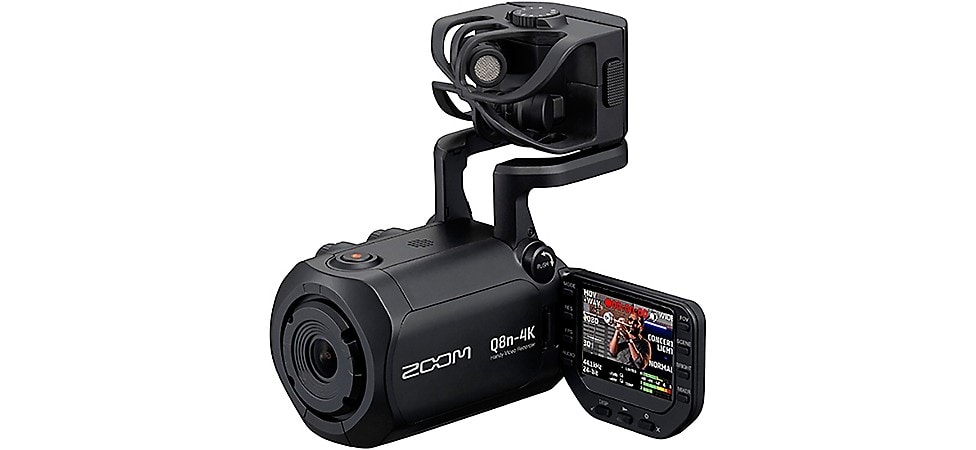
Add two more audio tracks to your video production with the onboard stereo mics and dual XLR inputs featured on the renowned workhorse that is the Zoom Q8N-4K Ultra-High Definition Handy Video Recorder. The Q8N-4K’s extra inputs facilitate some cool tricks if you can bring a small mixer to the show and use it to provide a stereo submix that supplements the onboard microphones. For example, if you’re concerned a trio of background vocalists and a percussion section might get overwhelmed by the volume of the guitars and drums, you can set up three or four additional mics by the singers and percussionists, run the cables into the supplementary mixer, blend everything to taste and run the board’s stereo output to the Q8N-4K’s two XLR inputs. Problem solved. Or perhaps you’re making a music documentary, and you want to augment the stage sound captured by the Q8N-4K mics with some “bar ambience.” The two additional inputs will let you create your cinematic soundstage by simply placing a mic near the bar and another near the pool table.
If your smartphone or video device is already making the grade visually, but you want to improve the audio quality, explore popular camera add-ons such as the RØDE VideoMicro Compact Directional On-Camera Microphone or RØDE VideoMic Directional On-Camera Microphone. Both of these microphones are mono, rather than stereo, but nonetheless offer a film set level of clarity and dimension.
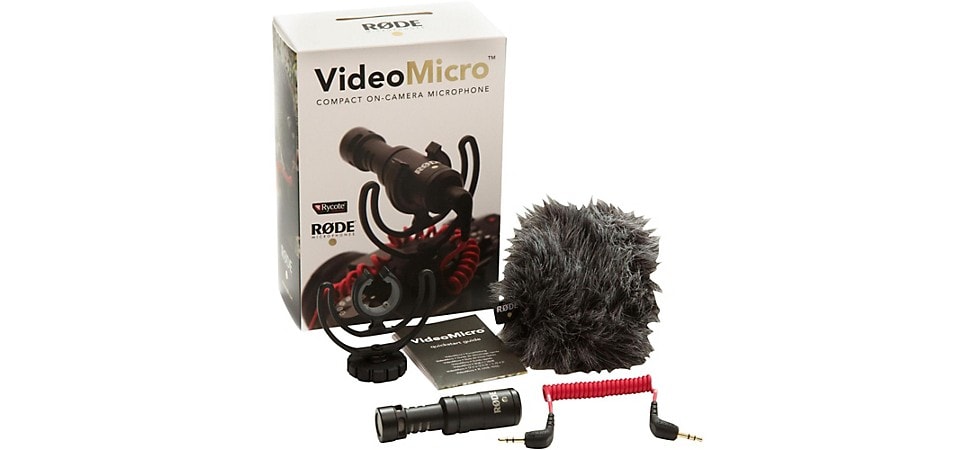
Pictured: RODE VideoMicro Compact Directional On-Camera Microphone
Pro tip: Don’t like how the band looked during a filmed performance that it played absolutely brilliantly? Even famous bands can fall victim to the “great audio/chillingly awful video” demons. Think about the fantasy sequences in Led Zeppelin’s The Song Remains the Same, just about any Spandex-packed epic from the 1980s, or “Rock Me Tonite” by Billy Squier—the unanimous choice for worst video ever in I Want My MTV, which even Squier admitted “snuffed out” his career.
But the good news is that you can claw your way back from ghastly video content. You can always extract the soundtrack from a video and distribute it as an audio-only release. Just get that music track out into the world now, and, for future video shoots, make sure the guitar player wears a far less-embarrassing shirt (or doesn’t channel Billy Squier).
Also, if you can, capture some songs with the full band visible and others while focusing on close-ups of each individual player. During the editing process, you can look for spots to insert the “B-roll” close-ups to add some energy and excitement to the video production. Study the editing of your favorite movies and television shows for ideas on how to incorporate long shots, mid shots and close-ups to generate visual excitement.
Pros
- Video is ubiquitous. It’s tough to build an audience without consistent video content
- Affordable video cameras and add-on microphones can deliver excellent quality
- Video soundtracks can be extracted and used for audio-only releases
Cons
- Playing marvelously while looking fabulous and beaming charisma can be challenging
- Evocative, musically sensitive video editing can be difficult for beginners
- The sweet spot for audio might be different than the optimum position to capture great video.
Capturing the Glory
Whether you’re recording a band in the studio or onstage, it can be tough to assemble the right gear and know how best to use it. You can dig a little deeper and further upgrade your live-sound chops, by reading "How to Record Your Worship Service". In addition, take advantage of a pro’s real-world experience doing sound for Black Pumas, The Revivalists, Brian Wilson and The Zombies by studying "Michael Pierce| Sound for Every Situation".
After all, we’re well aware that choosing the best mic positions for capturing great sounds and diminishing annoying signal bleed can be nerve-racking in the relative isolation of the studio. But it can be a circus of frustration out in a live venue populated with all kinds of sound-compromising surfaces (wood floors, huge windows, high ceilings, etc.), environmental noises and crowd chatter.
So, when you’re done reading these articles and checking out other resources, if you still want some help finding the best microphones, mixers, recorders or cameras for live concert applications—as well as getting some counsel on proven recording techniques—seek out one of our Gear Advisers. You can find them at your local Guitar Center store or at our call center. Now, go out and record your band’s live performances without fear. We’ve got you.