


AcousticElectricCymbals
Pro Gear Advisers
•866-498-7882
Guitars
Guitars
Amps & Effects
Amps & Effects
Used & Vintage
Keyboards & MIDI
Keyboards & MIDI
Drums
Drums
DJ Equipment
DJ Equipment
Basses
Basses
Recording
Recording
Live Sound
Live Sound
Accessories
Accessories
Mics & Wireless
Mics & Wireless
Music Software
Music Software
Lighting
Lighting
- Popular Brands
Band & Orchestra
Band & Orchestra
Platinum Gear
Deals


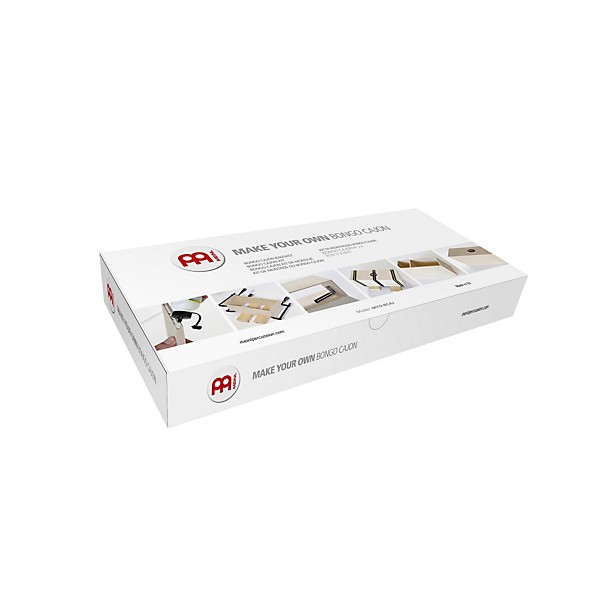
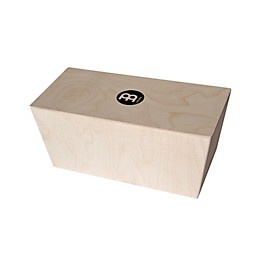
MEINL Make Your Own Bongo Cajon
$24.99
6-month special financing^ + $1 back in Rewards** Limited time Learn More
Protect your gearLearn more
Cover drops, spills or cracks with Pro Coverage
Need Help?
Videos (2)
View All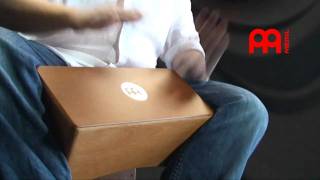
Meinl Bongo Cajon

Make Your Own Bongo Cajon

Description
A very popular item from the MEINL ultimate selection of instruments is the Bongo Cajon and now you can build your own with this construction kit. The kit comes with all the parts and a list of the materials and tools you need. The instructions will guide you through this fun project and at the end you will be able to customize the finish of the instrument by adding oil, a lacquer, wax, or paint it with an entirely unique design.

Specs
- 1 x assembly instructions in 7 languages
- 2 x side panels, long
- 2 x side panels, short
- 1 x playing surface (with MEINL logo)
- 1 x sound chamber partition
Warranty
One year replacement, parts, and labor warranty on all percussion products.
Reviews
4.4
5 Reviews
50%
of respondents would recommend this to a friend

Filters
Best Uses
- Accompaniment1
- Personnel enjoyment1
Describe Yourself
- Experienced1
- Novice1
Pros
- Sounds better after playing for a time1
- Fun build1
Reviewed by 5 customers
I take back my previous review
submitted6 years ago
bySureshot
fromColorado
I liked the building project. The screen printed logo on mine was poorly done so I sanded the top until it was gone. This may have improved it's responsiveness. It sounds ok and has different tone on all sides.
No
submitted6 years ago
byDennleo
fromDenver
This is fun to build. It is all ply wood so it does not sound as good as a hardwood canon.
Okay kit, some fraying of the plywood
submitted12 years ago
bybrian olsen
fromDenver, CO
Out of the box one of the long side pieces had a little fraying of the plywood on the outside top, a short side piece had a bit towards the bottom. I switched up the order of assembly. Box first, sanded the top level, then chamber divider followed by the top. While gluing the box part together (step 1) I realized the notches for the chamber divider were allowing the long sides to flex too much. Also I was afraid glue beads from the top would get into those notches. So after doing some sanding to make sure the top would go on flat, I used a flat surface and glued in the chamber divider. With the long side flex I wouldn't really suggest using belt clamps. To glue the top on I put the bongos on a folding workbench with the top and a couple of 1x3's length wise along the edges, clamping that all together. I used a rasp plane to take down the top overhang followed by 60 sandpaper on all the edges, then finished it all off with 220 and some coats of danish oil. The bongos play just fine and look nice with the finish. I'm not a percussionist and wanted something my kids could play with as well (no drum heads to poke through). The finish is clearly not to the level of the normal bongo cajons, but it does work in a pinch. Mine rocks when put on a solid surface.
If you have the tools and the motivation....
submitted12 years ago
byMichael Berkowitz
fromChicago, IL
This kit makes a pretty good bongo cajone but requires you to provide more than $25 worth of work and materials, which is the price difference between the kit and a (better) "built" model. If you've never done any kit building or woodworking, don't bother. The instructions are sparse and contrary to Meinl's video showing cute little kids building the kits, without power tools, it will take hours to sand the top to size. I love playing my new cajone but will never build another one.
Fun project!
submitted13 years ago
bySheila Mast
fromsaginaw mi
The video show this as a kid's project, and I suppose it very well can be. I wanted the fun of putting one together while saving a little ($). Be aware that you will need a few tools. The top piece of my kit was at least 1/16" of an inch oversized. I didn't want that much hanging over, so I trimmed the top piece on the table saw. Also, I wanted the top to have a beveled or rounded edge, so I used a quarter-round bit on my router table. You will definitely need four wood clamps or belt clamps. Also, the end pieces were a tad high, so I used a rasp to take them down even with the longer-side pieces. I definitely wanted the top to fit flush all around! One last thing...in the directions it says to stain after assembly. I disagree!! I think you should stain the pieces first. Because when the glue oozes out of the joints, the wood won't take the stain in those spots, and it will look horrible. You DO want the glue to ooze out, by the way, or you're not using enough glue.
- Previous
- 1
- Next
Q&A
Have a question about this product? Our expert Gear Advisers have the answers.
No results but…
You can be the first to ask a new question.
It may be Answered within 48 hours.
Be the first to know about exclusive offers, tips and more.

866-498-7882 English
877-687-5402 Español