


The sound and impact of drums in music production has evolved throughout the years—perhaps even more so than the role of vocals, guitars and other instruments in a mix. Some early rock productions, for example, have the drums somewhat gobbled up by the overall mix. The rhythm tracks added a pulse that still compelled the kids to dance, but the drums didn’t exactly speak with clear, loud authority. At times, the maracas got more love than the snare drum. Those drum mixes still rocked, but as styles and recording techniques progressed, the old-school grooves didn’t rock as explosively as John Bonham’s boisterous Led Zeppelin tracks, the cannon-like tom fusillades of some ’80s metal songs or the massive sampled/synth bass drums let loose by rap, hip-hop and dance music. All of the masterful performances and advancement of the recording arts through the years have risen up to give today’s creators one prime directive: Unless you’re mixing a Barry Manilow track, your drum sounds must RULE.
Crafting commanding and exciting drum tracks is often a matter of balancing two disparate sonic palettes: pristine articulation and volatile overdrive. Knowing which way to turn and when is a matter of being sensitive to the song as a complete work, of course, but spontaneous imagination and boldness should also be factors in your mixing decisions. Read on for some ideas we’ve compiled to help you create some crushing drum mixes. You’ll just need one more thing—a notepad inscribed with the words “Don’t Be Boring” situated next to your mix position.
Table of Contents
Pre-production for Mixing Drum Tracks
Preparing Drum Tracks for the Mix
How to EQ Drums for Powerful Mixes
Tips for Compressing Drums During Mixdown
Reverb Processing for Drum Mixes
5 Zany Drum Mix Tips
Boom, Bang, Crash
Pre-production for Mixing Drum Tracks
Okay. Digital recording can cure a lot of ills, fix a ton of mistakes and transform wobbly into wonderful. That’s quite a gift from the digital deities, but getting drum tracks as flawless as possible during the recording process absolutely saves time, brain matter and CPU power. Great-sounding drum tracks mean you can spend more mix time improving, rather than fixing, and, trust us, taking inspired tracks to the next level of stratospheric awesomeness is the real gift when you’re in that critical mixdown mode. Start off right with our tutorial, How to Tune Your Drums, and then dive into Best Drum Recording Techniques if you need a brush up on microphones and mic positioning. Now, let’s see what else we need to address.
Listen for Sonic Anomalies in the Drum Kit
Before you set up microphones, have someone play the drums while you walk around the kit and make sure the hardware is tight and noise free—the kick pedal is often a “squeak culprit”—and that the toms, kick and snare are well tuned and do not produce snare rattles and hums, or distracting resonances. Fix anything that doesn’t sound perfect. There’s a fair amount of options to fix troublesome drum head ringing, such as draping tea towels over the top head (a Ringo Starr trick), or using drum dampeners such as an RTOM Moongel, drumdots Mini Drum Dampener or Evans Min-EMAD Tom and Snare Dampener. Once the mics are positioned, repeat the listening process by soloing each drum track to ensure no unpleasant noises are at risk of being recorded. Record clean. Mix clean.
Pick the Mic That Sounds Right
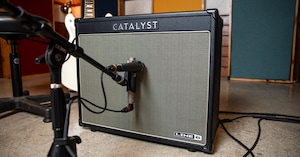
When producer/engineer Brendan O’Brien was miking up Chad Smith’s kick drum for the Red Hot Chili Peppers’ Blood Sugar Sex Magik, he used a Shure SM57—which wouldn’t be the first choice for a lot of engineers. (A more conventional option might have been an Electro-Voice RE20, AKG D112 or Neumann U 47 FET.) But it worked, brilliantly. Remember this when you’re selecting and positioning your own mics around the drum kit. All you really need to do is listen carefully to the mic and source to ensure you’re getting the sound you want—before EQing or any other processing. If the natural sound from the microphone is clear, clean and pleasing, the drum mix will likely go marvelously. For some suggestions on which mics to acquire for optimal drum recording, see Best Drum Microphones of 2023.

Make Sure Every Drum Track Is in Phase
Multiple microphones on snares, toms, kick drums and even overheads can produce signals that are out of phase, resulting in thin, flanged or weak tones—or even sounds that disappear entirely. Sometimes, phase “problems” are not problems at all if you like the way the out-of-phase signal sounds. But you should always listen carefully to the entire kit—soloing and combining elements—to track down any phase issues that compromise the sound you’re going after. Get some more information on phase incidents in What Causes Phase Cancellation and How to Fix It. If you’re somewhat nervous about catching and correcting phase issues, look into Sound Radix Auto-Align, which automatically detects and compensates for out-of-phase signals.
Don’t Make Processing Decisions That Will Haunt You Later
It may help to envision the recording phase of your project as an “in-the-now” process and mixing as an “in-the-future” scenario. The reason for this visualization is that you don’t want to compromise any fine-tuning you may need to do at the final mix—when all of the sonic elements of the project are in front of you seeking a harmonious or surprising blend—by pre-selecting a set path through processing choices. For example, going with aggressive EQ and compression settings during the tracking phase, and recording that processing along with the source sound, may limit your creative options during the mix. There are definitely two minds at work here, and many very successful engineers and producers record their signal-processing moves to tape—because, well, they want it to sound the way they want it to sound, and they know very early on what that sound is. But if you want every possible creative decision easily available to you during mixdown, then track clean, unprocessed drum tracks and add the magic during the mix. Something else to keep in mind is if you send out your track for someone else to mix, and the drum tracks are already EQ’d and compressed within a micron of their sonic lives, you will prevent them—on some level—from bringing their own creativity and experience to your mix. Clean tracks offer boundless possibilities. Processed tracks can limit ideas.

Preparing Drum Tracks for the Mix
Let’s assume that everything went great during the recording of drum sounds. You were able to record clean and punchy tracks without any audio gremlins making the scene. Now, you need to assess the drum performance.
Get the Tempos Tight
Some drummers tremble at the mere utterance of the phrase “click track,” but if you were able to get your drummer to play along with one, it will be much easier to do drum timing fixes and part swaps (rolls, fills, kick patterns, etc.) in your DAW. Make sure that every snare and kick smack, hi-hat cadence, roll and cymbal crash are locked in with the tempo, and move waveforms around as needed to get the drum track as solid as possible. This is also your opportunity to mess with time a bit. If you want a lazy snare groove, tuck the waveform back a bit. Looking for an anticipated crash cymbal? Sneak the waveform forward.
Natural Drum Sounds or Drum Replacement?
No matter how superbly the drum tracks are recorded, there still may be sound-related issues at the mixdown, and ones that can’t be entirely remedied with EQ. For example, the snare drum might be too thick or too thin, or the snare wires sound off too much or not enough. In the studio, a big-time session drummer with a ton of alternate gear might have told the recording engineer something like, “Oh, I think a small piccolo snare would work better for this part,” or “We need more meat. I’ll grab my 14x8" Ludwig Black Beauty.” There also might have been a couple of tuning adjustments that would match the song better, and the player could have tightened up or loosened the snare wires, as well. Happily, digital technology means no more crying over “spilt” snares—or any other drums for that matter. Drum replacement software, such as Steven Slate Audio Trigger 2 Platinum, lets you swap out the organic miked sound for a modeled substitute. You can also choose to blend samples with the natural source sound to create colossal drum sounds. This is huge. Kick drum not Bonham or Barker enough? No problem—just search for a fatter and punchier kick model. Wishing the player had used more resonant rack toms instead of puny 8" and 10" sizes? Well, you have the option to seek out models of 12" and 14" toms, and insert them into the drum performance. For mixing applications, drum replacement software is like having a magician’s top hat offering infinite opportunities for pulling out better, cooler or more enormous drum sounds. However, keep in mind that crafting drum-replacement samples that meld organically with the drummer’s performance—as well as the other natural and/or sampled drum sounds—can take some work. You may need to minutely adjust sample placement, tweak crossfades and dig into other digital-editing functions to ensure the drums sound realistic and “un”-replaced.
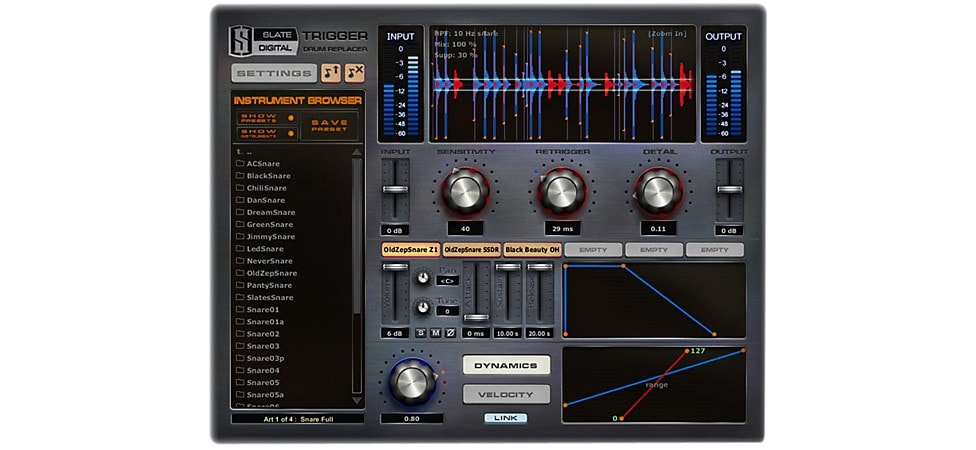
Pictured: Steven Slate Audio Trigger 2 Platinum Drum Replacement Plug-in
Noise Gate Settings for Drums
Recording drums with multiple microphones doesn’t just invite phasing problems. The technique also lets a barrage of signal bleed crash the party. Even if the drums were recorded in an isolation booth, the snare and kick will bleed into the tom mic, and the cymbals and hi-hat will jump into everything. It could get more bothersome if the entire band played all together in the studio, as guitar, bass and other instruments will seep into the drum mics. (Although it didn’t help the drum tracks, a famous producer once said the coolest part of a guitar tone on a classic rock track was the guitar bleeding into the rack tom mics.) You definitely want to minimize or eradicate signal bleed on elements where you want the most punch from the source alone—such as kick drum and snare—and some pro engineers often seek to remove outside sounds from everything except the overheads and hi-hat. A clean, uncompromised source sound also helps immensely if you swap out miked tracks for samples in order to avoid false triggering of the drum-replacement software by, say, a rhythm guitar stab. Applying a noise gate to a track is the proven, time-honored method of blocking out every sound except the one you want to hear.
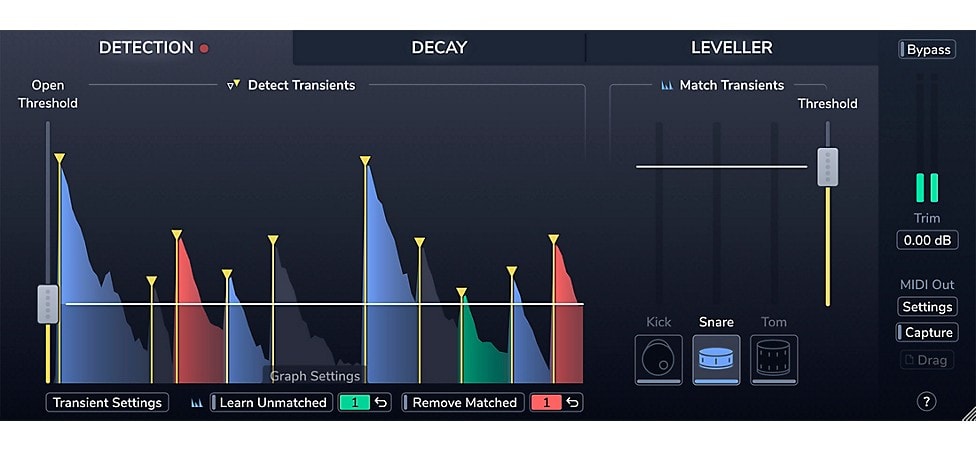
Pictured: Sonnox Oxford Drum Gate Native Plug-in
Of course, it can take time to refine signal threshold, attack and release settings on a noise gate, as you want the drums to sound as natural as possible—even while the gate clamps down on any ugliness. Let’s take a look at the snare drum. Typically, you’d raise the threshold level to hear the snare impacts without any noisy bits sounding off between hits. That, in itself, might take some time to get just right, but the part that may really try your patience is carefully dialing in attack and release settings so it sounds like a noise gate never showed up at all. Sometimes, you can actually catch a break from room and overhead mics. For example, even if you must gate the snare to an abrupt “dit” to manage signal bleed (or excessive snare wire rattle), the unprocessed overheads may provide enough of the “snare in the room” sound to make the drums appear natural. However, there may be times when the chopped-up “dit” is too audible, which can detract from a pleasant listening experience, as well as spotlight an unprofessional mix.
If you’re concerned about all that hullabaloo managing the gates and mix blend, plug-ins such as Sonnox Oxford Drum Gate, offer intelligent drum hit detection and dynamic triggers to make signal gating relatively automatic. Even so, be sure to listen critically to the noise gate settings to ensure nothing appears unnaturally choked off. Always listen with brutally honest ears. You’ll thank yourself for all the times you were so blunt and inflexible when the mix is done.
How to EQ Drums for Powerful Mixes
If you thought a drum kit would respectfully inhabit its special little place in a mix’s frequency spectrum and not bother any other instruments, well, you are mistaken. A typical drum kit can devour frequency ranges from around 50Hz (kick drum) to 3kHz (snare), and 10kHz and above (cymbals). So, yeah, the drums are pretty much hitting everything in your mix, and if you’re not strategic with your application of EQ, the kit will more than likely interfere with other elements, such as guitars, bass, keyboards and vocals. The challenge with mixing drums is much the same as finding space for other instruments—you want to protect a glorious tone while simultaneously ensuring the sound doesn’t reinforce frequencies that create a muddy, bright, unbalanced or outright unlistenable mix. Here are some tips and tools for maintaining the rhythmic power you want the drums to have, but without surrendering absolute power over your sonic spectrum.
Exploring Drum EQ Plug-ins
Before we get into tone-crafting strategies, let’s discuss some options for really taking control of your drum sounds. To make incisive tweaks, you’ll need a comprehensive EQ processor, such as the FabFilter Pro-Q 3, which offers 24 bands of dynamic EQ and other handy features. A powerful EQ with the ability to narrow Q (the center frequency of a bandwidth) as needed, the Pro-Q 3 lets you do things such as surgically diminish a problematic resonance on a snare without making the drum as a whole sound too thin. Conversely, you could choose to boost only the high-end ring of a ride cymbal, letting it shimmer nicely without clanging or appearing uncomfortably bright.
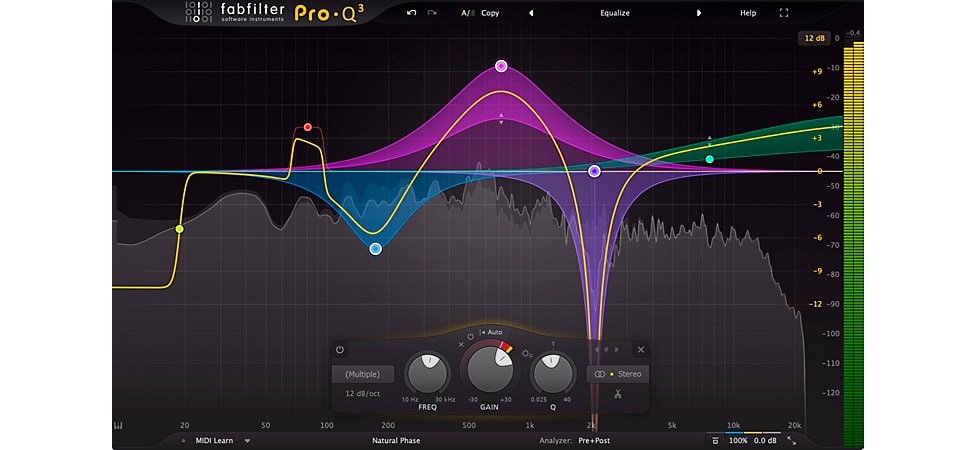
Pictured: FabFilter Pro-Q 3
Constructing massive drum sounds isn’t always about total, sterile precision. Recording engineers back in the glory years of analog recording often used EQs that imparted their own character to signals. These devices became renowned as much for being aggressively non-transparent as they did for managing frequency bands. Some of the most celebrated and vibey vintage EQs are the Pultec models manufactured by Universal Audio. The Universal Audio Pultec Passive EQ Collection UADx and UAD-2 provides digital-era creators with emulations of three classic Pultec EQs: the EQP-1A (which produces a fat and warm sound that’s perfect for drums), the MEQ-5 (a midrange-focused device that adds energizing punch and articulation) and HLF-3C (offers wide-range high- and low-cut filters for clarifying instruments and vocals, as well as diminishing hum and hiss).
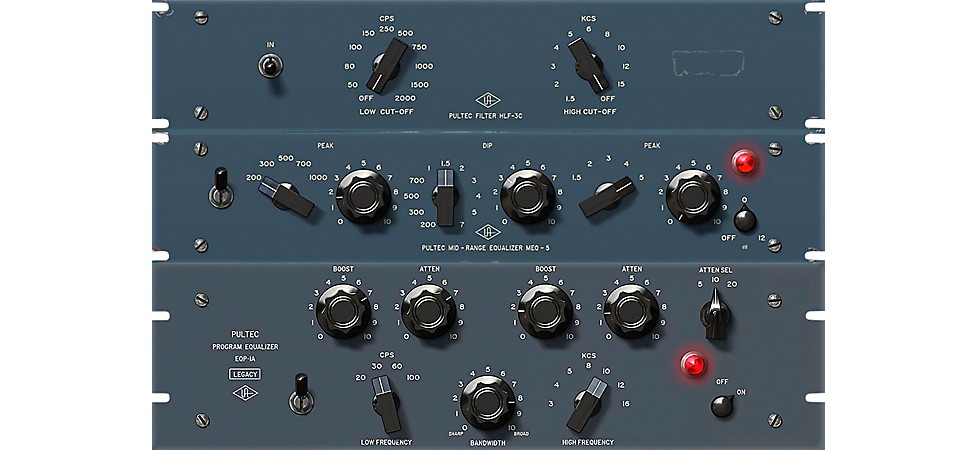
Pictured: Universal Audio Pultec Passive EQ Collection
An interesting and very functional way to manage and mold transients—snare hits, cymbal crashes, tom strokes and kick impacts—without resorting to conventional EQ is to experiment with the Eventide Newfangled Punctuate Transient Shaper Plug-in. This 26-band transient modulator lets you intensify or reduce specific drum kit attacks without messing with the overall frequency range of your mix.
When to Use the Solo Button on Your Mixer
Do solo individual drum tracks to check for audio anomalies and phasing issues. Don’t solo tracks to critically dial in EQ settings. It’s not a drum solo—the drums must fit in with all of the other sounds in your mix. For instance, it’s not generally productive to spend significant time EQing a snare sound all by itself—without listening to the other drums or instruments—and then discover the snare sounds different (or interferes with the timbre of a guitar or vocal) when you bring in all of the other tracks. No sound exists in isolation, so don’t make the mistake of mixing tracks in “solitary confinement.”
5 Drum EQ Hacks
The probability is that no one knows your mix landscape better than you do. After all, you are intimately aware of what musical elements were used to construct the tracks that are now right in front of you. So, the bad news is that EQ tips for each component of the drum kit may or may not work for your mix, because tutorials can only offer general frequency-range data without precise knowledge of the other frequencies present in your track. You’ll still need to fastidiously listen to each EQ tweak you make to confirm that, [a] it does exactly what you want it to do, and [b] that it doesn’t adversely compromise the sound of some other element in your mix. The good news is that those basic frequency charts are super helpful as a starting point. Let’s check out some common drum frequency ranges and which EQ modifications can deliver the most impact.
Kick Drum EQ Roadmap
To lower the boom, boost around 50Hz–80Hz. This will provide a lot of warm, pillowy resonance. If the kick is too fat, cut in the same area. Add beater attack by boosting from 3kHz–5kHz, or cut to bring on some thud. The hollow snap heard on lots of recordings—because the sound usually stays out of the way and is audible at low volumes and on tiny playback systems—is often a matter of cutting around 400Hz–500Hz and sneaking in a subtle boost around 3kHz.
Snare Drum EQ Roadmap
A lot of the energy for a fat, stout snare resides in the 100Hz–250Hz range. Boost here for a meaty swack but take care not to go overboard, or the snare tone can deteriorate into muddiness. Snare attack and articulation sits in the 900Hz–1kHz range, and a boost here can help the sound bark and punch through a dense mix. Go for crack and pop by boosting around 5kHz, and crisp airiness at 10kHz.
Rack Tom EQ Roadmap
Conventional rack toms aren’t huge drums, but they can still sound like cannons if you make the right EQ tweaks—well, assuming you want that effect in the mix. To bring on warmth and resonance, boost frequencies in the 200Hz–500Hz range if you’re hearing too much body or plumpness. If you’d prefer a rounder, hollower tone, cut those frequencies instead.
Floor Tom EQ Roadmap
You usually want a booming attack on floor toms, a sound that thumps and jumps—such as Gene Krupa’s iconic “Sing, Sing, Sing” groove from way back in 1937. You can pump up the boom at 80Hz or 100Hz, and add in some stick attack by boosting 5kHz. Phasing issues between the floor tom and kick drum may arise in the 60Hz area, so roll off all frequencies below it. It may also be a good idea to cut in the 250Hz–500Hz range, as this is where some distracting resonances and rings can appear.
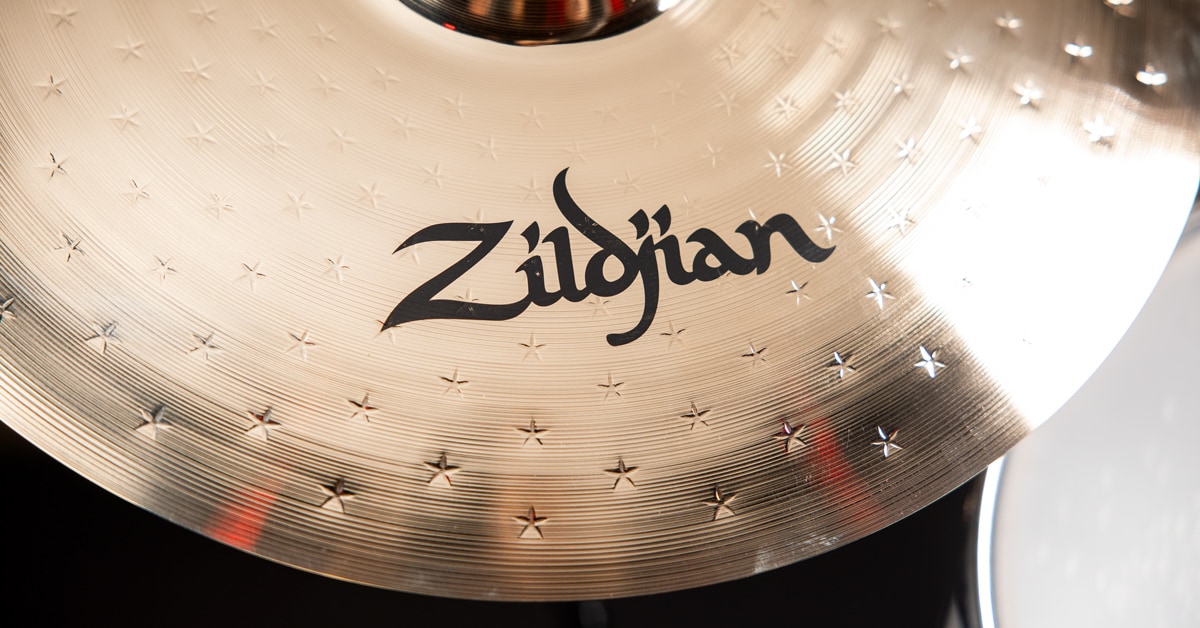
Cymbal EQ Roadmap
EQ cymbals? Don’t they cut through everything? They do. But you also want the high-end shimmer and clang to be both impactful and pleasant to the ears. Too much intense brightness can turn off anyone to a mix. Typically, the cymbal tracks are going to be in the overheads and hi-hat mics (if one was used—sometimes, engineers like hearing the hats solely through the overheads and they don’t mic them separately). To achieve sparkling cymbal sounds in the overheads without too many other frequencies bleeding into those tracks, use a high-pass filter to roll off everything below 400Hz. The roll off may also prevent ride cymbals from sounding annoyingly harsh and clangorous, as the fundamental clang appears around 200Hz. If you want more some glistening airiness, carefully boost around 6kHz–15kHz. Take care not to bring out any unforgiving high-treble frequencies. Something else to watch out for is cutting the higher frequencies to the point where the cymbals sound unnaturally muffled.
Tips for Compressing Drums During Mixdown
Obviously, EQ is important for crafting the sound of your drums, but compression adds a lot to the vibe, impact and funkiness of the kit. As a necessary tool, compression can certainly even out signal levels—such as correcting the annoying dynamics of a drummer hitting the snare with wildly different attacks during recording—but transforming a drum performance into an explosion of wallop, groove and depth is what really makes using compressors fun. The ride gets more entertaining when you use compression plug-ins that emulate the compelling sonic characteristics of vintage gear. For example, the Universal Audio 1176 Classic Limiter Collection UADx and UAD-2 models three versions of one of the most famous compressors of all time. If you want more history on the classic compressor, check out our guide to the 1176. Have some dastardly diversion by playing with the Soundtoys Devil-Loc Deluxe 5, which calls itself an “audio level destroyer.” Modeled from the 1960s Shure Level-Loc limiter designed for PA systems, the Devil-Loc delivers tons of gritty character.
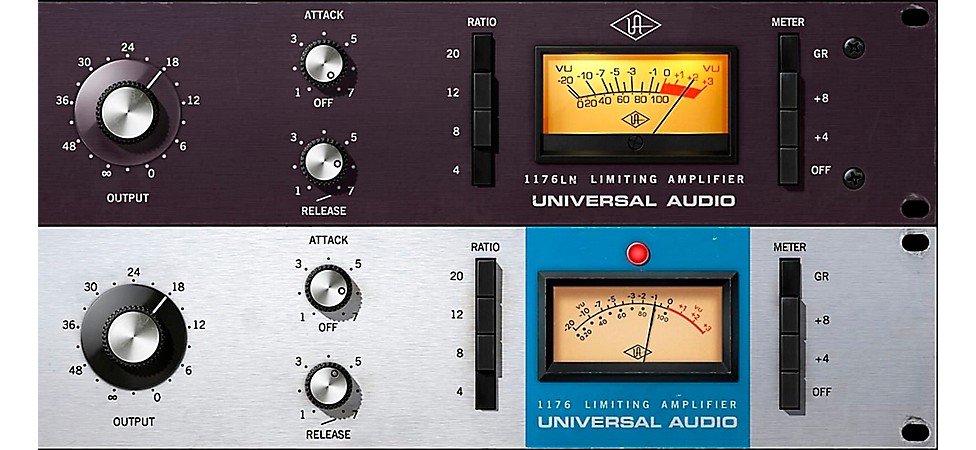
Pictured: Universal Audio 1176 Classic Limiter Collection
The next step is experimenting with how you want to compress the drums, because there are three popular ways to go about it. Compressing individual tracks—such as the kick, snare, toms or overheads—gives you definitive control over the impact and sound of each drum. This doesn’t mean you need to assign each drum to its own compressor—although some mix masters have surely done that. The main opportunity is that individual compression allows you to pick and choose which drums are squashed and which are unprocessed. You have the option to, say, crush the toms, but leave everything else untouched. Bus compression involves sending all of the drum tracks to a stereo bus (or an auxiliary track for a mono perspective) and compress the drum mix with one compressor. If you’ve compressed individual drum tracks already, bus compression is a great tool for gluing all of the tracks together for a cohesive mix. As you’ve already compressed some tracks individually, try not to go overboard by hammering down on compression settings for the bus. This tactic is usually meant to avoid some individually compressed drums from bursting out of the complete drum mix, while other elements of the full kit sound too small or weak. Parallel compression is a cool trick where you blend compressed and uncompressed drum tracks. This technique lets you compress the drums to taste, but still have control over the dynamic impact of the dry, unprocessed drums. It’s a best-of-both-worlds situation where you get drums with clear, unfettered authority and fat, processed drums that pulse with aggressive vibe. You get to decide how much or how little of each sound gets heard in the overall drum mix.
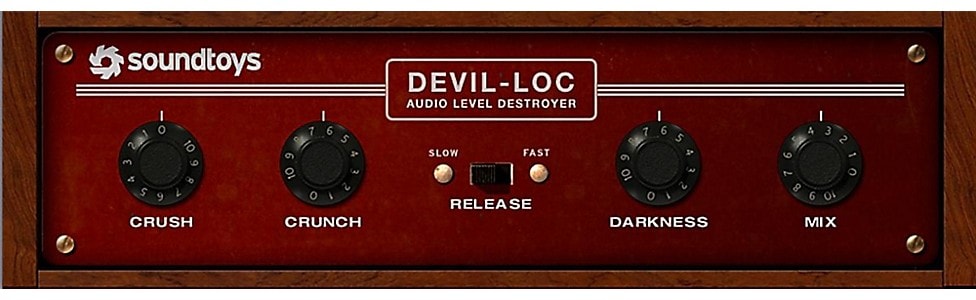
Pictured: Soundtoys Devil-Loc Deluxe 5
Many plug-in compressors (and some hardware models) have a built-in mix control that lets you play with parallel compression quickly and easily. When the control is set to 100-percent dry, no compression is active. Turn it towards the wet level, and your compression settings start to act on the signal. If your compressor doesn’t have a mix feature, you can still try parallel compression by routing the dry drum tracks to a bus—as you did with bus compression—and compressing the signals there. A fair amount of producers and engineers dig brutally compressing the bus track and blending it in subtly with the dry drums to really punch up the percussion without muting any of the attack.
Compression Settings for Drums
Compression settings are sometimes misunderstood by musicians, so if you need a refresh, here are the critical things to know. Threshold is the signal level at which the compressor starts doing its magic. Any signal that falls below the set threshold is untouched. Ratio indicates how much compression is imposed once a signal pops over the threshold level. The ratio numbers are in decibels. For example, a 2:1 ratio means that for any signal that exceeds the threshold by 2dB, its level will be reduced by 1dB at the output. Attack sets the amount of time it takes for compression to begin once a signal passes the threshold. Not surprisingly, Release sets the timing for when the compressor eases off after the signal falls below the threshold. As compression reduces the peak level of a sound, a Gain control is often included to “make up” the gain you lost during the onset of compression.
Setting Attack and Release Times
Engineers and producers often use slow attack-time settings on compressors to allow the initial hit of the drums to roar uncompressed. A fast attack time might grab the transient (initial peak of the sound) too quickly and deaden the impact. One trick for figuring out the most appropriate attack and release times for a drum track is to start with a slow attack and a fast release. You can adjust the times from there to see which settings produce the most energy. Take care that you don’t reach a point where “pumping and breathing” rears its ugly little head. This is when you can clearly hear the compressor working to grab and release an audio signal. You’ll definitely know it’s happening when you hear it, and if you do, ease up on the timing until the anomaly is no longer audible.
Setting Ratio
You can find a bunch of “compression cheat sheets” online that provide ratio settings for each drum. They usually recommend something like 4:1 to 8:1 for kick drums, snares, toms and overheads. Those are good starting points, but they probably aren’t much help—and that’s a good thing. Instead of reading where to set the ratio, listen to what each ratio setting does to your track. In practice, you can consider a ratio of 2:1 as subtle compression (smooth, transparent gain reduction), 4:1 as medium (you may hear changes to tone and articulation) and 10:1 as pretty aggressive (audible squash). Producers will often discuss what ratio settings they used on classic or current drum tracks, but they usually don’t repeat those settings for every session, drum kit and drummer they work with. Why not? Because every session, drummer, drum kit, studio, song, arrangement, audio treatment and performance is different, so having a “standard” ratio setting for a snare, kick, rack tom and whatever is pretty much impossible from a sonic standpoint—or, at a very basic level, wildly uncreative and inappropriate. LISTEN. ASSESS. Your ears won’t steer you wrong.
Reverb Processing for Drum Mixes
Artificial reverb and natural room sounds animate drums, making them sound live, dimensional and potent. Today’s reverb plug-ins give creators ultimate power over the size, decay, tone, diffusion and more, so that the level of drum ambience can sit in the mix perfectly. You can also choose to call attention to the effect if a strange or unanticipated reverb is conceptualized as one of the sonic hooks of the production.
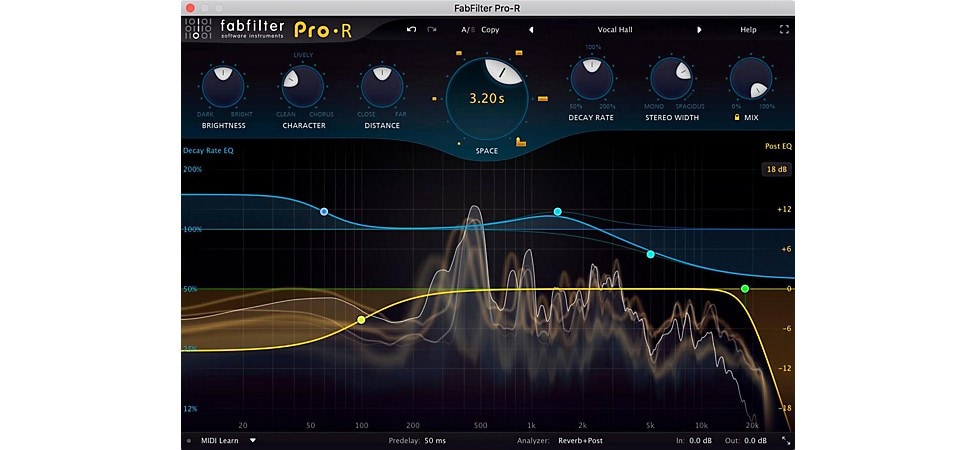
Pictured: FabFilter Pro-R
There are some danger zones, however. If you use too much reverb on the drums—perhaps thinking you’re emulating John Bonham’s glorious room sound on “When the Levee Breaks,” but you instead exceeded the mark—you can overwhelm the entire mix. In addition, while stealing licks from records is fun and often practical, unless you’re mixing a throwback 1980s new wave track, precisely copying an iconic effect such as a gated reverb on the kick and/or snare can “age” your mix in perhaps not the best way. If possible, the drums should always seamlessly enhance the mood and vibe of your track, rather than stand as a “drum reverb history lesson.” As with everything else in a mix, the sound is also a factor. You should always evaluate the tone of the reverb to make sure it isn’t too dull, or too bright, or interfering with other instruments, secondary reverbs or modulation effects.
Happily, comprehensive and musical reverb plug-ins such as the FabFilter Pro-R provide enough parameters to tailor room environments to your needs. By the way, when dialing in reverb effects, don’t fear going too far initially. Sometimes, it’s quite educational to gum everything up by applying too much reverb. Then, you can learn where the danger spots for tone, decay and room size pop up, and bring the parameters under control to help the drums power up the mix without overwhelming it.
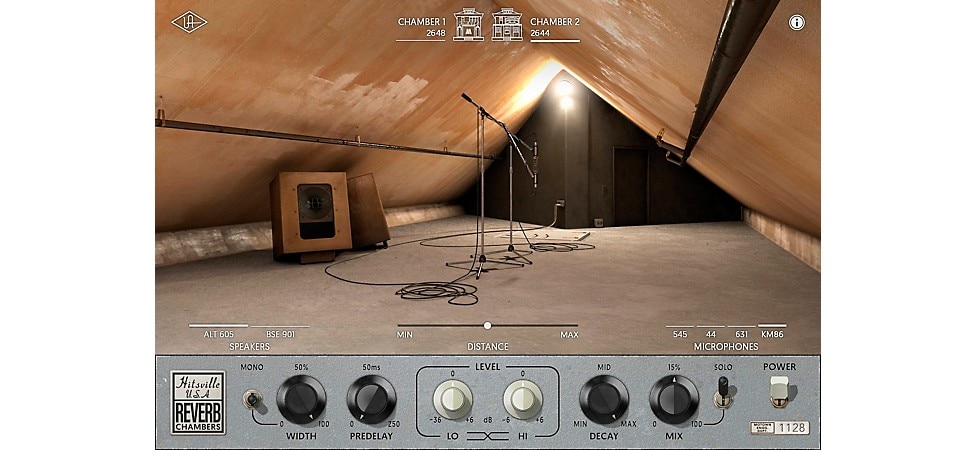
Pictured: Universal Audio Hitsville Reverb Chambers
Plug-ins can also offer up “only in your dreams” environments where you can access the echo chambers and room sounds of legendary studios. For example, Universal Audio Hitsville Reverb Chambers UADx and UAD-2 Plug-ins lets you bring the ambience of Motown studios to your DAW. These tools are like having a world tour of hitmaking spaces to inspire your own atmospheres.
Explore more super fun, great-sounding and practical reverb-software solutions in our guide, 8 Essential Reverb Plug-ins for Stunning Mixes.
5 Zany Drum Mix Tips
As you work refining the drum tracks to get everything just right for a mighty mix, don’t forget that having a little fun with the process is allowed. Little surprises can delight listeners as much as a well-defined sound spectrum, and whenever it’s appropriate, messing with audience expectations to present a somewhat off-kilter mix can enhance your reputation as an imaginative and always-evolving creator. Here are some suggestions to keep the fans guessing at what you might do next.
Wide Stereo Imaging for the Drum Kit
This isn’t exactly an incredibly innovative tip, but it’s interesting how many creators tend to keep the drum mix fairly tight, as far as panning elements across the stereo spectrum. Why? Taking advantage of widescreen-styled panning can add action-movie dimension to the drums. Go extreme. Pan the stereo overheads hard left and right, instead of a 50-percent or 75-percent spread. Depending on whether you want the drum mix to reflect the drummer’s perspective or the audience’s, position the hi-hat 100-percent left or right. Then, pan the rack toms with the first tom completely to one side, the second off axis to one side or the other (never in the middle) and the floor tom all the way opposite to rack tom one. Extreme stereo panning will really bring drum fills alive when the drummer moves from rack to floor, or vice versa. If you want to anchor the main groove drivers of the kit, pan the kick and snare to the center—although moving the snare a little to the left or right will add realism, as drummers seldom position their snare drums directly in the middle of their bodies.
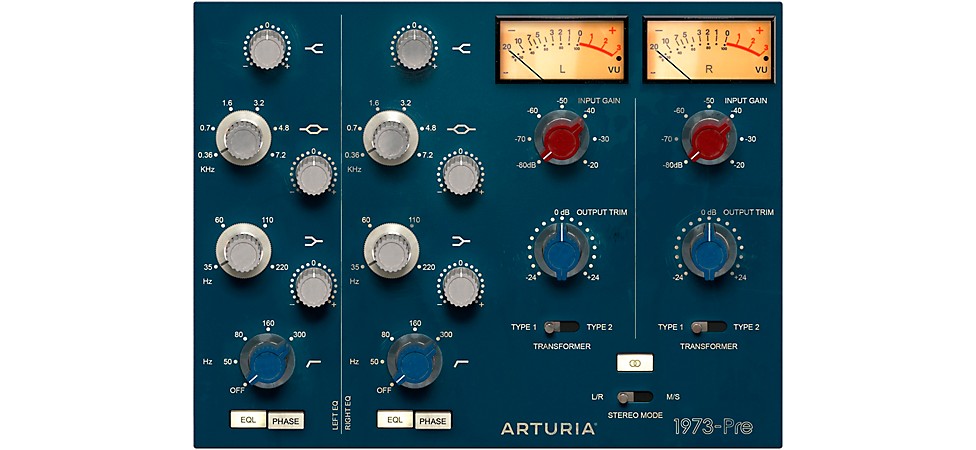
Pictured: Artura 1973-Pre
If you’re dealing with stereo drum samples, or have a bit of trepidation about going too wide with the stereo spectrum on a drum bus mix, you can explore mid/side processing with the vintage Neve 1073-inspired Arturia 1973-Pre. This plug-in splits the stereo signal into a middle and two edges perspective—a feature that did not appear on the original hardware models of the iconic Neve preamp—which gives you the opportunity to have a strong, punchy mono mix in the center, along with some ambient sparkle swelling across the right and left sides of the audio spectrum. The 1973-Pre lets you EQ and mix the middle and side perspectives separately, so you can choose to focus on the boom and snap of the kick and snare with the middle settings, while boosting the attack of the cymbals and toms with the side controls. As a safety measure, it is virtually impossible to weaken the impact of the drums with too broad of a stereo spread—that hole-in-the-middle audio anomaly—because the mid setting has your back. There’s always going to be something “chunky in the middle.”
Drums in Primitive Stereo
When stereophonic sound hit the commercial marketplace in the late 1950s, some producers went to extremes to exploit the new medium. Space-age lounge music pioneer Juan Garcia Esquivel, for example, would simultaneously record his big band in two completely different studio rooms to maintain strict sonic separation of his records’ right and left stereo perspectives. Some early rock and psychedelic-music-era productions from artists such as the Beatles, Paul Revere & the Raiders and Jimi Hendrix would have the full drum kit positioned totally on one side or the other. Vocals might be completely on the side opposite the drums, with background vocals, guitars, bass and other instruments sprinkled relatively hard right or hard left across the mix. It was a wacky time, but it sure made listening to music on headphones an experience.
You can choose to evoke the early days of stereophonic sound by doing the same. Take a mono mix of your drum kit and position it 100 percent to the left or right. There are a lot of original stereo mixes you can find online for references. Perhaps mix the drums and bass on the left, and put the vocals and the rest of the band on the right. Or place a dry drum mix on the right and send the drum reverb to the left. The possibilities are near endless. Yes, your mix will be completely unbalanced. Are you brave enough not to care? Admittedly, this can be a controversial approach for some listeners, but with the right song, extreme stereo panning can be fun, exciting and cinematic.
Ghostly Drum Reverb Settings
If you want a dry punch to the drum kit, but still want some ambience to be perceived, send the overheads or the snare to a large reverb (a hall or chamber) and return the reverb only (100-percent wet mix) on a dedicated track. Now, you can mix the dry kit as loud as it’s appropriate to drive the song, and fade the reverb subtly into the background. You get all the punk-like wallop of the unaffected kit hitting it hard, along with an almost ethereal mood hovering over the soundscape. This trick can deliver a moody, three-dimensional impact to what otherwise may have been a more conventional mix.
Fuzz Pedal Drums
What? Yes, you are reading this correctly. It shouldn’t be too surprising. Brutalized and distorted drums have become critical components of modern music making for decades. While most creators blend in distortion with clean drum tracks to craft fuller, beefier grooves, some EDM, ambient and rap producers put the fuzz front and center. Most every DAW has an onboard distortion plug-in that can be used to rough up drum tracks. Amp simulators are also great options. A snare drum through a Marshall stack? Brilliant! In addition, you can use a send/return on your audio interface to route drum signals to hardware devices, such as stompboxes, multi-effects floorboards and so on. In fact, the Electro-Harmonix Big Muff Pi Hardware Plug-In is a hybrid hardware plug-in that easily connects to your DAW, giving you the fabulous analog fury of the company’s iconic guitar fuzz pedal.
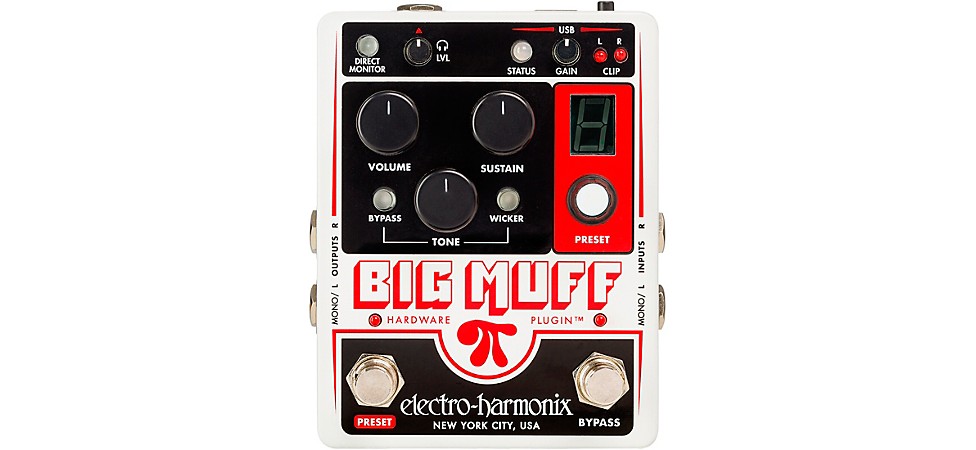
Pictured: Electro-Harmonix Big Muff Pi Hardware Plug-in Harmonic Distortion/Sustainer
While there’s no “typically” when experimenting with sound, if you want to explore shredded drums, many engineers and producers select the kick and/or snare for adding dirt, and then blend the overdriven elements into the whole kit to taste. This doesn’t mean you shouldn’t play with distorting the entire kit, toms and overheads, but perhaps leave those larger modifications until you’re more comfortable with the operation. Once you’ve routed the drum tracks to the overdriver of your choice, you can further amend the tone by using the distortion device’s gain, tone and other controls.
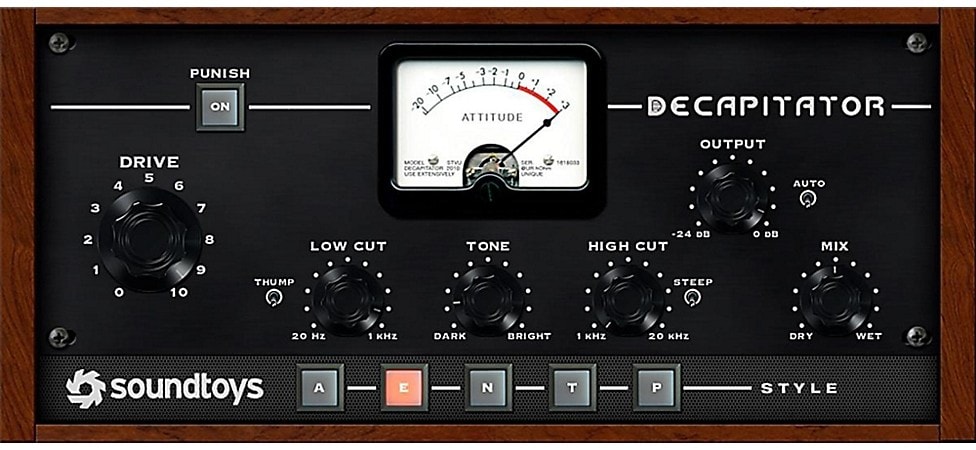
Pictured: Soundtoys Decapitator 5
If you’re looking for a slightly more “delicate” method to saturate the heck out of your drum mix, try the Soundtoys Decapitator. Based on the analog sound characteristics of vintage and modern preamps, consoles, compressors and other hardware gear, the Decapitator can punish your drums with belligerent saturation.
Boom, Bang, Crash
At the beginning of this tutorial we asked that you not be boring. Ultimately, drums should be exciting, groove-o-licious, dynamic and thunderous. They should also ground the mix as a whole and speak clearly and powerfully without hampering or obscuring the position and/or sound of the other instruments and vocals. It’s not a job that comes with the note: “This should be a breeze.” It’s tremendously challenging to make everything work. But if you start and finish the process of mixing drums with a commitment to astound listeners—rather than yield entirely to convention and accepted practices—you’re going to be a star.